Resilient integrations
Heads Up!
This article is several years old now, and much has happened since then, so please keep that in mind while reading it.
When you use any external system to Umbraco, you can never assume that everything is going according to plan. In fact, it will never go according to plan ;)
Let’s say that you create a record in Salesforce or your favourite CRM (customer relationship management system) each time a user submits a form with their details. You want to return a success message to your user before your record was created in your CRM and run this task in the background. What can you do if this task fails?
Another example: You want to create some content in Umbraco from an external API, let’s say an eLearning platform that will return some courses. Are you going to schedule a task to import them? What if the import fails? What if the eLearning system is down?
In this article, I want to go through some tools and techniques to help you make your integrations more resilient to failures and make your website respond to those failures actively.
Logging your errors
I will start with probably the simplest way to make you aware that something didn’t go smoothly: The Umbraco logs.
You can record your messages, warnings or error messages in Umbraco using a service already registered for you in the DI container: ILogger. If you are in an Umbraco controller (Surface Controller, for example) you can use the Logger property instead:
Logger.Error<MyController>("Argh! Something broke!");Notifying the admins
Recording messages in the logs is pretty useful for debugging purposes, but if you don’t go further, you will need to check your logs manually to find if anything failed.
The manual way
You can always create a notification service that sends an email to your admins. Something like this:
catch(Exception ex){
    Logger.Error<MyController>("Argh! Something broke!", ex);
    _notificationService.SendErrorToAdmins(“Argh! Something broke on MyController!”, ex)
}
The Serilog way
Umbraco logs use Serilog. Serilog is a .NET library to write to logs in a structured way. From the Umbraco docs: ‘This allows us to have a more detailed log message, rather than the traditional text message in a long text file.’
There are extensions for Serilog (these are called ‘sinks’) that can extend the workflow of your log to perform other tasks. For our specific example, we could use the Email sink to send an email to the admins when something is written in the logs.
Configuring this package can be a bit tricky if you have never done it before. Umbraco Serilog configuration is done using XML but the help on the package shows how to do it in code instead. The translation of that would be:
<add key="serilog:using:Email" value="Serilog.Sinks.Email" />
<add key="serilog:write-to:Email.fromEmail" value="app@example.com" />
<add key="serilog:write-to:Email.toEmail" value="support@example.com" />
<add key="serilog:write-to:Email.mailServer" value="smtp.example.com" />
If you try to configure a server port, you’ll realise that you need to use an EmailConnectionInfo object instead. This is not supported in the XML configuration. You have a workaround you can adapt from JSON.
Scheduling your tasks
If you need to schedule a task, let’s say you need to import some external content every 24 hours, you have a few options here. If you don’t want to install any extra external dependencies, you can use Umbraco’s BackgroundTaskRunner. You have more information about how to create your tasks on the Umbraco documentation.
Hangfire
Instead of using a BackgroundTaskRunner, I prefer to use Hangfire. It involves way less code, it offers a pretty cool dashboard to monitor your tasks, and the best of all is that it keeps any failed jobs in a list, recording the exceptions thrown and giving you the chance to retry them again.
Hangfire allows you to run background jobs. There are a few types of jobs you can configure and run depending on your requirements: fire-and-forget, delayed and recurring.
Fire-and-forget Jobs
You can create a background job that is created on the fly like
BackgroundJob.Enqueue(() => _myService.Method());
Delayed Jobs
Create a background job on the fly that won’t run immediately:
BackgroundJob.Schedule(() => _myService.Method(), TimeSpan.FromDays(7));Recurring Jobs
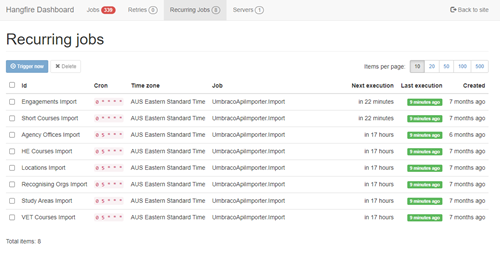
You can create recurring jobs that run for unlimited times. These have to be configured when your site starts, so you would use a Umbraco Component and enter some code like this:
RecurringJob.AddOrUpdate<UmbracoApiImporter>("My Job",
                x => x.RunJob(),
                Cron.Daily(5, 0),
                TimeZoneInfo.FindSystemTimeZoneById("AUS Eastern Standard Time"));
Installing Hangfire in Umbraco
First, you need to configure Hangfire to load with your site. To do this, we need to create a component that will ‘insert’ our Hangfire middleware into the Umbraco application.
   public class InitHangfireComponent : IComponent
    {
        public void Initialize()
        {
            UmbracoDefaultOwinStartup.MiddlewareConfigured += (_, e) => ConfigureMiddleware(e.AppBuilder);
        }

        private void ConfigureMiddleware(IAppBuilder app)
        {
            // Give hangfire a URL and start the server
            var dashboardOptions = new DashboardOptions { Authorization = new[] { new UmbracoAuthorizationFilter() } };
            app.UseHangfireDashboard("/hangfire", dashboardOptions);
            app.UseHangfireServer();
        }

        public void Terminate()
        {
        }
    }
You can see that the Authorization property is initialised to use the UmbracoAuthorizationFilter that we created before.
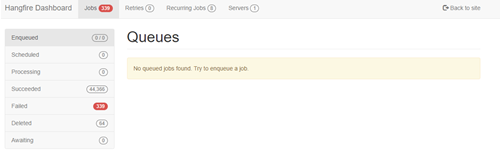
Dashboard
Once your site is running, you can access your Hangfire dashboard from ‘~/hangfire’. But at this point, anyone could access it as it is not secured. Let’s fix that.
Securing the dashboard
First, you need to create a class that inherits from IDashboardAuthorizationFilter. This interface is in the Hangfire package. This filter will get our Umbraco user and will let Hangfire know if we can access or not.
  public class UmbracoAuthorizationFilter : IDashboardAuthorizationFilter
    {
        public bool Authorize([NotNull] DashboardContext context)
        {
            var auth = new HttpContextWrapper(HttpContext.Current).GetUmbracoAuthTicket();

            UmbracoBackOfficeIdentity user = UmbracoBackOfficeIdentity.FromClaimsIdentity(auth.Identity);

            if (user.Roles.Contains("admin"))
            {
                return true;
            }
            return false;
        }
    }
Next, you will need to modify the Hangfire’s configuration. In the previous created InitHangfireComponent you’ll add the authorisation filter like so:
private void ConfigureMiddleware(IAppBuilder app)
{
    // Give hangfire a URL and start the server
    var dashboardOptions = new DashboardOptions { Authorization = new[] { new UmbracoAuthorizationFilter() } };
    app.UseHangfireDashboard("/hangfire", dashboardOptions);
    app.UseHangfireServer();
}
Now your Hangfire dashboard is secured by Umbraco.
A dashboard for the dashboard!
Another way of accessing the dashboard is by creating a Umbraco dashboard, so it’s nicely integrated into your backoffice. To do so, you have to create a folder in `~/App_Plugins/Hangfire` (or another name of your choice but in the App_Plugins folder) and create a couple of files in there, first a package.manifest:
{
    "dashboards": [
        {
            "alias": "futuraPhoto.Hangfire",
            "view": "/App_Plugins/Hangfire/dashboard.html",
            "sections": [
                "settings"
            ]
        }
    ]
}
And a dashboard.html that will contain the actual content of your dashboard:
<style type="text/css">
    .hangfireWrapper {
        margin: -30px -20px;
    }

    .hangfireContent {
        position: absolute;
        width: 100%;
        height: 100%;
    }
</style>

<div class="hangfireWrapper">
    <iframe name="hangfireIframe" class="hangfireContent" id="Hangfire" frameborder="0" scrolling="yes" marginheight="0"
        marginwidth="0" src="/hangfire/" allowfullscreen="true" style="width:100%!important"
        webkitallowfullscreen="true" mozallowfullscreen="true" oallowfullscreen msallowfullscreen="true"></iframe>
</div>
Polly
Polly is a .NET resilience and transient-fault-handling library that allows developers to express policies such as Retry, Circuit Breaker, Timeout, Bulkhead Isolation, and Fallback in a fluent and thread-safe manner.
Behind that description lives a library that once you start using it, you can’t live without it.
Polly allows you to channel your API calls through pre-configured policies. You configure these policies to react to the success or failures of your methods, improving the resilience of your application. It’s like having someone taking care of the response of your methods and dealing with them without you being present.
Retrying after a failure
With Polly, you can configure different kind of policies that react in different ways when your method throws an exception.
In this example, we are going to start using the Retry policy. With this policy, we run our method, if it fails we wait for some time, and then we retry the same method again expecting that the external system we are connecting to gets recovered and our call gets through.
Our policy will retry twice and will wait 3 seconds between calls.
var retryPolicy = Policy
        .Handle<Exception>()
        .WaitAndRetry(2, retryAttempt => TimeSpan.FromSeconds(3));
To run our method through this policy we use it like this:
retryPolicy.Execute(()=>service.Method(data));
The previous call doesn’t expect any values returned by our method; it just takes care whether it succeeds or not. We can run Policies using ‘ExecuteAndCapture’ that you to return the values from your methods. To keep this article a bit simpler, we are assuming we don’t need any returned values.
Notifying that something went wrong
With the previous retry policy, we can run our method a few more times, but what if the service stays down for longer than expected? Or maybe the request is incorrect and cannot be requested? In this case, we can make use of the Fallback policy. This policy allows as to define an action that must be run if the method throws an exception.
var fallbackPolicy = Policy.Handle<Exception>()
                            .Fallback(() =>
                            {
                                _notificationsService.SendNotification();
                            });
We want this policy to quick off only after our method has failed a few times. For that to work, we need to nest our policies, which we would run like so:
fallbackPolicy.Execute(() => retryPolicy.Execute(() => service.Method(data)));
As you can see the fallback policy needs to wrap the retry policy in case this one fails.
There’s another way of nesting policies, and it’s using the PolicyWrap. This method allows us to combine other policies flexibly. The previous example would be written as:
wrappedPolicy.Execute(action);From Polly’s docs: “the outermost (leftmost in reading order) policy executes the next inner, which executes the next inner, etc.; until the innermost policy executes the user delegate.”
We would run the method through this policy in the normal way:
var wrappedPolicy = Policy.Wrap(fallbackPolicy, retryPolicy);
A policies service recommendation
You can always create your policies right before using them in your code, but it’s highly recommended that you create your own policies service to store them all and use them over your code. In this service class you can add any dependencies you will need like, in the previous example, a notifications service. Don’t forget to register this service in the Umbraco dependency container.
Wrapping up
Integrating with external services is tricky and prone to failures. Your application should be ready to manage those failures and never assume that they will never fail because they eventually will.
We have seen how you can keep track of your integrations with external APIs, recoding to the Umbraco logs, notifying to the admins if something goes wrong, running jobs in the background to improve the user experience and make them resilient enough, so you are aware of the status of those jobs. Also, we have seen how your integrations can be resilient to failures, retrying failed calls or fallback to emergency tasks if things are definitely broken.
