Prototyping in the Umbraco Backoffice
Heads Up!
This article is several years old now, and much has happened since then, so please keep that in mind while reading it.
Why would I want to prototype?
You’re working on a fantastic Umbraco project. The front-end is an intuitive work of art, full of carefully designed user journeys and easy to understand processes. It’s been a dream, and the client has taken to content management like a duck to water.
Now, for your next trick, they want you to add a custom section to the Umbraco backoffice. Here is the client brief:
When an editor logs into Umbraco, we want them to see an overview of their recent activity on the site – perhaps also some appropriate quick links to make new content. Also, maybe information about all recent edits and some statistics on the site content, so they can get an “at a glance” overview.
It’s a broad specification and they trust you to make the best of it; there is no budget left for design and (as always) time is tight.
Note: if this design spec sounds familiar, it’s probably because it is! For more information, check out the Umbraco tutorial on how to create a custom dashboard: https://our.umbraco.com/documentation/tutorials/Creating-a-Custom-Dashboard
So, what do you do?
You could just build something – it’s “only the backoffice” after all. It will be quick and functional, even if not beautiful, and does that matter?
Let us take a moment to consider what is at stake here… it is true to say that whatever happens in the backoffice will likely not affect the number of sales the client makes, or how many visitors come to the site or how many visitors can be converted into sales; it also won’t materially affect the impression that external customers have of the client. However, it will affect how the client uses Umbraco – how quickly they can meet their goals, how long they will spend in the backoffice and how much they enjoy the experience!
At the beginning of a project you are the Umbraco expert - especially if the client has had little to no experience with Umbraco previously – and you are in charge of mapping out the topography for a client based on their needs. You signpost the journeys they need to take in order to update their news articles, or add new components to the homepage, or compose product details, but they are the ones who will follow these paths through Umbraco; you might have lain the stones but they are the ones who walk the walk back and forth, day in and day out. The same is true of the custom sections you add to a site, so it goes to reason that it needs to be more than just functional: at the very least what you build should be tailored and, in an ideal world, also engaging and intuitive. If the extension to the backoffice is hard to use or there are unintentional consequences, you can rest assured that the client’s life will be made considerably harder rather than easier.
So perhaps, before you jump into the bear pit of code, a prototype of the custom backoffice flow could serve to set expectations, preserve the good working relationship and highlight possible pain points – after all it is they that will be using it and not you!
Let’s have a look at how one might create a prototype for this task…
What is a prototype?
There are several different definitions of what constitutes a prototype, but essentially what we want to achieve with ours is a representation of information and a flow of interactivity – Umbraco already has a polished backoffice with clear styles and layouts, we want to use this as a base to create an extension. There is no need for us to reinvent the wheel here.
So, we want to:
- Show the client what information we can display to them
- Show them what that information will look like in the layout
- Demonstrate what information they can interact with
- Demonstrate the outcomes of interacting with that information
What might success look like?
To understand if we are successful or not, we must first look at what tasks the client wants to do. Let us breakdown their requirements, and consolidate them into user story format:
- As an editor I want to see my most recent five actions
- As an editor I want to be able to speed up completion of the tasks I do the most
- As an editor I want to see a list of the most recent edits from all content editors
- As an editor I want to see statistics about the site content
Now, some of these tasks are achievable albeit perhaps scattered or long-winded, and some would take rather a large amount of cross-referencing effort. So, then the question becomes: how can we reduce the amount of effort it takes to do these tasks?
Basics of prototyping
For this article we’re going to look at creating a prototype in Adobe XD. XD is free on a “starter” plan (which has more than enough features to get you off the ground!). Most of the concepts are platform-independent, although the processes will of course be different if you were to use another prototyping platform such as Sketch or Invision for example.
The goal of this exercise is to take the tasks the user wishes to accomplish and port them into an interactive prototype to share with the client so that they can establish whether the flow makes sense to them and whether the information that will be included meets their criteria.
There are three different modes to work in in Adobe XD:
- Design - this is where you can create new interface elements and components that will feed into your prototype flow. Think of it as a massive paint box.
- Flow – this is where you pick out interactive elements and link them together to create the illusion of functionality. It is the cornerstone of the prototyping process and breathes life into what would otherwise be just a series of images.
- Share – this is where you can gather feedback from the client or any stakeholder who needs an input into the process.
Let’s have a look at each of these in a little more detail.
Design
A quick note about designing for the Umbraco backoffice
When we think about how our custom data could look in Umbraco it is very tempting to just create from scratch – we only have a little data; let’s just roll our own tables and styles. This is a legitimate course of action, but ultimately you are not harnessing the full support that Umbraco can offer you here. Aside from the fact that the CMS already has several well-designed flows and conventions (such as infinite editing), it also had a whole catalogue of pre-made components and design features available to you; from buttons to tables to notifications (you can view all these at the Umbraco Angular UI docs: https://our.umbraco.com/apidocs/v8/ui/#/api)
If we return a moment to our goal of reducing the amount of effort to complete the tasks, we probably want to bear in the mind that the client’s editors have already used Umbraco, so if we stay consistent it will prevent them from having further interactions to master and remember. We are trying to simplify their cognitive load and not add to it!
Creating in Adobe XD
There are a number of excellent tutorials for XD out there (I would personally recommend the series by Dan Scott at Bring your own laptop); unfortunately it is outside the scope of this article to give you a full walkthrough of how to use XD - but I will touch on a couple of strategies that I use as shortcuts when creating prototypes for Umbraco.
- As there is already a fully designed layout for Umbraco, it speeds the process up to use screenshots for areas that you are not interested in modelling new data or interactivity for. For example, in this case we are focused on the dashboard section and so do not need to spend time with peripheral interactions with the tree or header navigation
- There are visual samples in the backoffice of most types of element you will want to add: buttons, tables, headings etc – XD has a number of tools that you can combine to create simple shapes
- You can build up interfaces quite quickly by creating elements, grouping these in the layers panel and then duplicating them (a handy shortcut is holding down the ALT key and dragging the element on the screen to clone it). XD also has some handy features such as repeat grids:
I have taken a little time to mock-up what my custom dashboard might look like using the Umbraco tables (for example in the URL redirects tab) and the “create new” action areas on list views as sources of inspiration. If I show each requirement in full, my prototyped layout is now built up to look like the below:
First shown is "viewing own recent activity", second is "following shortcut for tasks", third is "viewing sitewide activity", and fourth is "viewing sitewide statistics".
Flow
So, now we have what is essentially just an image, but we can use prototyping flows to link them up to one another. This is what brings the prototype to life and is the bit that speaks a thousand words more than just the picture alone will! To demonstrate this, I have copied Umbraco screens for a new “news item” and to edit a “news item” which we can link to the buttons and points on interaction on our custom dashboard layout.
This page flow is set up like this:
If we wanted to make use of the overlay feature (infinite editing styles in Umbraco) we could add another prototype link for the statistics, for example, and that could be set up and look like this:
Share
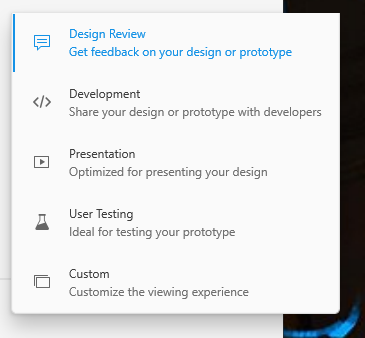
Now that you have some flows and layouts that you would like feedback on, there are a bunch of different ways you can share your finished prototype depending on what your desired response is going to be. In the prototype that I have shared below, I have set it to "Presentation" but as you can see from the below options there are a number of other paths you could take.
I have shared the screens that I have made for this demo here:
You can click through the few simple flows that we have added on the “create news item” button, the “edit” button and the activity detail overlays. These fairly simple flows are just designed to give you a taste of how Adobe XD (or any other prototyping software) might be able to help you out in not just visualising your backoffice interactions, but being able to share that intended interactivity with others.
Summary
Thanks for following along! Hopefully you now have a little more insight into not only how prototyping Umbraco backoffice interaction flows might work, but also an idea of how you could get started with making one yourself to share with a client. This is a high-level article and unfortunately there isn’t the time to really delve into all that Adobe XD has to offer; but I am always happy to help out and answer any questions that I can!
If this article has piqued your interest on prototyping, I have dipped an initial toe in the water to create a base kit of Umbraco styles that can be used between projects as a touchpoint for typography and colours. You can see the early bones here: Adobe XD Semantic Umbraco UI Kit
