Scripting Azure Deployment
Heads Up!
This article is several years old now, and much has happened since then, so please keep that in mind while reading it.
Disclaimer
This script is provided 'as is' and 'with all faults'. The author is not liable for any costs or deletions of resources within your Azure subscription. The code is not production-ready and has many improvements in the pipeline.
Instructions
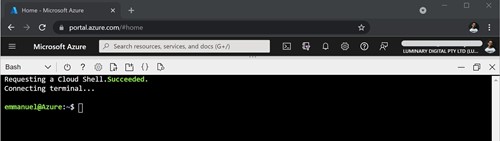
1. Log in to https://shell.azure.com, set up your cloud shell in your preferred region, and select bash as your environment.
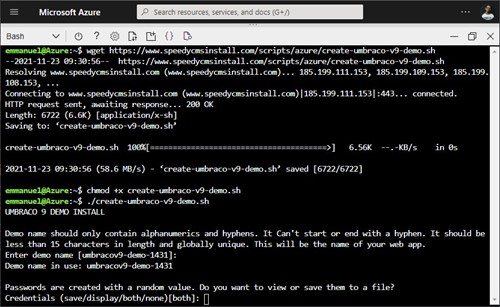
2. Copy and paste the following code into the cloud shell. Note that all new Azure resources will be created in your default subscription.
wget https://www.speedycmsinstall.com/scripts/azure/create-umbraco-v9-demo.sh
chmod +x create-umbraco-v9-demo.sh
./create-umbraco-v9-demo.sh
download-umbraco-v9-demo-script.sh
You can also find this code on Github.
3. Answer the two prompts regarding a name for your demo and whether to display/save the generated credentials.
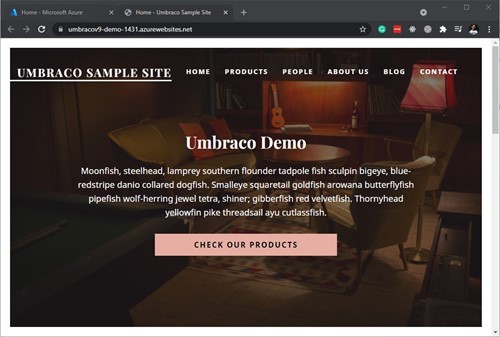
In less than 10 minutes, you would have a running Umbraco demo on Azure.
You can see this script in action on this 17-second video.
So what do these three lines do?
The first line downloads the script file to the local drive of the Azure Cloud Shell. The second line assigns the permissions to make the script executable, and the third line runs the script file.
Prerequisites
You need to have access to an Azure Subscription where you can create resources. Other than that, you just need a browser to access the Azure Cloud Shell. You don’t need a local development machine 🤩
Your default subscription
All the scripts here utilise your default subscription. Most of the Azure resources created by this script incur a cost and you need to make sure that you have the authority to spend before you run this script.
You can run 'az account show' in the Cloud Shell to figure out the subscription in use.
You can use 'az account set --subscription <name or id>' to change your default subscription.
Costing considerations
The script creates resources in the Australia East region which is a bit costly. According to the Azure Pricing Calculator, running this demo for a month would cost USD30.06 (AUD40.05).
You can find the cost for this demo via this estimate.
Script source
The create-umbraco-v9-demo.sh script is on Github and can be downloaded via speedycmsinstall.com/scripts/azure/create-umbraco-v9-demo.sh.
Dissecting the script
The script is over 180 lines of code. But it is not that complicated, and it has inline comments to make it easier to understand. We will dissect the entire script in the following sections.
Demo name
The following snippet of code requests a name for the demo from the user. If a name is not supplied, it uses a generated name that has a random number at the end.
#!/bin/bash
echo "UMBRACO 9 DEMO INSTALL"

# Set the default name for this demo
demoNameDefault='umbracov9-demo-'$RANDOM

# Get the demo name from the user
echo
echo "Demo name should only contain alphanumerics and hyphens. It Can't start or end with a hyphen. It should be less than 15 characters in length and globally unique. This will be the name of your web app."
read -p "Enter demo name [$demoNameDefault]: " input
demoName="${input:-$demoNameDefault}"
echo "Demo name in use: $demoName"
Demo name (Step 1 of 18)
Output credentials
This next snippet gets input from the user as to whether the randomly generated passwords should be displayed and/or saved.
# Check if the random passwords should be saved or displayed on screen
echo
echo "Passwords are created with a random value. Do you want to view or save them to a file?"
read -p "Credentials (save/display/both/none)[both]: " input
outputCredentials="${input:-both}"
echo "Output credentials: $outputCredentials"
Output credentials (Step 2 of 18)
Demo folder
A single folder is created to contain the files from this demo. The folder is named after the supplied demo name.
# Run everything inside this folder for easy clean-up
mkdir "$demoName"
cd "$demoName" || exit
Demo folder (Step 3 of 18)
Setting variables
All the variables used throughout the script are then set. Most variables use the demo name as an identifier. This is the best place to customise your own script to make it more secure in terms of usernames and passwords.
# Set variables
groupName="rg-"$demoName
location=australiaeast
serverName="sqlServer-"$demoName
adminUser="serveradmin"
adminPassword="High5Ur0ck#"$RANDOM
dbName="sqlDb-"$demoName
appServiceName="app-"$demoName
deployUserName="u9deployer"
deployPassword="woofW00F#9"$RANDOM
umbracoAdminUserName="DemoUser"
umbracoAdminEmail="demo.user@monumentmail.com"
umbracoAdminPassword="UNatt3nd3d#dotnet5"$RANDOM
deleteScriptFile="delete-demo-$demoName.sh"
Setting variables (Step 4 of 18)
Resource Group
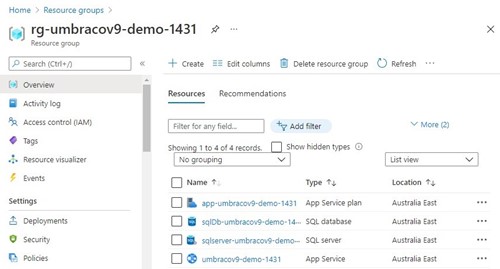
This snippet creates an Azure Resource Group concatenating the demo name. For example, a resource group with the name 'rg-umbracov9-demo-1431' will be created. This resource group will hold all the resources for this demo and makes it easier for clean-up.
# Create a resource group to contain this demo
echo "Creating Resource Group $groupName..."
az group create --name "$groupName" --location "$location"
Resource Group (Step 5 of 18)
SQL Server logical instance and firewall
The next line in the script file creates a new SQL server instance. Then the script adds a firewall rule to allow other Azure Resources to access the SQL server.
# Create a SQL server instance
echo "Creating SQL server instance..."
az sql server create --admin-password "$adminPassword" --admin-user "$adminUser" --location "$location" --name "$serverName" --resource-group "$groupName"

az sql server firewall-rule create --resource-group "$groupName" --server "$serverName" --name AllowAzureIps --start-ip-address 0.0.0.0 --end-ip-address 0.0.0.0
SQL Server logical instance and firewall (Step 6 of 18)
SQL Database and connection string
The next part of the script creates a SQL database instance in the Standard SO Tier. This tier provides 10 DTUs (Database throughput units), 250 GB storage and standard geo-replication.
Once the database is created, we use a query to retrieve the connection string. Then we replace the username and password with the values in our script variables.
# Create the SQL server database
echo "Creating SQL database instance..."
az sql db create --name "$dbName" --resource-group "$groupName" --server "$serverName" --service-objective S0

# Get the connection string for the database
connectionString=$(az sql db show-connection-string --name "$dbName" --server "$serverName" --client ado.net --output tsv)

# Add credentials to the connection string
connectionString=${connectionString//<username>/$adminUser}
connectionString=${connectionString//<password>/$adminPassword}
SQL Database and connection string (Step 7 of 18)
Create a Web App
Next, we create a Linux App Service plan to host our Web App. Note that the Linux App Service plan is five times cheaper than the Windows App Service plan in the same tier.
Then we create the Web App with a .NET 5 runtime and set up a user to handle deployments.
# Create a Linux App Service plan in the B1 (Basic small) tier.
echo "Creating Linux App Service plan..."
az appservice plan create --name "$appServiceName" --resource-group "$groupName" --sku B1 --is-linux

# Create a web app
echo "Creating Web App..."
az webapp create --name "$demoName" --resource-group "$groupName" --plan  "$appServiceName" --runtime "DOTNET|5.0"

# Set WebApp Deployment User
echo "Setting WebApp deployment user..."
az webapp deployment user set --user-name "$deployUserName" --password "$deployPassword"
Create a Web App (Step 8 of 18)
Install the .NET 5 SDK
The default .NET Core runtime for the Azure Cloud Shell is currently 3.1.403. This does not allow us to build or publish the Umbraco solution. So we need to install the latest version of .NET 5 (currently 5.0.403).
The script downloads the .NET 5 SDK from Microsoft and unzips it to a folder within our demo folder. Then this .NET SDK path is added to the current PATH.
# Install the .NET 5 SDK
echo "Installing .NET 5 SDK on this cloud shell..."
mkdir dotnetinstall
cd dotnetinstall || exit

wget https://download.visualstudio.microsoft.com/download/pr/b77183fa-c045-4058-82c5-d37742ed5f2d/ddaccef3e448a6df348cae4d1d271339/dotnet-sdk-5.0.403-linux-x64.tar.gz

DOTNET_FILE=dotnet-sdk-5.0.403-linux-x64.tar.gz
DOTNET_ROOT=$(pwd)/dotnet
export DOTNET_ROOT

mkdir -p "$DOTNET_ROOT" && tar zxf "$DOTNET_FILE" -C "$DOTNET_ROOT"

export PATH=$DOTNET_ROOT:$PATH

cd ..
Install the .NET 5 SDK (Step 9 of 18)
Caution: Many examples ask you to 'export PATH=$PATH:$DOTNET_ROOT'. But this does not change the .NET SDK and keeps pointing it to the default 3.1.403 version on the Azure Cloud Shell. Inverting the code to 'export PATH=$DOTNET_ROOT:$PATH' gives access to the .NET 5 SDK. I spent almost a day trying to figure this one out. 🤦♂️
Set Umbraco Unattended install variables
As the initial bootstrap run of this demo will happen on the Web App, we need to make sure that the connection string and all other variables are set on the Web App configuration.
The following lines add the connection string and app settings from the variables in our script. As a security precaution, we avoid adding these values to the local config files.
# Set Umbraco Unattended install variables
echo "Setting unattended install variables on the web app config..."
az webapp config connection-string set --resource-group "$groupName" --name "$demoName" --settings umbracoDbDSN="$connectionString" --connection-string-type SQLAzure

az webapp config appsettings set --resource-group "$groupName" --name "$demoName" --settings UMBRACO__CMS__GLOBAL__INSTALLMISSINGDATABASE=true UMBRACO__CMS__UNATTENDED__INSTALLUNATTENDED=true UMBRACO__CMS__UNATTENDED__UNATTENDEDUSERNAME="$umbracoAdminUserName" UMBRACO__CMS__UNATTENDED__UNATTENDEDUSEREMAIL="$umbracoAdminEmail" UMBRACO__CMS__UNATTENDED__UNATTENDEDUSERPASSWORD="$umbracoAdminPassword"
Set Umbraco Unattended install variables (Step 10 of 18)
Create Umbraco solution
Next, we run 'dotnet new -i Umbraco.Templates::*' to install the project templates. Then we create a new Umbraco solution, switch to that directory and add the Umbraco StarterKit.
# Create Umbraco Solution
echo "Create a new Umbraco solution on this cloud shell..."
dotnet new -i Umbraco.Templates::*
dotnet new umbraco -n UmbracoUnattended
cd UmbracoUnattended || exit

dotnet add package Umbraco.TheStarterKit
Create Umbraco solution (Step 11 of 18)
Publish and Zip up site
In the next step, we use the 'dotnet' command to publish the site to a folder named release. Then all content from that release folder is zipped up to a file named release.zip.
# Publish the Umbraco sample site
echo
echo "Publish the Umbraco site..."
dotnet publish --output release
cd ./release || exit
zip -r ../release.zip .
cd ..
Publish and Zip up site (Step 12 of 18)
Deploy to Web App
Next, the release.zip file is deployed to the Azure Web App.
# Deploy the Umbraco sample site
echo
echo "Deploy site to Azure Web App..."
az webapp deploy --resource-group "$groupName" --name "$demoName" --src-path ./release.zip
Deploy to Web App (Step 13 of 18)
Get the site URL
Using a JMESPath query we retrieve the default hostname for the web app and concatenate it with the schema.
# Get the site URL
siteUrl="https://"$(az webapp show --resource-group "$groupName" --name "$demoName" --query defaultHostName --output tsv)
Get the site URL (Step 14 of 18)
Output credentials
The prompt at the beginning of this script checks if the credentials should be displayed and/or saved.
- If the user enters 'none', the credentials are not displayed nor saved.
- If the user enters 'save', the credentials are saved in a file named “credentials.txt” in the demo folder. A sample 'credentials.txt' file can be found later on in this article. At this point, the credentials are not displayed to the user.
- If the user enters 'display', the credentials are displayed on the screen but not saved in a file.
- If the user enters 'both', the credentials are saved as well as displayed on the screen.
# Output credentials if requested
cd ..
echo
if [[ "$outputCredentials" == "none" ]];
then
echo "Credentials are NOT saved/displayed as requested"
fi

if [[ "$outputCredentials" == "save" || "$outputCredentials" == "both" ]];
then
echo
echo "Saving credentials as requested"
{
  echo "Site URL: $siteUrl"
  echo
  echo "Database Admin Username: $adminUser"
  echo "Database Admin Password: $adminPassword"
  echo "Deployment Username: $deployUserName"
  echo "Deployment Password: $deployPassword"
  echo "Umbraco Admin Username: $umbracoAdminEmail"
  echo "Umbraco Admin Password: $umbracoAdminPassword"
} > credentials.txt
echo "Saved $demoName/credentials.txt file"
fi

if [[ "$outputCredentials" == "display" || "$outputCredentials" == "both" ]];
then
echo
echo "Displaying credentials as requested"
echo "Site URL: $siteUrl"
echo "Database Admin Username: $adminUser"
echo "Database Admin Password: $adminPassword"
echo "Deployment Username: $deployUserName"
echo "Deployment Password: $deployPassword"
echo "Umbraco Admin Username: $umbracoAdminEmail"
echo "Umbraco Admin Password: $umbracoAdminPassword"
fi
Output credentials (Step 15 of 18)
Deletion/clean-up script
The script creates a deletion script so that all the Azure resources and the demo folder can be deleted. This keeps costs down on Azure and the file system on your Cloud Shell clean. The following snippet only creates a new .sh file to be used later on. The deletion script is not executed at this point.
# Write script for deletion
cd ..
echo
echo "Writing script to help deletion later..."
{
  echo "#!/bin/bash"
  echo "echo UMBRACO 9 DEMO CLEAN UP"
  echo
  echo "# Once done, delete the entire resource group to keep costs down"
  echo "echo Deleting resource group..."
  echo "az group delete --name $groupName --yes"
  echo
  echo "# delete the folder"
  echo "echo Deleting install folder..."
  echo "rm -r $demoName"
} > "$deleteScriptFile"
chmod +x "$deleteScriptFile"
echo "Delete script location - $deleteScriptFile"
Deletion/clean-up script (Step 16 of 18)
Bootstrap/unattended install
A curl request is made to retrieve the home page of the site. This will trigger an unattended install since we provided all the app settings in the Web App.
# Bootstrap the site with an initial request
echo
echo "Trying to access the site for the first time..."
curl -s -o /dev/null -w "%{http_code}" "$siteUrl"
Bootstrap/unattended install (Step 17 of 18)
Display site URL
The final step of the script displays the site URL which can be clicked through to load the site on a new tab of your browser.
# Provide the site URL to click through
echo
echo "Demo site install complete. Go to $siteUrl"
Display site URL (Step 18 of 18)
That’s it for the script! As I mentioned previously, the entire deployment script is available on Github.
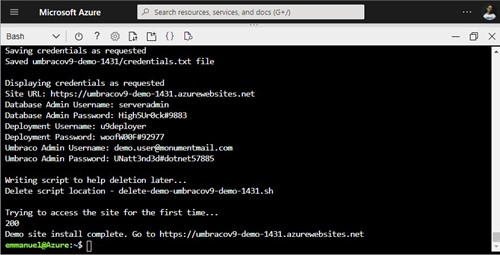
Credentials
The script creates a credentials.txt file in a folder with the project name. You can opt out of saving and/or displaying the credentials.
Site URL: https://umbracov9-demo-1431.azurewebsites.net

Database Admin Username: serveradmin
Database Admin Password: High5Ur0ck#9883
Deployment Username: u9deployer
Deployment Password: woofW00F#92977
Umbraco Admin Username: demo.user@monumentmail.com
Umbraco Admin Password: UNatt3nd3d#dotnet57885
credentials.txt
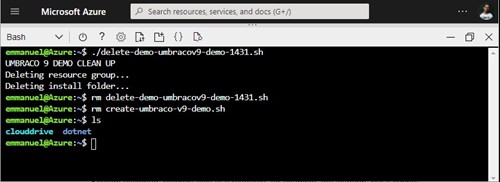
Cleaning up
Whenever the script is run, it creates a script file that allows for easy deletion of all Azure resources and folders on the Cloud Shell. This will allow you to manage your resource costs. The name of the script file will be the supplied demo name prefixed by 'delete-demo-' and suffixed by a '.sh' extension. The file will reside next to the 'create-umbraco-v9-demo.sh' file.
For example, delete-demo-umbracov9-demo-1431.sh will contain the following.
#!/bin/bash
echo UMBRACO 9 DEMO CLEAN UP

# Once done, delete the entire resource group to keep costs down
echo Deleting resource group...
az group delete --name rg-umbracov9-demo-1431 --yes

# delete the folder
echo Deleting install folder...
rm -r umbracov9-demo-1431
Sample deletion script - delete-demo-umbracov9-demo-1431.sh
To clean up, you should run the following:
./delete-demo-umbracov9-demo-1431.shExecuting clean up
Deleting the scripts
To clean up the downloaded creation script and the generated deletion script, run the following.
rm delete-demo-umbracov9-demo-1431.sh
rm create-umbraco-v9-demo.sh
Deleting the script files
An example of a full clean up can be seen here.
Improvements/next steps
There are quite a few improvements that could be made to this shell script. A few ideas off the top of my head:
- Robust error handling
- Better security practices
- Passing arguments to the shell script
- A Powershell version of this shell script
- Using Azure Blob Storage for storing Umbraco media items
- Asynchronous creation of Azure resource (--no-wait option) to speed up this process
Contributions are welcome
Got some time to improve this script? Contributions are welcome. You can find this code on Github. Don’t be shy to submit a PR.
Make it your own
Consider this shell script as a starting point and customise it to suit your needs. Share it with the wider Umbraco community for some #H5YR appreciation. At Luminary, we are passionate Umbraco and Azure Gold partners. Making them work hand-in-hand is our mission and you can join us on that journey.
References
I used the following as references and you could delve into them as you customise this script.
