Advanced BlockList Editor
Heads Up!
This article is several years old now, and much has happened since then, so please keep that in mind while reading it.
Block based content historically
Way back in the days of Umbraco 6 and lower we did not have a lot of options to create block based content. The most common way to solve this, was to create the blocks that needed to be displayed on the page as child nodes of that page (or maybe in a folder called "blocks" below the page). Although this worked fine there were a lot of things you needed to handle:
- Make sure blocks get indexed with the page (and update the page in the index when blocks are changed)
- Because the blocks are created as content items they can be previewed from the CMS and accessed directly by their URL; this had to be handled correctly.
A side effect of this setup was that your tree got cluttered with a lot of items that were not pages.
With the release of Umbraco 7 and the backoffice being built in AngularJS this opened the door for a whole new set of editors that allowed for a new way of doing block-based content. All of these editors store the block-based content with the page itself.
- Archetype: this open source property editor gave us the option to have block-based content by defining the structure in the datatype configuration. You could reuse existing datatypes as input fields.
- Grid Layout: this core property editor gives editors the ability to insert different types of content in a predefined layout.
- Nested Content: started out as an open source editor that made its way into the Umbraco core project. It works similar to Archetype, but instead of defining your block structure as part of the datatype configuration, you can (re)use document types for the structure.
This is a just a handful of options, but there are many others available. Peter Gregory wrote an article comparing four block editors in last year's edition of 24 Days In Umbraco.
But for the remainder of this article we will focus on the new Block List Editor in Umbraco. I will walk you through some useful tips and techniques that will make your solutions more user-friendly.
Reusable content blocks
Often editors want to reuse a piece of content on several pages. For example a Call to action component that allows users to sign up for a newsletter.
Out of the box the Block List Editor has no support for reusing content. It supports copying and pasting of blocks from one page to another. But when the content of the block needs to change, the editor still needs to update all the instances across the website. When you have a large site this will require them to go by all the pages to make sure that they don't miss one. So it would make more sense that they can create the component somewhere in the content tree and reuse that on pages where they want to show it.
So let's have a look on how to achieve this.
Like nested content, the structure of a content block is defined by an Umbraco Content Type. This needs to be an Element Type, otherwise it can not be used in the content editor. But because it is an element type we can't create items of that type in the tree. And what we want is a way to create items in the tree with the same fields as the element type we use in the Block List Editor.
Here document type compositions come to our rescue.
So you need to create a document type (that is not an element type) and then select your block element type you want to reuse as composition.
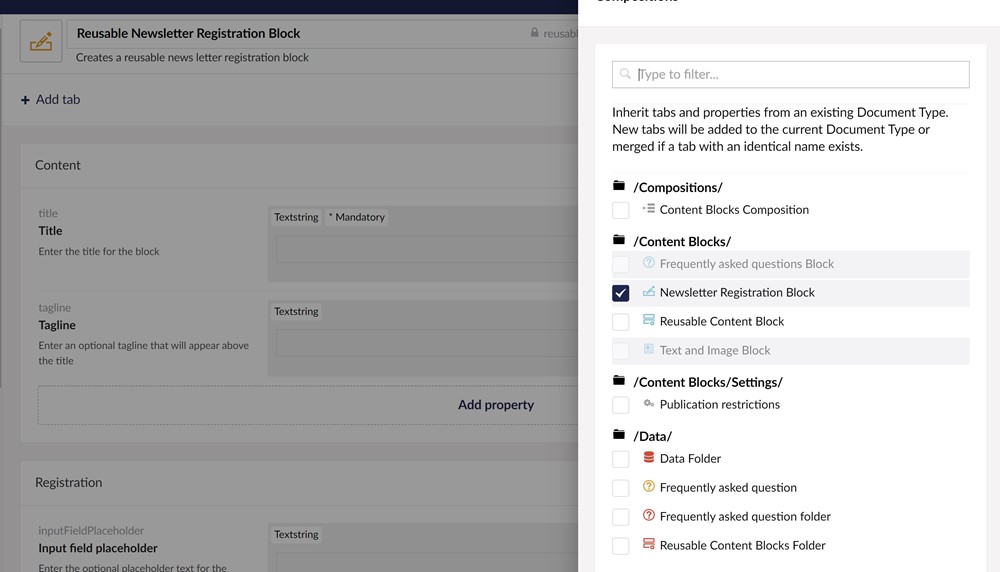
Now you can create content nodes using this document type in the tree with the exact same properties as the block you use directly in the block list editor. Because you are using a composition you only need to update the element type to add/remove/change properties.
Tip: If you are building a multi-language site don't forget to set Allow vary by culture on your element type and its properties.
The next thing we need to do is create a document type editor where editors can pick a reusable content block and configure it to be used in the Block List Editor.
Once that is in place we only need to setup the view for "Reusable content block". We want the selected block to be rendered with the same view as a block we place directly in the Block List Editor.
@using Umbraco.Cms.Core.Composing
@using Umbraco.Cms.Core.Models.Blocks
@using Umbraco.Cms.Core
@inherits UmbracoViewPage<Umbraco.Cms.Core.Models.Blocks.BlockListItem<_Days.Models.Content.ReusableContentBlock>>
@inject ITypeFinder _typeFinder
@inject IPublishedValueFallback _publishedValueFallback
@{
    var blockContent = Model.Content.Block;
}
@if (blockContent != null)
{
    // we assume the picked content is always composed of one document type, so we get the first composition alias
    var compositionAlias = blockContent.ContentType.CompositionAliases.FirstOrDefault();

    // get the models builder type based on composition alias
    // so this is the type of the strongly typed model of the composition document type.
    var compositionType = _typeFinder.FindClassesWithAttribute<PublishedModelAttribute>().SingleOrDefault(x => x.GetCustomAttribute<PublishedModelAttribute>(false).ContentTypeAlias == compositionAlias);

    // create instance of the composition type using the picked content
    var compositionInstance = Activator.CreateInstance(compositionType, blockContent, _publishedValueFallback);

    // get a generic block list item type based on the composition type
    var blockListItemType = typeof(BlockListItem<>).MakeGenericType(compositionType);

    // create instance of the block list item
    var blockListItem = (BlockListItem)Activator.CreateInstance(blockListItemType, new GuidUdi("document", blockContent.Key), compositionInstance, null, null);

    // and render it using the same view as normally.
    @await Html.PartialAsync("blocklist/Components/" + compositionAlias, blockListItem)
}
It requires some "reflection magic" to get it working, but the end result is that we can render the selected block from the tree using the same view as if it was added directly to the Block List Editor.
Scheduled "publication"
Out of the box the Block List Editor does not support hiding a block or having it displayed for certain time on the website. While this is often a requirement when we build websites, the only option is that editor actually removes the block from the Block List Editor.
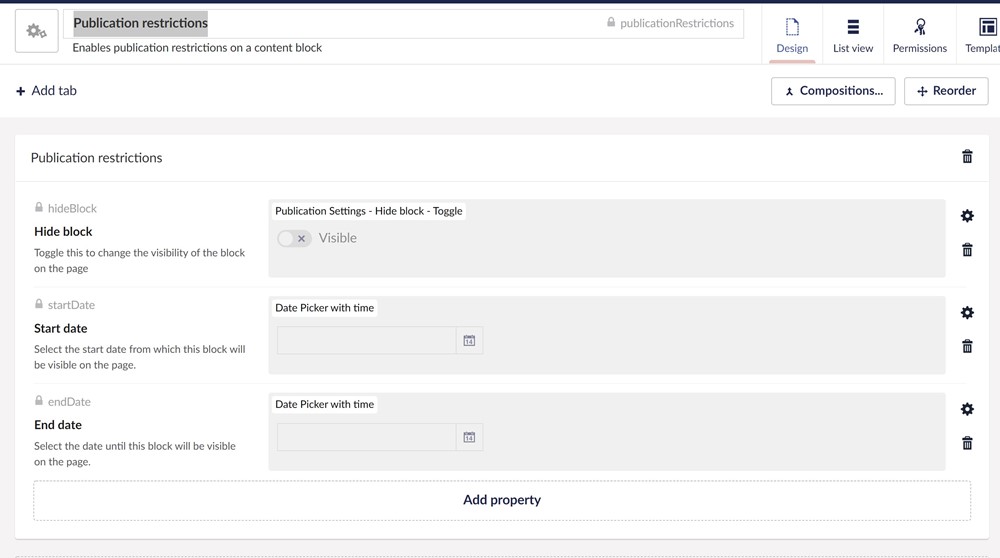
So the first thing we need to do is create a element type called "Publication restrictions" for example with the following properties:
- Hide block: when toggled the block will be hidden on the page
- Start date: a datetime from which the block will be visible on the page
- End date: a datetime from which the block will be hidden on the page
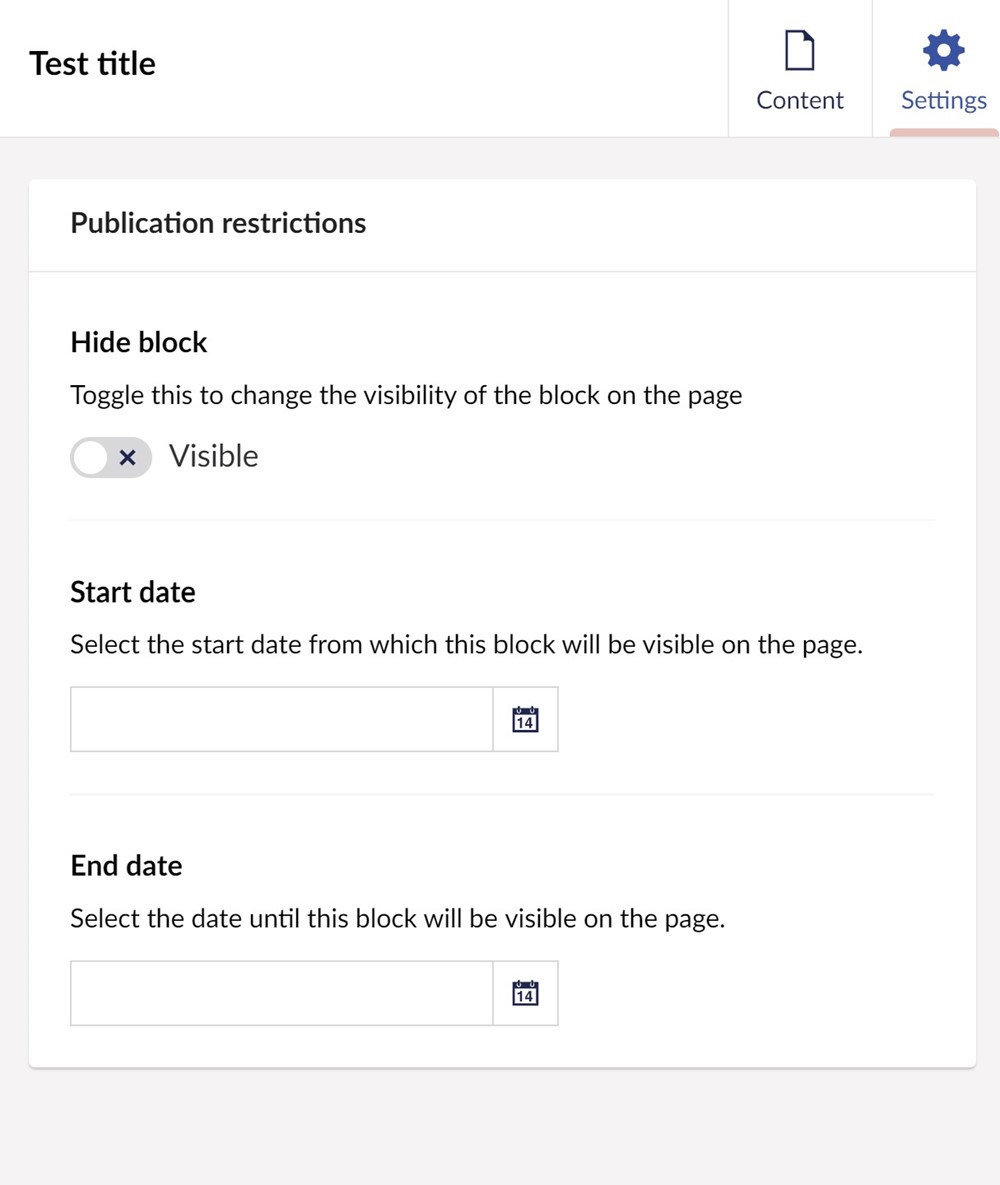
The next thing is to update all our content blocks in our Block List Editor datatype by selecting our newly created element type as a "Settings model".

After that your editors have access to these settings when editing the content block.
With the configuration in place we only need to update the rendering of the block list to check these settings if the block should be shown. For that I created service that does the checks to see if a block should be displayed.
using System;
using _24Days.Core.Ranges;
using _Days.Models.Content;
using Umbraco.Cms.Core.Models.Blocks;
using Umbraco.Extensions;

namespace _24Days.Core.Services
{
    internal class BlockPublicationCheckService : IBlockPublicationCheckService
    {
        public bool IsBlockPublished(BlockListItem block)
        {
            if (block == null)
            {
                return false;
            }

            if (block.Settings == null)
            {
                return true;
            }

            if (block.Settings.ContentType.Alias == PublicationRestrictions.ModelTypeAlias ||
                block.Settings.IsComposedOf(PublicationRestrictions.ModelTypeAlias))
            {
                var settings = (PublicationRestrictions)block.Settings;

                if (settings.HideBlock)
                {
                    return false;
                }

                var dateRange =
                    new DateRange(
                        settings.StartDate == default ? DateTime.MinValue : settings.StartDate,
                        settings.EndDate == default ? DateTime.MaxValue : settings.EndDate);

                return dateRange.Includes(DateTime.Now);
            }

            return true;
        }
    }
}
The interface definition and registration are omitted but can be found in the with the full example
With this service in place I can inject it in to the view and check if a block needs to be shown.
@using _24Days.Core.Services
@inherits Umbraco.Cms.Web.Common.Views.UmbracoViewPage<Umbraco.Cms.Core.Models.Blocks.BlockListModel>
@inject IBlockPublicationCheckService publicationCheckService;
@{
    if (!Model.Any()) { return; }
}
<div class="umb-block-list">
    @foreach (var block in Model)
    {
        if (block?.ContentUdi == null) { continue; }
        var data = block.Content;

        var isBlockPublished = publicationCheckService.IsBlockPublished(block);

        if (isBlockPublished)
        {
            @await Html.PartialAsync("blocklist/Components/" + data.ContentType.Alias, block)
        }

    }
</div>
There you go. You can now hide blocks or schedule displaying blocks on your webpage.
Disclaimer: Keep in mind that the hidden content will be in the content cache and Examine indexes. So if you have a search function on your website you will need to handle this.
Preview
Out of the box what your editors get to see when using the block list editor is not very user-friendly.
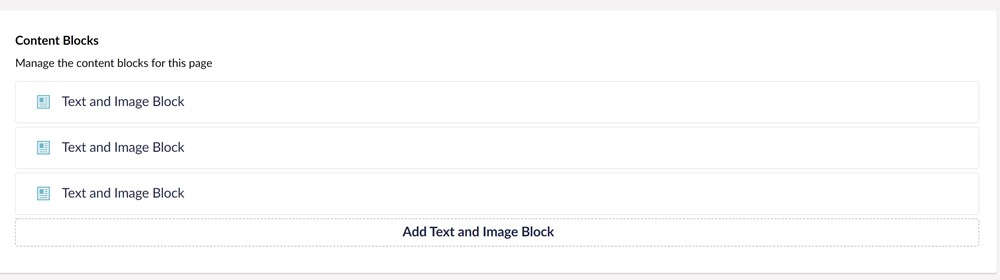
They can see what type of block is placed in the block editor but that's it. To see what content is being used they need to open up the block.
But by setting a for the block we can make it a bit more user friendly.
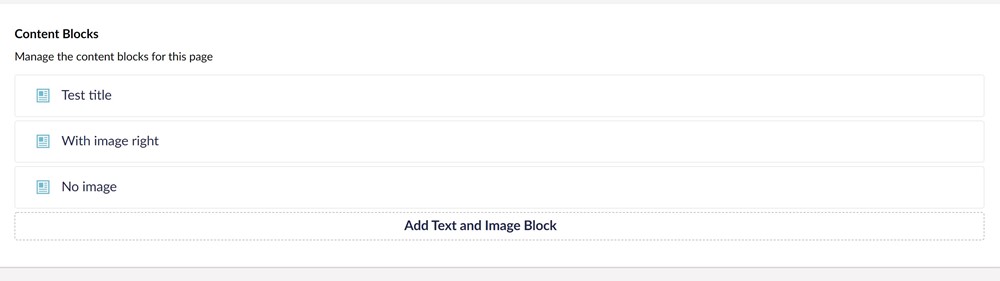
This improves the editor experience a bit because they can see a piece of the content inside the block without going in to the edit mode.
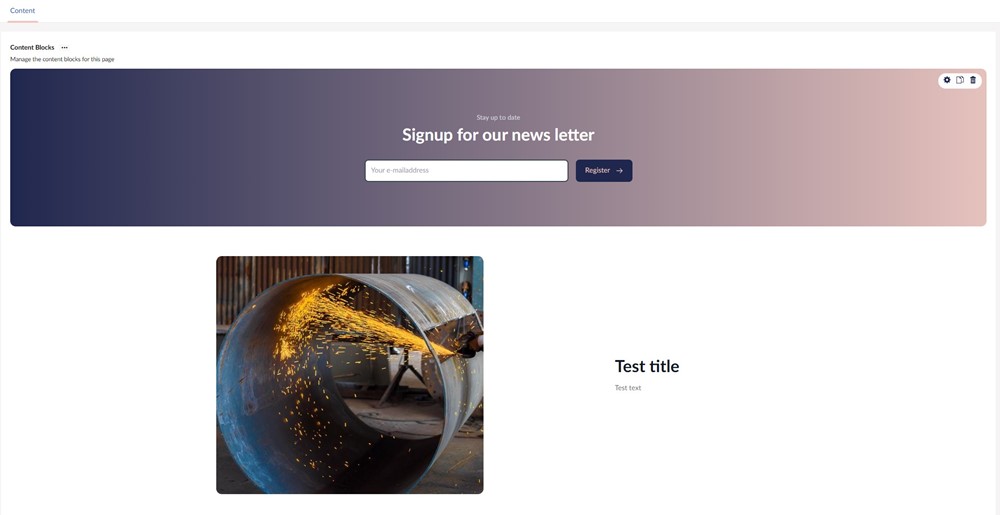
But to get the most out of the Block List Editor you can create a so editors can see in the backoffice how a block will look on the web page. Tim Payne wrote an excellent on how to build custom previews in AngularJS.
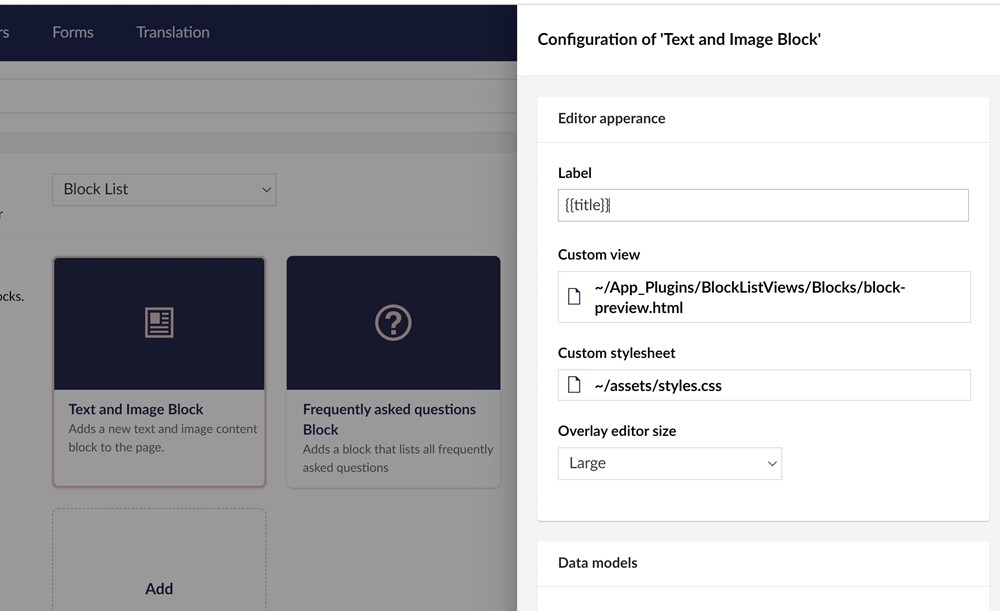
Configuring a custom view is done in the datatype for each element type.
And then your Block List Editor could look like this in the backoffice :
Because the custom preview is rendered in a shadow DOM you can use the same CSS file as the one on your website without interfering with the backoffice styling.
But creating a angular view (and maybe a controller) for each block can be a lot of work if you have a lot of different content blocks. Especially if you see in the article written by Tim, as well as the example in the official documentation, you already need a controller and a API call to display an image. Imagine you have a block where you display the latest x number of news articles. You probably need to write your own API controller to retrieve that data. You could also opt to render fake data for complex blocks, but then I don't see any benefit of having a custom preview.
You also have to maintain your rendering in two places, the angular view and your razor view.
So when I was working on big projects with a lot of different blocks, this took a lot of time to create new previews and update the existing previews when the design changed, especially because I also needed to do the same work in the razor views. To limit the time spending on creating previews I spent some time investigating if I could reuse the razor views for the back office preview. Turned out I could.
What I did is create an API controller with a method where I pass in the block data, the page id and culture.
This method does the following :
-
Get the Umbraco content item for the page id from the cache or preview cache
-
Configure an Umbraco published request based on the page and culture
-
Construct an IPublishedElement type from the passed in block data and render the correct view to a string
-
And finally returns the cleaned up markup
You can see the full code of the API .
Then I created an angular view and controller to call the API. All the code needed for that can be found .
So now I never need to create a another angular preview anymore and just reuse the razor rendering.
As a bonus I have a directive that checks the publication settings and changes the look of blocks that will not be visible on the frontend in the preview :
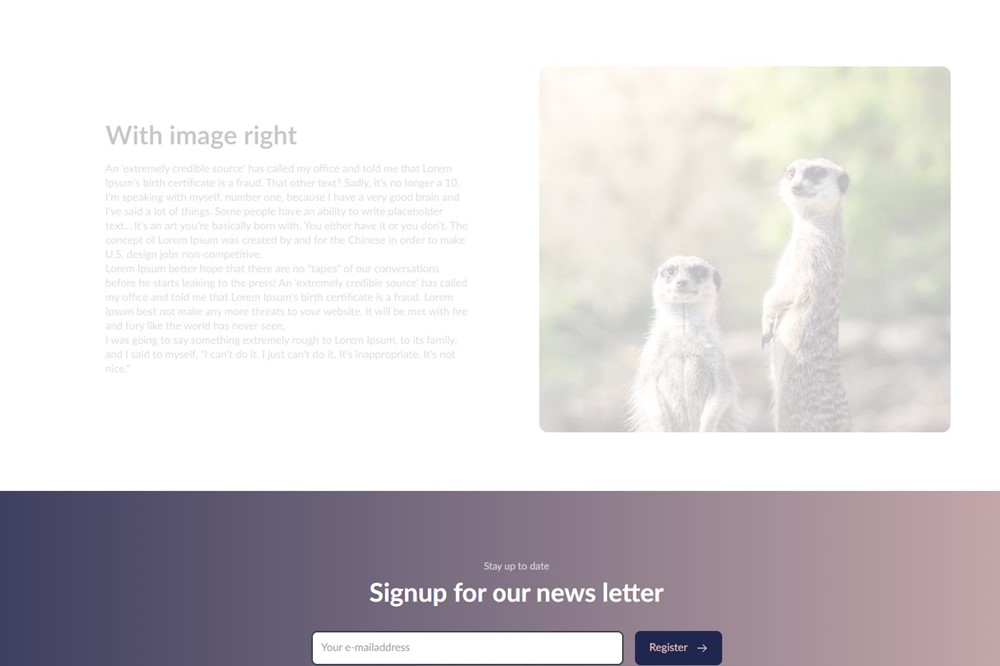
So editors can see this as well without going into the settings to check this.
Wrap up
I hope you will use some or all of these tips in your next or current Umbraco projects.
If you want to get your hands dirty, I have a fully working Umbraco 9 site available that you can download and run locally to play around with this yourself. But don't forget to wash your hands afterwards 🧼🧼🧼
