Creating and Publishing a Package
Heads Up!
This article is several years old now, and much has happened since then, so please keep that in mind while reading it.
- There is a fantastic community of Umbracians out there who are willing to help you.
- There are some fantastic packages available for you to install and use.
When I was new to Umbraco, a contractor once showed me the packages section and he said "when you get used to Umbraco, you should write one of these packages one day".
I thought to myself "no chance, I wouldn't know where to start". I was struggling to get to grips the basics of Umbraco and MVC, learning the current best practises etc. How would I ever be able to write a package for others to use?
Well time has passed and I learned how to create packages in Umbraco.
For this article, I thought it would be good to create a package from scratch, that others could find useful, and show you how I got it into the Our Umbraco projects directory.
Where to start?
Before you create an Umbraco package, you need an idea. You need to have something reusable that either you or at least one other person will find useful in another project.
Working for an agency, I build a lot of websites, and most of them are in Umbraco. I would say I've built 40 - 50 sites in Umbraco. I find that I do a lot of the same things in all of my sites. Wouldn't it be good to have a starting point which has all of these basic concepts in one package. A starter kit, if you will.
TL;DR
I show you how I created this Umbraco Package.
Here is the Demo site.
What functionality do I want to include?
Before building it, I needed to stop and think about what functionality I wanted to include in this starter kit. What best practices am I trying to share? Here is a list of functionality I decided to include:
- Automatic site navigation menu using Bootstrap with dropdowns (I've been asked to do a blog post on this quite a few times)
- A carousel using Nested Content. (I needed to start using this now that Archetype has been sunsetted)
- A news or blog section with a list of latest articles on the home page
- A working contact form which uses Ajax
- A search page which uses Umbraco's built-in search functionality
- Pretty links. Pages which act like links to internal or external pages
- Social links in the footer
- Page links in the footer
- Grid editor for the content
- Use of Client Dependency for bundling and minifying CSS and JavaScript.
Okay I know what I want to build, what now?
So to build this starter kit, I decided to use Bootstrap Studio to create the front end build. I made a video which shows you What is Bootstrap Studio and How do you use it? Bootstrap Studio has a great drag and drop interface so I was up and running with a static site in no time.
Next I created a new Umbraco project using the latest version of Umbraco (7.7.6 at the time of creating it). I got to work on building all of these features and I had a working site running in a fairly short amount of time. Mainly because I'd done these things before (that's why I'm building it, right).
Okay, enough waffle, how do I create a package in Umbraco?
Just to be clear, there is a difference between creating a package and publishing it on Our Umbraco. This first part shows you how to create the package using the Umbraco backoffice Create Pacakge screens. If you already know how to do this, you can skip down to find out how to get it into the Our Umbraco projects directory.
Lets start by creating the package in the Developer section of Umbraco.
There are various ways of creating packages in Umbraco. The way I'm showing you is the simplest way I have found.
- In the project where you want to create the package, go to the Developer section.
- The first item in the menu should be Packages.
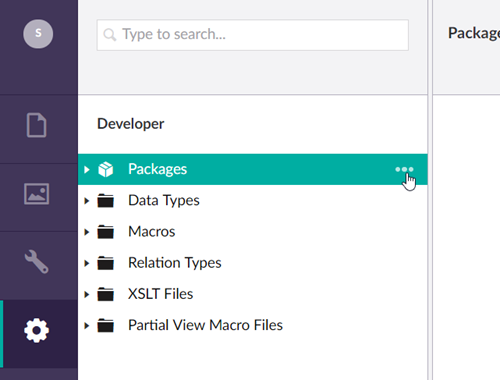
Right click on it, or click on the three dots next to it and choose 'Create'. - Enter a name for your package and click on the Create button.
- There are 4 tabs:
- Package Properties
- Package Contents
- Package Files
- Package Actions

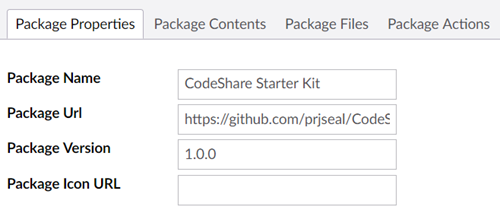
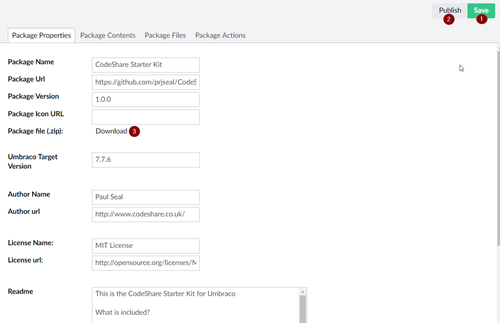
Package Properties
- The package name will already be there.
- Enter a url for the package. I like to enter the GitHub repository address in here.
- Package Version is important. Use semantic versioning, like how Umbraco does, so start with version 1.0.0
- Package Icon Url. I don't add one at this stage, I usually set this up when it is in the Our Umbraco Project directory.
- Package file (.zip) This will show as a link when you have saved and published your package. (Don't worry published doesn't mean submitted to Umbraco)
- Umbraco Target Version. This is the lowest version of Umbraco you are saying it will work on. As mine is a starter kit I will leave it as 7.7.6 because who installs a a fresh older version of Umbraco?
- Author Name is pretty obvious
- Author url is too, I put my website address codeshare.co.uk in there.
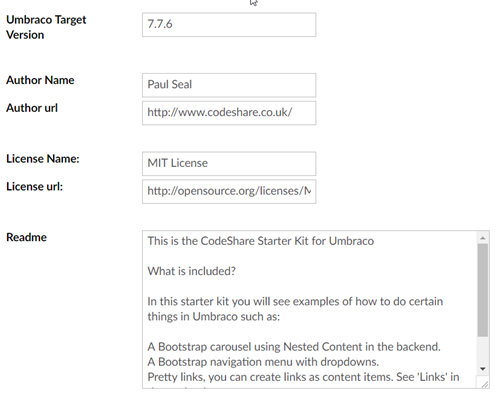
- License Name I always leave this as MIT because I'm happy for people to re-use it however they want.
- License url is filled in by default, but if you change the license name be sure to include a url to the license.
- Readme. I Just enter some basic text in here about the project. Apparently you can enter HTML in there, but I believe you can format it later.
Package Contents
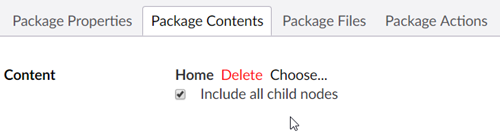
As I am intending on sharing a full site with all of the content I need to choose the home page and all of it's children
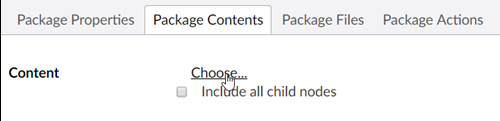
Click on Choose, then click on the home page
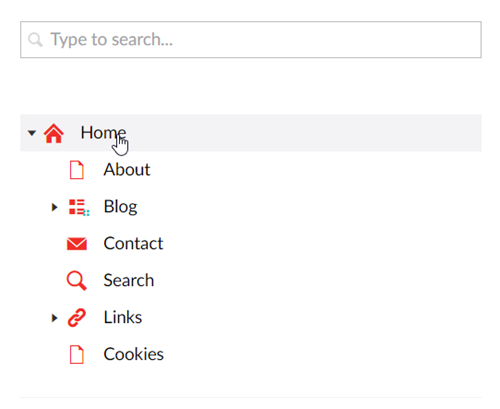
You will see it selected, and if you want to include all child pages, you need to tick the box underneath it.
Next I needed to add all of the document types I had created.
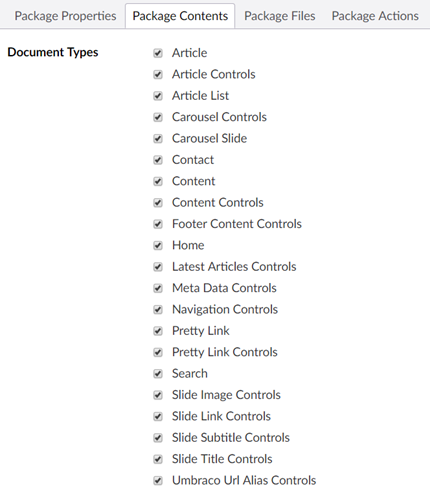
With all of them selected I could move on to selecting the templates and stylesheets.
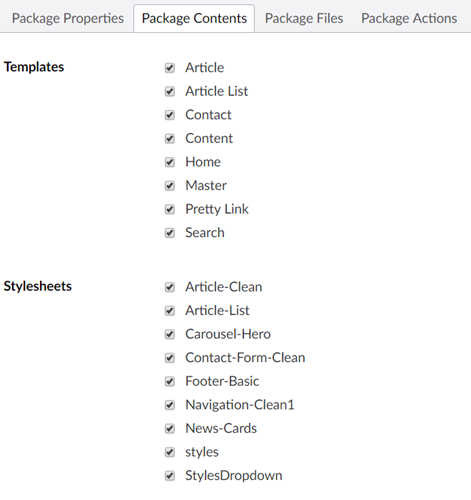
This is pretty easy, right? And the last part on this tab is to select the custom data types that I had created
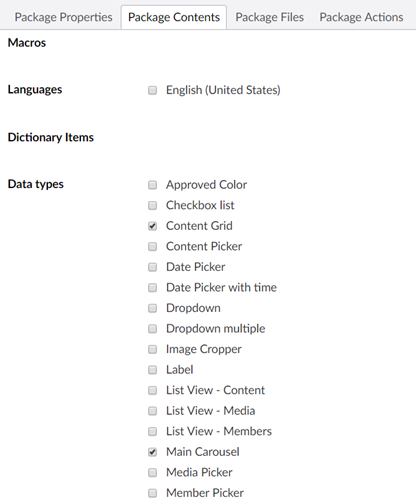
That's everything on this tab. I like to press save now and again so I don't lose my work.
Package Files
This tab is a bit trickier. If you miss some files here, it could mean your package doesn't install properly.
Here are the files I included:
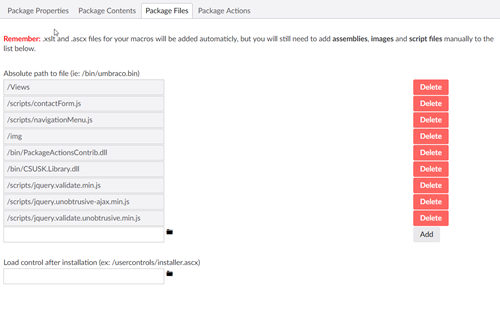
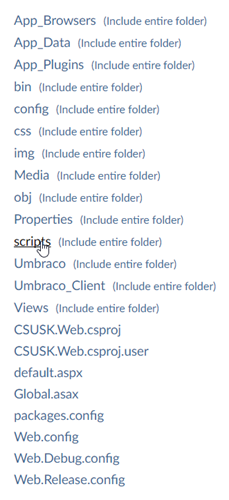
You can add files or folders by click on the black folder icon
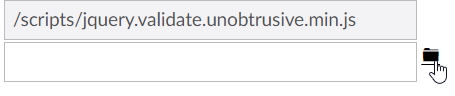
Then you click through to select individual files or you can click on the link to the right to include the entire folder.
I included a library in my package which has the code for the contact controller and model. It also has the code for some package actions, but we will get on to that on the next tab.
What about Media?
At this point we could click on Save and then click on Publish and we would be able to download the package, but there would be no media included in the package and it would ruin the effect of the package. We want the package to look like a working site. So before we get onto the Package Actions tab, we need to write a package action to add the media.
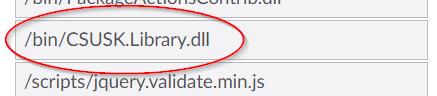
Package Actions
I created a new Class Library called CSUSK.Library and in there I created a folder called Package Actions. In the folder I added a class called CreateMediaHandler.cs
using Newtonsoft.Json.Linq;
using System;
using System.Collections.Generic;
using System.IO;
using System.Linq;
using System.Web;
using System.Xml;
using umbraco.interfaces;
using Umbraco.Core;
using Umbraco.Core.Logging;
using Umbraco.Core.Models;
using Umbraco.Core.Services;
using Umbraco.Web;

namespace CSUSK.Library.PackageActions
{
    public class CreateMediaHandler : IPackageAction
    {
        IMediaService _mediaService = ApplicationContext.Current.Services.MediaService;

        public string Alias()
        {
            return "CreateMediaHandler";
        }

        public bool Execute(string packageName, XmlNode xmlData)
        {
            try
            {
                LogHelper.Info(System.Reflection.MethodBase.GetCurrentMethod().GetType(), "Executing CreateMediaHandler");
                return CreateMediaItems();
            }
            catch (Exception ex)
            {
                LogHelper.Error(System.Reflection.MethodBase.GetCurrentMethod().GetType(), "INSTALL Package Error", ex);
                return false;
            }
        }

        public bool CreateMediaItems()
        {
            const string SLIDE_IMAGE_ALIAS = "slideImage";
            const string MAIN_IMAGE_ALIAS = "mainImage";

            try
            {
                IContentService _contentService = ApplicationContext.Current.Services.ContentService;


                int parentId = -1;
                IMedia codeImage = CreateMediaItem(parentId, "code.jpg");
                IMedia carouselImage = CreateMediaItem(parentId, "carousel.jpg");
                IMedia navigationImage = CreateMediaItem(parentId, "navigation.jpg");
                IMedia partyImage = CreateMediaItem(parentId, "party.jpg");

                Guid homeId = new Guid("6352118a-8432-4a53-9572-b5555b9cf3e3");
                IContent homePage = _contentService.GetById(homeId);
                string carouselData = homePage.GetValue<string>("mainCarousel");

                JArray carouselObject = JArray.Parse(carouselData);

                carouselObject[0][SLIDE_IMAGE_ALIAS] = codeImage.GetUdi().ToString();
                carouselObject[1][SLIDE_IMAGE_ALIAS] = navigationImage.GetUdi().ToString();
                carouselObject[2][SLIDE_IMAGE_ALIAS] = carouselImage.GetUdi().ToString();

                homePage.SetValue("mainCarousel", carouselObject.ToString());
                _contentService.SaveAndPublishWithStatus(homePage);

                IContent aboutPage = homePage.Children().Where(x => x.Name == "About").FirstOrDefault();
                aboutPage.SetValue(MAIN_IMAGE_ALIAS, partyImage.GetUdi().ToString());
                _contentService.Save(aboutPage);

                IContent blog = homePage.Children().Where(x => x.Name == "Blog").FirstOrDefault();

                IContent article1 = blog.Children().Where(x => x.Name == "CodeShare Starter Kit is released").FirstOrDefault();
                article1.SetValue(MAIN_IMAGE_ALIAS, partyImage.GetUdi().ToString());
                _contentService.Save(article1);

                IContent article2 = blog.Children().Where(x => x.Name == "Something interesting").FirstOrDefault();
                article2.SetValue(MAIN_IMAGE_ALIAS, codeImage.GetUdi().ToString());
                _contentService.Save(article2);

                IContent article3 = blog.Children().Where(x => x.Name == "Another blog post").FirstOrDefault();
                article3.SetValue(MAIN_IMAGE_ALIAS, carouselImage.GetUdi().ToString());
                _contentService.Save(article3);


                SaveAndPublishChildPages(homePage.Children(), _contentService);

                LogHelper.Info(System.Reflection.MethodBase.GetCurrentMethod().GetType(), "Created Media Items");
                return true;
            }
            catch (Exception ex)
            {
                LogHelper.Error(System.Reflection.MethodBase.GetCurrentMethod().GetType(), "Error when creating media items.", ex);
                return false;
            }
        }

        private void SaveAndPublishChildPages(IEnumerable<IContent> items, IContentService _contentService)
        {
            foreach(IContent item in items)
            {
                _contentService.SaveAndPublishWithStatus(item);
                if(item.Children() != null && item.Children().Any())
                {
                    SaveAndPublishChildPages(item.Children(), _contentService);
                }
            }
        }

        private IMedia CreateMediaItem(int parentId, string fileName)
        {
            IMedia newFile = _mediaService.CreateMedia(fileName, parentId, "Image");
            string filePath = HttpContext.Current.Server.MapPath("~/img/" + fileName);
            using (FileStream stream = System.IO.File.Open(filePath, FileMode.Open))
            {
                newFile.SetValue("umbracoFile", fileName, stream);
            }
            _mediaService.Save(newFile);
            return newFile;
        }

        public XmlNode SampleXml()
        {
            const string sample = "<Action runat=\"install\" undo=\"true\" alias=\"CreateMediaHandler\"></Action>";
            return ParseStringToXmlNode(sample);
        }

        private static XmlNode ParseStringToXmlNode(string value)
        {
            var xmlDocument = new XmlDocument();
            var xmlNode = AddTextNode(xmlDocument, "error", "");

            try
            {
                xmlDocument.LoadXml(value);
                return xmlDocument.SelectSingleNode(".");
            }
            catch
            {
                return xmlNode;
            }
        }

        private static XmlNode AddTextNode(XmlDocument xmlDocument, string name, string value)
        {
            var node = xmlDocument.CreateNode(XmlNodeType.Element, name, "");
            node.AppendChild(xmlDocument.CreateTextNode(value));
            return node;
        }

        public bool Undo(string packageName, XmlNode xmlData)
        {
            return true;
            //Can't really undo this.
        }
    }
}
The main code here is in the CreateMediaItems() method.
It uploads 4 images from the /img/ folder to the Umbraco Media section. It the uses the unique ids of these items and sets some media picker values in the content items. Like in the carousel, or the page header images.
Then it saves and publishes the pages in the site. There is probably a more efficient method for saving and publish all content items, but as there aren't many in the package, this works fine.
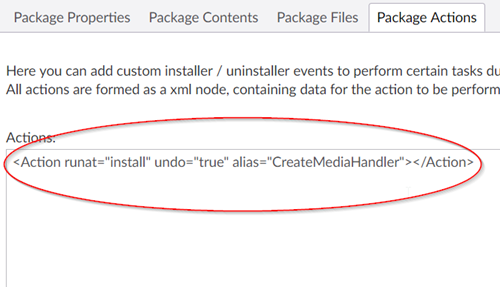
To call this Package Action on install, in the Package Actions tab we enter this command in the Text Area
How to Add App Settings in your package
You may have noticed this dll in the Package Files list
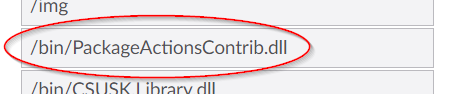
It is from this package made by Richard Soetman Package Actions Contrib
It has lots of Package Actions you can use, such as adding app settings to the web.config file.
To learn more about Package Actions in greater detail see this blog post by Jon Humphrey
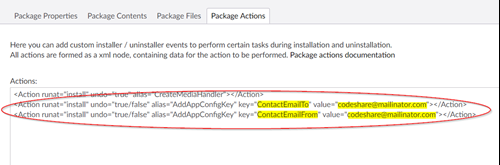
But for now we add the app settings using these Package Actions:
Now it's time to save, publish and download the zip file.
Get testing
Now you have created your pacakage locally, you need to start testing it.
I set up a clean install of Umbraco 7.7.6 on GitHub so I could test installing packages onto it. You can use it too if you want. Just don't commit any changes, revert them each time you want to start again.
I also asked members of the Umbraco community to help me test the package. I got really valuable feedback from them so I would recommend doing that too.
Adding the package to our.umbraco.org/projects
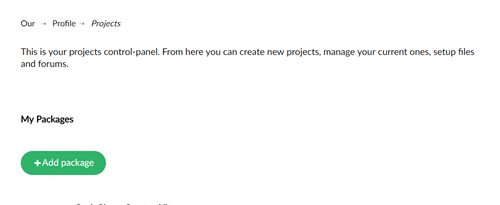
Now that we have tested the package and we are ready to share it with the Umbraco community we can create a project on Our Umbraco.
Go to https://our.umbraco.org/member/profile/projects/ and click on the Add Package button
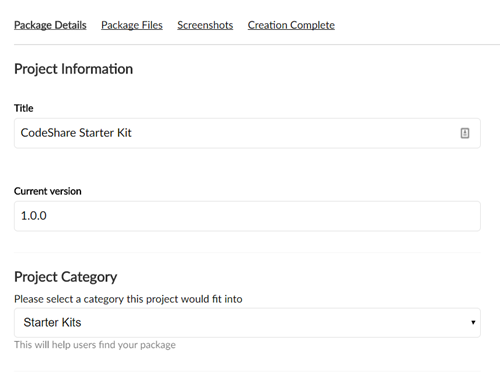
To start with, enter Title of your package, the version number, and the category you want it to be included in, in the packages directory.
Be careful not to use the word Umbraco in your package name as it will probably be rejected.
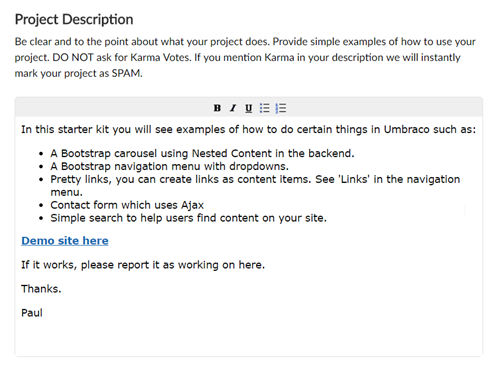
Enter a description like I have done here:
The next set of fields are similar to the ones we've already completed when creating the package, so enter the license information etc.

The last fields on this page are where you can add a bug tracking link, Google Analytics code and tick to say you are happy for others to contribute to this project.
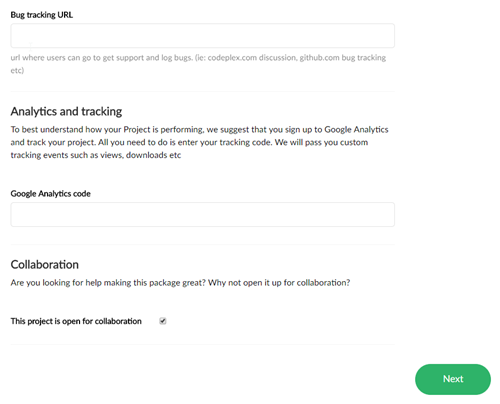
Click on Next to go to the next section where you will upload the package zip file.
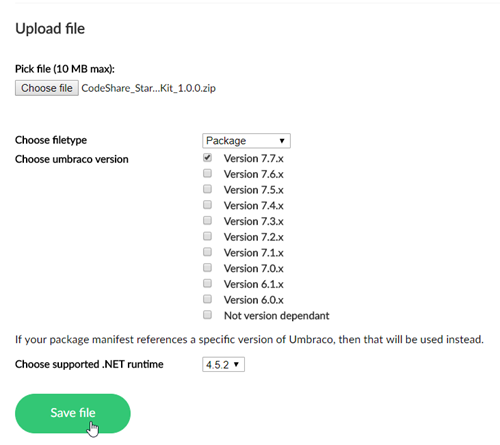
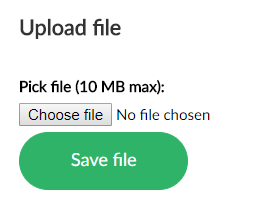
On this screen, click on the file upload button and choose the zip file which you downloaded earlier, then click on Open.
Choose the file type, I chose Package, then choose the versions of Umbraco it is compatible with and the version of .NET it is compatible with, then click on Save File
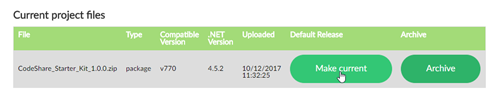
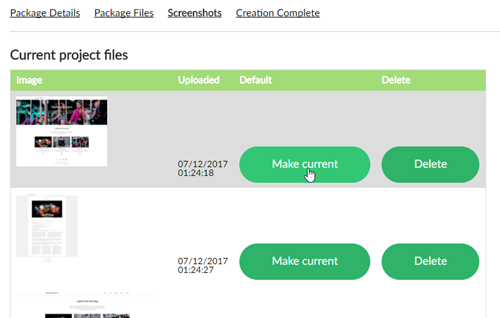
Once the file has saved, you need to go to the list of files above and click on Make Current.
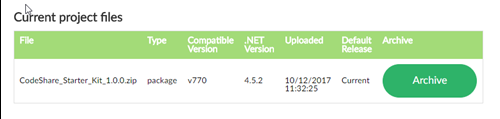
Click on Next to go the Screenshots tab.
On this screen you will need to upload screenshot images to give people a look at what they will see with your package.
As with the previous screen, click on the file upload button
Choose your images, click on Open and then press Save file.
When the images have uploaded, if you want to use one as your main image, click on the Make Current button.
Now click on Next and go to the last screen.
On this list screen, you choose if you want the package to be live by ticking the box and pressing Save.
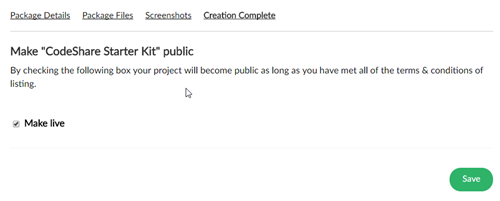
When you do this it will be reviewed by Umbraco HQ and if it passes their rules, your package will be live in the list of projects https://our.umbraco.org/projects/
Summary
To summarise what we have done in this post, we have had an idea, built something useful, created an Umbraco package in the Developer tab and then submitted it to Our Umbraco.
Here is a link to the package I created for this article. CodeShare Starter Kit
Here is the demo site for this package so you can see what you get when you install it. Demo site
