CODECABIN Recipes
Heads Up!
This article is several years old now, and much has happened since then, so please keep that in mind while reading it.
But this time was different, this time we were actually going to do it! I mean, they had talked about it for past four years! By the end of the day we had found a venue and paid a deposit. By the end of the week we had figured out the budget needed, designed a brand, set up the social media and started a series of mysterious Tweets.
Sounds simple, but it was hard work, with much more to do to pull off a successful weekend. The main thing we needed was attendees, but we needn’t have worried. Within a couple of weeks we had sold all the tickets and had a full bill of people getting excited for the inaugural weekend in the coming September.
The next concern surrounded how the event would run. Would people find it engaging, without being too full on? What would people want to do? How would we feed everyone?
Initially the event was going to be run by just Matt and Lee, while I helped out with admin, booking stuff and general organisation in the run up to the weekend, but I wouldn’t actually attend myself. However, it soon became clear that I needed to be more involved and be part of the team during the weekend to help it all run smoothly, freeing up Matt and Lee to concentrate on the sessions without them having to worry about sorting the food out. I soon found my title of Organiser now had the addition of Head Chef.
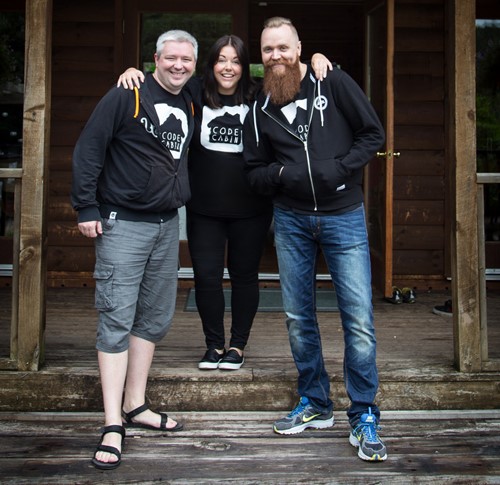
My main task during the CODECABIN weekend was to make sure everyone was fed and watered. As a fairly enthusiastic home cook, choosing what to make wasn’t too hard. I went straight for some of our home comfort favourites, with a few naughty puddings thrown in. Scaling up to feed 20 people was the harder job, working out the right quantities, then breaking that down by pack sizes for a supermarket order, multiple ingredients reused for other recipes and taking into account some specific dietary requirements. My costings spreadsheet was pretty massive, but essential to keep me on track with the budget and ensuring we had everything we needed.
One of the first meals I planned to cook for the 2016 weekend was Three Bean Sausage Chilli. It was a hit at the first CODECABIN and so it made sense to do it again for this year. It’s a classic store cupboard recipe with a hint of heat and depth of spice, perfect for wintery evenings and definitely one to batch cook and freeze for a quick win when you’ve had a long day developing awesome Umbraco websites and packages.
RECIPE - Three Bean Sausage Chilli
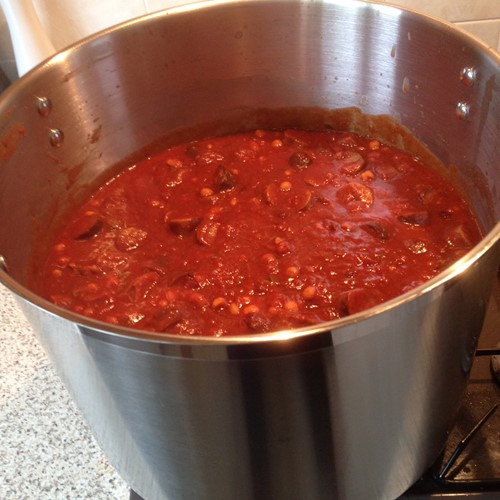
This should make four, two person portions depending on how generous you are in dividing them up. You’ll also notice that I don’t really work to measurements very often, as I tend to work by eye and taste, so expect to see things like a “glug”, a “squeeze” and so on.
Ingredients:
10 x pork sausages (or an alternative of your choice)
1 x can of chickpeas in water
1 x can of kidney beans in chilli sauce
1 x can of baked beans in tomato sauce
2 x cans of chopped tomatoes
Tomato puree
Garlic – I used the squeezy kind for ease
Chilli puree – as per garlic
Squeezy marmite
Bunch of coriander (or if can’t get/don’t have fresh then dried or squeezy puree will do)
Ground coriander
Ground cumin
Ground cinnamon
Mild chilli powder
Sweet chilli sauce
Worcestershire sauce
Black Pepper
Sugar
Garlic infused olive oil
Method:
- Prick and bake sausages as normal. Once cooked slice and set aside for later.
- While the sausages are cooking, make a start on the three bean chilli sauce.
- In a bowl squeeze half the tube of tomato puree, a good glug of sweet chilli sauce, about a teaspoon or two of the garlic, and the same for the chilli puree (depending on how garlicky and spicy you like things), roughly 2 teaspoons of each of the ground spices, and 3 of the cinnamon. Add a good glug of Worcestershire sauce, a good pinch of black pepper and sugar, and a massive squeeze of marmite. Stir together into a paste, adding boiled water to loosen if needed.
- Add some oil to a large pan/pot, heat up and then add the spicy paste. Cook this out for a few minutes, stirring regularly so it doesn’t catch.
- Then add the tomatoes and all the cans of beans. I usually like to shell the chickpeas as I hate the texture of them. It was a total pain to shell them for CODECABIN as there were 6 cans worth!!
- Let this mix cook through, bring to a high heat, thoroughly stir it, then onto a low simmer, stirring every 5/10 mins, until all the beans/chickpeas are soft. The longer it cooks the better it seems. I had it on simmer for a good 3 to 4 hours at CODECABIN. It will also be even better the next day or after being frozen and reheated.
- Taste. If it’s good then don’t add any more spices etc., but you can always make more paste up if needed. If the sauce seems a bit thin, just add a teaspoon of flour to a small glass or cup and add some cold water. Stir until dissolved and add to the chilli. This will help to thicken it (not sure of your cooking skill level, so apologies if I’m telling you things you already know).
- Finely chop the coriander and add to the chilli, along with the cooked, sliced sausages. Stir and serve.
I like to serve it as I did at CODECABIN, with grated cheddar, sour cream (or half fat crème fraiche) and tortilla chips/flat bread. Matt likes to add jalapeños for an extra kick.
Also, if you have vegetarian friends it’s great (not sure on vegan – you’d have to check ingredients on the pre-made sauces etc., but I’m sure it will easily adapt), as you can make the bean chilli and reserve some for them before adding the sausages.
At CODECABIN ‘16 the venue catered breakfast for us, which wasn’t that great. At CODECABIN ‘17 however, we catered it ourselves, sticking with a continental style buffet; with fruit, fresh berries, Greek yogurt, granola and cereals, bagels, toast and croissants, with all the usual accompaniments and plenty of tea, coffee and juice. Breakfast was informal, allowing people to grab what they wanted as they awoke and came down to start their day.
To help free me up to concentrate on the main evening meal I chose to order in lunch from Marks and Spencer, in the form of sandwich platters, crudité and humus, fresh fruit salad, crisps and a few sweet treats. This was a factor when booking a venue, to ensure we were within a reasonable distance from an M&S or other place I could collect a lunch order from, and for that matter, in a catchment for a supermarket delivery as there was no way we could bring the amount of food needed for the whole weekend in our car, with all the other things we needed to take with us. Having the sandwich platters also meant I wasn’t making loads of sandwiches with lots of ingredients as they were easy to put out and clear away, which was a huge time and cost saving for the event.
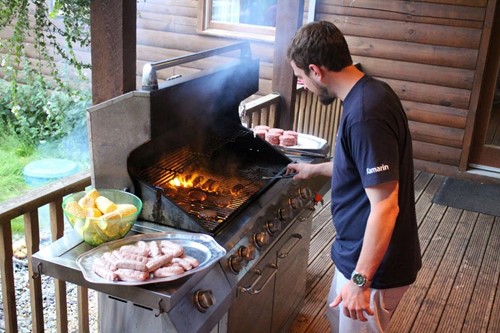
One of the evening meals at CC16 was a BBQ on the last night. This was fairly simple to prepare and execute, with a few helping hands from a couple of attendees to handle the grill while I continued with prep of the sides and had a cheeky beer while they flipped burgers, which I was totally ready for by the last night. We ate cheeseburgers, sausages, corn-on-the-cob, salad, halloumi and vegetable kebabs with garlic and rosemary wedges. We had hoped to have a BBQ at CC17, however the weather forecast was appalling and the venue had no undercover area to cook the food, so we decided against it, which was a wise decision as the forecast was correct and the rain was horizontal for most of the weekend.
However, what we did keep from the CC16 BBQ night was the dessert. Another go-to favourite, which I often make for family gatherings and friends’ parties as it is super easy and tastes delicious. Lemon and Ginger ‘Cheesecake’, cheesecake in inverted commas, since it doesn’t contain any cheese!
RECIPE – Lemon and Ginger Cheesecake
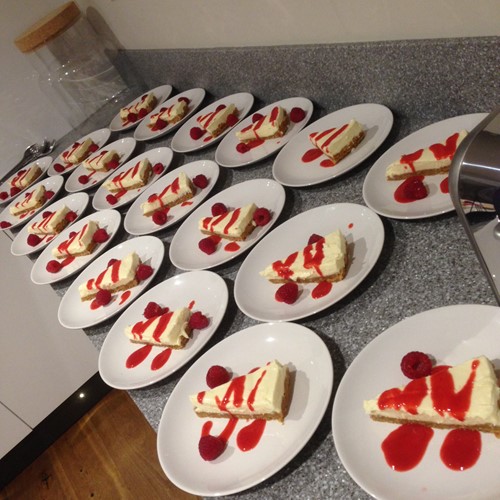
Ingredients:
2 x large or 3 average sized lemons
1 x 284ml carton of double cream
1 x can of reduced fat (every little helps with this recipe!) condensed milk
30 x ginger nut biscuits
1 x block of salted butter
1 x pack of fresh raspberries
Sweetener
Vanilla paste
Method:
- Melt 2/3 of the block of butter (you won’t need the rest, thankfully!) and set aside to cool a bit
- Crush all of the biscuits in a bag, leaving some chunkier pieces, but don’t crush it to the point of looking sandy. Transfer to a large bowl.
- Add the melted butter to the crushed biscuits, ensuring they are thoroughly coated.
- Spread evenly, compacting the mixture as you go, raising the edges up slightly, into a spring release tin (I used a 24 inch tin) and refrigerate. You can also divide the mixture into glasses, for individual cheesecakes, however be sure not to compact the mixture if using glasses as it will set hard be difficult to break into when eating.
- For the cheesecake mixture, zest the lemons on the finest grater/plane you have and add to a large mixing bowl. If using a zester, just finely chop the zest.
- Then juice all the lemons into the bowl, removing any pips.
- Add all the cream and condensed milk and whisk until it all comes together and thickens slightly.
- Pour the lemony mix onto the ginger nut biscuit base, evenly spreading for a smooth finish and put back into the fridge to set.
I usually make this the day before I need it, however I have made it the same day, having only had three to four hours in the fridge and it’s been perfectly fine. I like to serve this with fresh raspberries and a raspberry coulis. Some coulis require the fruit to be cooked, but I simply blitz fresh raspberries, sieve out the seeds and add vanilla paste and a little sweetener if required, decanting the finished sauce into a squeezy sauce bottle for ease of application.
As with cultures all over the world, food is an important part of people’s day, not only as fuel but to bring communities together. At CODECABIN this was also true. We ate lunch and dinner as a group, family style. Group meal times gave for a good atmosphere as everyone congregated to see what was on offer and would then converse during the meal, sometimes about the sessions they had just participated in, continuing that dialogue and sometimes about life in general, other interests, and to find out more about one another on a more personal level.
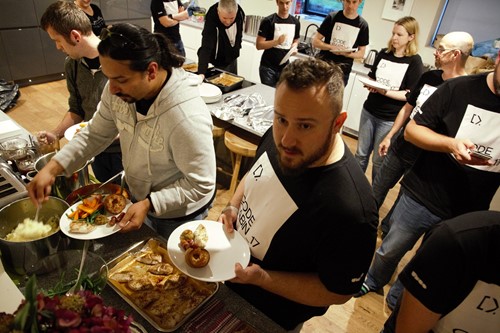
People often gravitated toward the kitchen during the day for quick time-out during sessions, grabbing a coffee or juice. Others pitched in and helped with serving and cleaning up afterwards. These break-out moments allowed for more one-on-one conversations, over non-Umbraco topics, which I found particularly interesting as it gave me an opportunity to get to know people more, since I was mainly in the kitchen and not a part of the sessions. Although I did find it difficult at times as I am the type of cook who likes to be left to it, so found it hard to fully engage while keeping an eye on more than one thing cooking, which I need to work on for future events.
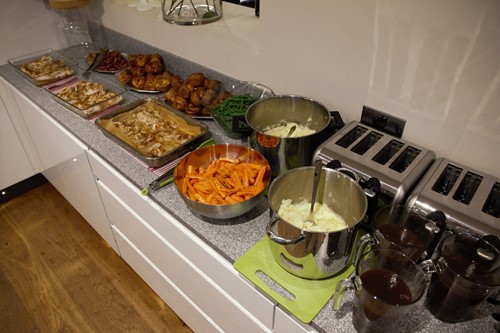
One of the most popular and family style meals we had at CC17, which was the replacement for a BBQ, was Sunday dinner on the last night. I had prepared sage seasoned roast chicken breasts, thyme and garlic roasted carrots, mashed potatoes, green beans, sage and onion stuffing balls, pigs in blankets, gravy, cranberry sauce and the all-important Yorkshire puddings. All of this had to be prepped and cooked on the day. However I was able to pre-prepare the Yorkshire puddings in advance and freeze them, which is what I would do at home in order to have them available anytime. Yorkshire puddings are easy to make and most definitely worth it as the shop bought ones don’t have the same texture. I follow my Nanna’s recipe, which I’ll share with you now.
RECIPE – Yorkshire Puddings

Ingredients:
7 heaped forkfuls of plain flour *This will make roughly 7 Yorkshire puddings
2 medium, fresh eggs
Milk – no measurement, all done by eye
Salt
Sunflower or vegetable oil
Method:
- Pre-heat the oven to 200c / 180c (fan) / gas mark 6.
- In a high sided bowl, measure out your seven forkfuls of flour, add a good pinch of salt, crack in both eggs and add a good splash of milk.
- Whisk (I do this by hand with a balloon whisk) until all the ingredients come together, and the mixture is lump free. It should have a consistency of pouring cream, so if it is too thick add a little more milk bit by bit until you reach the desired state.
- Give the mixture a good final whisk to add air and pop it in the fridge to chill down. A cold mixture into hot oil is the best way to get a good rise.
- While the mixture is chilling, add a tablespoon of oil to each section of a muffin tin and pop in the oven to heat up, about 8-10 minutes should be enough. I use a muffin tin as I find the higher edges help the rise and cook the puddings through a little better, than a more shallow tin.
- Once the oil is hot, ladle the chilled batter mix into the tin, about 2/3 of a ladle per Yorkshire pudding should do it. You should hear/see the batter sizzle when it hits the oil. Do this as quickly as possible and get them in the oven so as not to lose heat.
- They will take between 15 and 20 minutes to cook. But do not open the oven door or they may sink. So make sure whatever else you might need to cook in the oven is well timed so you aren’t disturbing the Yorkshire puddings.
- Once cooked, to a golden brown colour, tip them out onto kitchen paper to absorb any excess oil and serve immediately.
If you're freezing leftover Yorkshire puddings or making a batch for later date, ensure they are fully cold before bagging and freezing. Reheating a frozen Yorkshire pudding will only take about 10 minutes in the oven.
Yorkshire puddings are an essential part of the British roast dinner, but can be enjoyed with lots of different meals; Toad in the Hole, where a large tin is used and sausages are added to the batter, Stew and Yorkshire pudding, where giant Yorkshire puddings are made in a large round tin and then filled with stew, or even a sweet version rolled in cinnamon sugar while piping hot, filled with apple compote and served with vanilla ice cream. The options are endless!
Not everything goes to plan at CODECABIN though. Both years brought their own kitchen calamities, with a couple of delayed meal times thanks to temperamental ovens, hobs that wouldn’t heat up and forgotten equipment. This all meant I had to think on my feet as my best laid plans hadn’t quite covered everything. How much of that was noticed though I don’t know and was, perhaps, my own panic and worry that things weren’t going to plan. At this year’s CODECABIN I had planned to serve spaghetti meatball marinara on the second night, however while I was batch browning the meatballs, they started to fall apart (which has never happened before!). This briefly threw me, but with some reassurance from my team mate Matt, I quickly resolved to make spaghetti Bolognese instead, which used all the same ingredients, worked out well and everyone enjoyed it. Phew!
We’re very proud that both CODECABIN events were successful and people enjoyed themselves. It takes a lot of work to make it happen, but it is all worth it to see people having fun, learning more and making new friends. I like to think the food played a big part in that and I am most pleased that nobody had food poisoning!
