Authenticating with AD FS and IdentityExtensions
Heads Up!
This article is several years old now, and much has happened since then, so please keep that in mind while reading it.
In the past couple of years we have seen quite a few demos of using various external back office authentication providers to Umbraco. I remember quite a cheer at Codegarden 15 during a demo of logins to the back office using Google and Facebook accounts. However, sweet as they are, the bells and whistles of social media doesn’t necessarily fare well with a corporate security policy and on-premise server requirements.
I was recently faced with the task of securely managing Umbraco backoffice users from a Microsoft Active Directory. Furthermore, we wanted as few server dependencies as possible and if possible use Microsoft standard technology and rely on existing infrastructure. Enter Active Directory Federation Services (AD FS) and UmbracoCms.IdentityExtensions.
AD FS is a Security Token Service (STS) that it is commonly used for claims-based authentication and authorization in newer Microsoft server products. If you have no experience with certificate management and working with claims it can be a bit daunting to set up an STS infrastructure correctly. If this is new to you and you don’t have it in place, set aside a few days, enjoy the ride and head back here. You will not be able to use this post to log in to the Umbraco back office if you do not have the infrastructure and valid certificates in place!
Now that you know what a claim, a token-signing certificate and a relying party is I hope you can use the rest of this article as a cut and paste solution to your problem.
Most of the examples found in the wild are based on the OAUTH or OpenID protocols. Unfortunately our exisiting infrastructure was based on AD FS 3.0 which does not support OpenID and has limited support for OAUTH. Many Microsoft server products use WS-Federation as the default protocol for claims-based authentication and as I came out empty-handed when searching for examples using this protocol I decided to give it a go. This article sums up my experience and work arounds for a few pitfalls I found in the process.
Note: AD FS 3.0 is the version that ships with Windows Server 2012 R2. Windows Server 2016 with AD FS 4.0 was released just last month and it should now support OpenID if you are setting up a new infrastructure.
Prerequisites
- I will assume you have a working on-premise Active Directory infrastructure with an AD FS 3.x server role. This will be enough for local area network access to the Umbraco back office. (If you need publicly available login to the back office you will need an internet facing AD FS proxy server available as well.)
- Your preferred NuGet-enabled development environment. I will use Visual Studio 2015 below.
Come on… show me the code!
We are getting there… Although you might be dissappointed in how little code is actually required to do this.
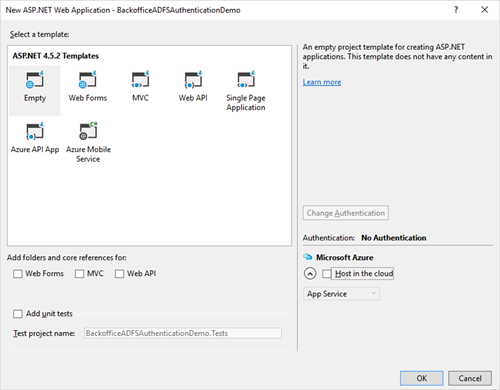
Let’s create a create a new empty ASP.NET web application hosted as you like. In this case I will go for an on-premise solution named BackofficeADFSAuthenticationDemo.
Now let’s add the latest and greatest version of UmbracoCms via NuGet:
Package Manager Console Host Version 3.4.4.1321
Type 'get-help NuGet' to see all available NuGet commands.
PM> Install-Package UmbracoCms…
Successfully installed 'UmbracoCms 7.5.4' to BackofficeADFSAuthenticationDemo
Compile and complete the Umbraco installer. Remember to keep track of your admin account in case you experience problems with the federated login provider.
Once you have verified that Umbraco is working as expected, continue to add IdentityExtensions via Nuget:
PM> Install-Package UmbracoCms.IdentityExtensions
…
Successfully installed 'UmbracoCms.IdentityExtensions 1.0.0' to BackofficeADFSAuthenticationDemo
Make sure you read the readme.txt that is displayed on install. It might actually be helpful and save you a cry for help on Our!
Since you probably skipped it anyway: You will find a number of new files available in your App_Start folder if you have a Web Application project or in App_Code if you have a Website project. Examine the code and read the comments and notes. They will be enough to get you running with some external authentication providers.
As you have learned from the documentation we will need to create a custom Owin Startup class and register it correctly in web.config.
Let's create create a new class ConfigureOwinStartup and place it in your App_Start folder for now (and let the religious warfare commence).
using Microsoft.Owin;
using Owin;
using Umbraco.Core;
using Umbraco.Core.Security;
using Umbraco.Web.Security.Identity;
using Umbraco.IdentityExtensions;
using BackofficeADFSAuthenticationDemo;

//To use this startup class, change the appSetting value in the web.config called
// "owin:appStartup" to be "UmbracoCustomOwinStartup"

[assembly: OwinStartup("ConfigureOwinStartup", typeof(ConfigureOwinStartup))]
namespace BackofficeADFSAuthenticationDemo
{
    /// <summary>
    /// A custom way to configure OWIN for Umbraco
    /// </summary>
    /// <remarks>
    /// The startup type is specified in appSettings under owin:appStartup - change it to "ConfigureOwinStartup" to use this class
    /// This startup class would allow you to customize the Identity IUserStore and/or IUserManager for the Umbraco Backoffice
    /// </remarks>
    public class ConfigureOwinStartup
    {
        public void Configuration(IAppBuilder app)
        {

        }
    }
}
Update your web.config and change the appSetting "owin:appStartup" to be "ConfigureOwinStartup". Compile and verify that your site still runs as expected.
In order to use WS Federation you will need to get an additional package Microsoft.Owin.Security.WsFederation from NuGet. It has a number of dependencies related to token handling that will be installed as well:
Package Manager Console Host Version 3.4.4.1321
Type 'get-help NuGet' to see all available NuGet commands.
PM>Install-Package Microsoft.Owin.Security.WsFederation
…
Successfully installed 'Microsoft.Owin.Security.WsFederation 3.0.1' to BackofficeADFSAuthenticationDemo
PM>
You should now have the needed dependencies in place. I hate to say it but we have to head to the AD FS server and do some initial configuration of our relying party there before you get to code any further.
Configuring a new relying party
In my example I will be using the AD FS Server role on a fully patched Windows Server 2012 R2. If you use a previous version the configuration might vary slightly.
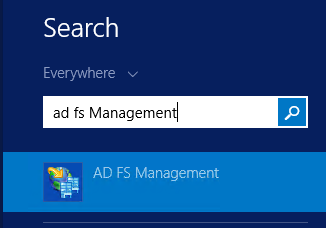
On your AD FS server find and open “AD FS Management”:
If you expand the tree in the left side of the management console you should see something like this:
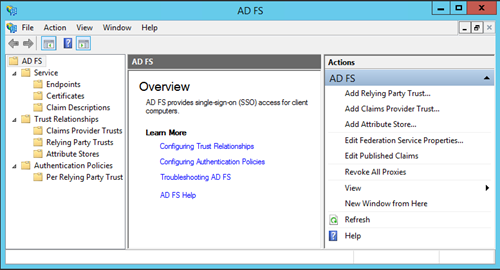
If you select AD FS ? Service ? Endpoints and scroll to the bottom you will find the metadata section:

Note the URI for Federation Metadata. It should look like this:
https://FullyQualifiedHostname/FederationMetadata/2007-06/FederationMetadata.xml
Typically the fully qualified hostname could be sts.domain.tld or sso.domain.tld.
Next we need to create a relying party trust. This can be achieved in a number of different ways. I will use the GUI for the sake of illustrations and leave the PowerShell approach as an exercise.
Back in the management console select AD FS ? Trust Relationships ? Relying Party Trusts. Right click the node and click “Add Relying Party Trust”.
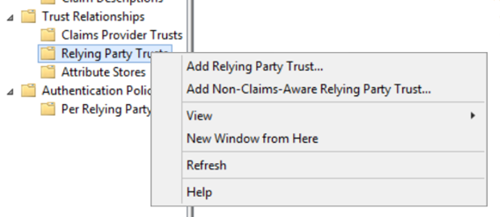
The Add Relying Party Trust Wizard displayed.
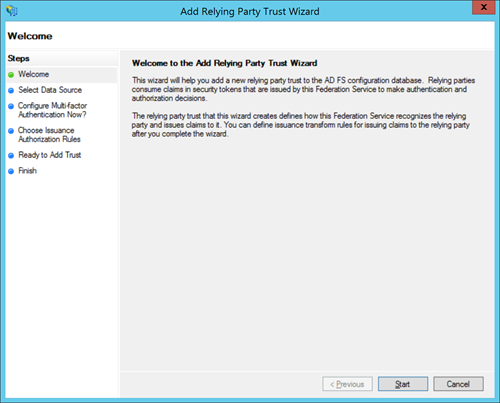
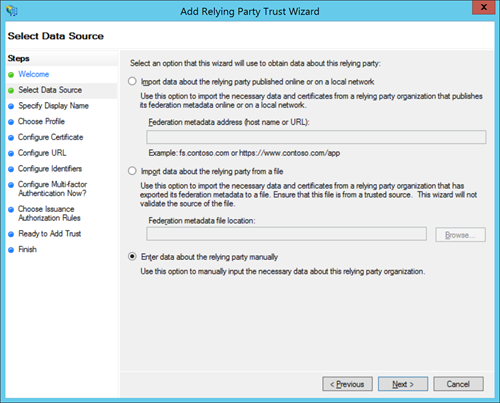
Keep your metadata URI at hand and press start. You will be asked to select a data source. Choose Enter data about the relying party manually and press Next.
In case you see this error dialog when using the wizard:

Do not pass go. Return to start and refer to the documentation or your preferred search engine to properly configure the AD FS infrastructure.
But of course this did not happen to you and you can continue to Specify a display name:
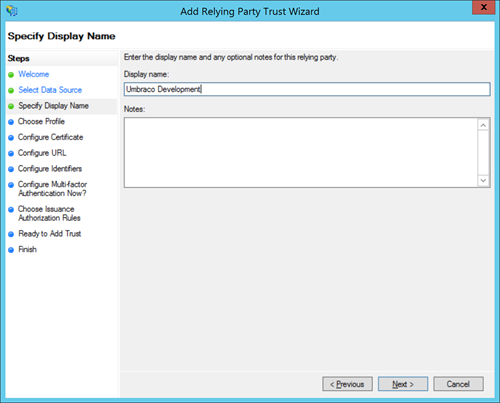
Click next to Choose Profile:
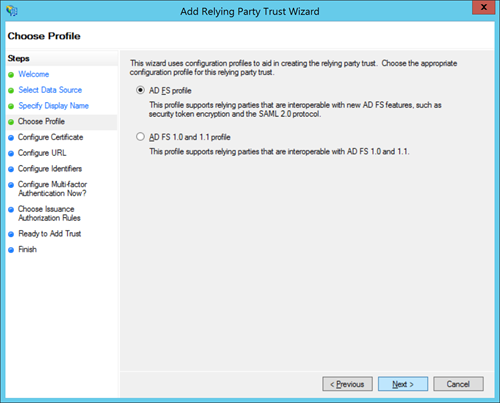
Leave the default option selected and click Next to Configure Certificate:
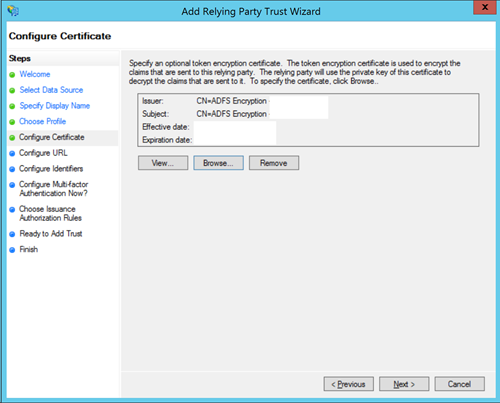
Select your Token Signing Certificate and click Next to Configure URL:
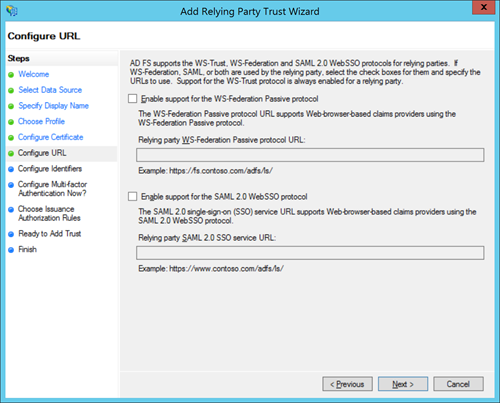
Leave the defaults and click Next to Configure Identifiers. This is where you enter the address the server running your Umbraco backend.
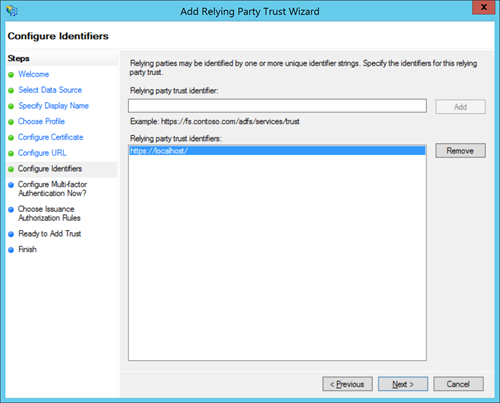
You may add multiple hostnames if you wish but in this case we will only be running a local development environment on https://localhost. Keep in mind that https is a requirement and include the trailing slash to stay sane. (Also make sure to include the port number if you are running on a port other than 443.)
Click next to Configure Multi-factor Authentication Now:
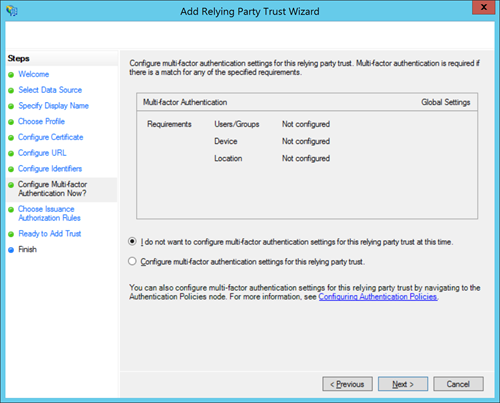
You really should configure this to improve your overall security in a production environment!
For a single display of brevity I will choose “I do not want to configure multi-factor authentication settings for this relying party trust at this time.” and click Next.
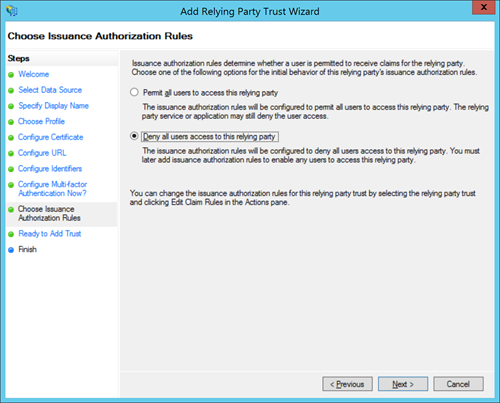
Under Choose Issuance Authorization Rules you decide which default issuance authorization rules should be applied to the Relying Party.
The default option will allow all authenticated users to access your Umbraco back office. Basically all active members of your Active Directory will be able to login to Umbraco and edit content. Unless this is what you are trying to achieve, select Deny all users access to this relying party. and press Next. The default behaviour will now be to reject access even for a valid domain user.
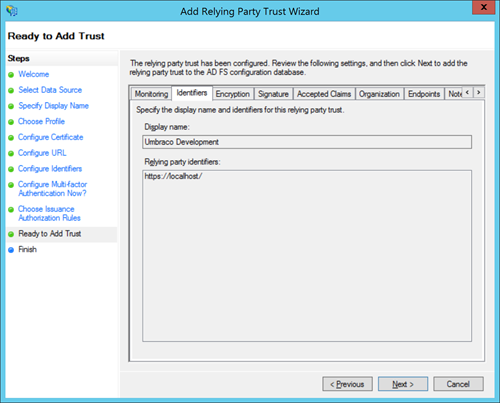
You will see see a summary page Ready to add trust. Verify your settings and press Next.
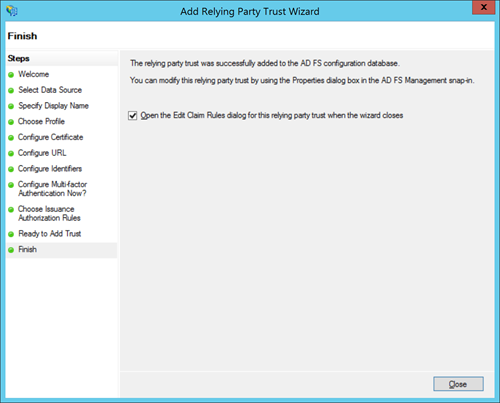
As a last step we need to configure Claim Rules the relying party. These include the data shared between your AD and Umbraco and the valid user audience for your back office. Leave Open the Edit Claim Rules dialog for this relying party trust when the wizard closes and click Close. You will see the Edit Claims Rules for sts.yourdomain.tld dialog:
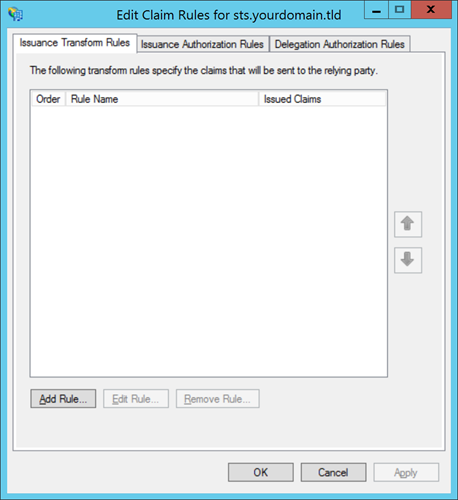
We need to create two types of rules Issuance Transform Rules and Issuance Authorization Rules. The first define the transformations of AD user attributes to claims and the second lets us describe which AD user groups we wish to grant access to the Umbraco back office.
Click Add rule to create our Issuance Transform Rule to display the Add Transform Claim Rule Wizard:
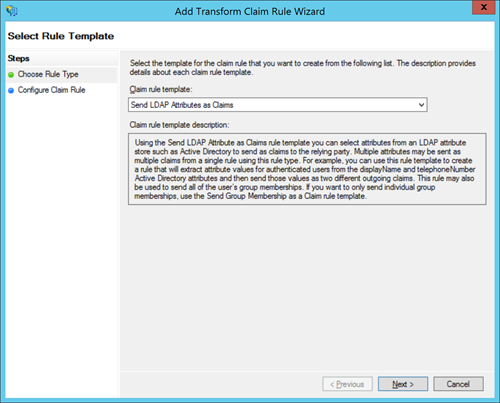
Choose the default option Send LADP attributes as Claims and click Next.
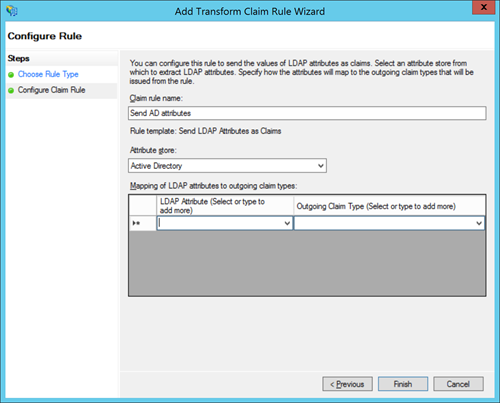
Provide a name and attribute store for your claim rule. For instance Send AD attributes and the attribute store Active Directory.
Now we will need to map the AD user attributes we need in the back office to outgoing claims.
You will need to create these claims which can be chosen from the drop down elements:
|
LDAP Attribute |
Outgoing Claim Type |
|
E-Mail-Addresses |
E-Mail-Address |
|
User-Principal-Name |
Name ID |
|
Display-Name |
Name |
This should yield a configuration similar to this:
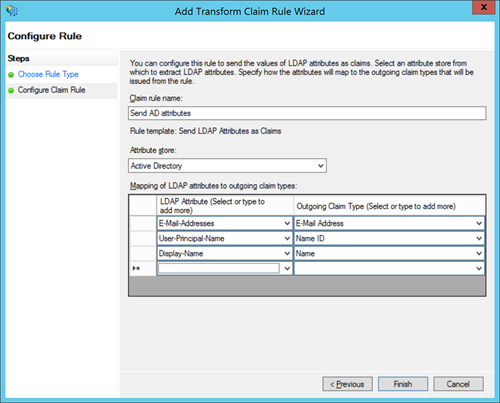
Press Finish to complete the rule creation.
Now we need to select which AD groups should be allowed to access the back office by creating an Issuance Authorization Rule.
Select Issuance Authorization Rule and select Add Rule to complete the Add Issuance Authorization Claim Rule Wizard:
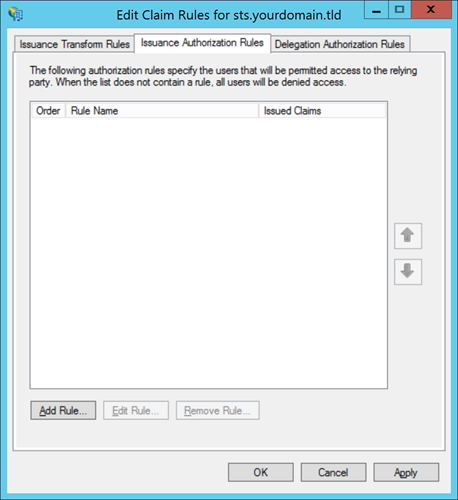
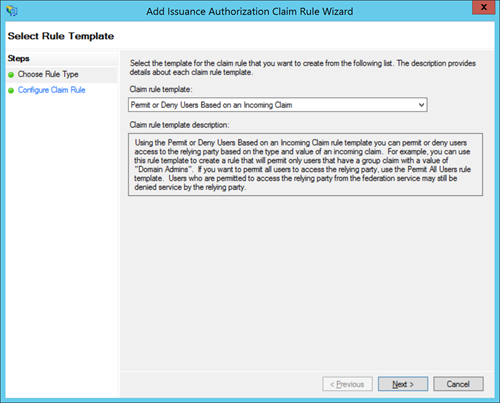
In the first step Choose Rule Type choose Permit or Deny Users Based on an Incoming Claim and click Next.
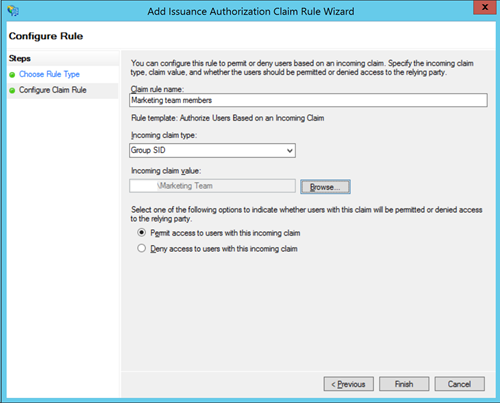
In the Configure Claim Rule step provide a Claim Rule Name, Choose Group SID as the Incoming claim type.
In the Incoming claim value choose the Active Directory Organizational Unit (group) you wish to grant access to the website.
Finally leave the default setting Permit access to users with this incoming claim and press Finish.
Congratulations you got past the the initial hurdle of configuration and you are close to letting your IT Department manage who should be able to manage your website.
Connecting the dots ...
We are almost there and you can get back to coding. Before we wire up the Owin startup handler, we will need to be able to manage a few settings namely an AD FS metadata endpoint, our relying party identifier and a federation server identifier.
Initially, let us add them to AppSettings in web.config for easy maintenance and deployment:
<appSettings>
...
   <add key="AdfsMetadataEndpoint" value="https://sts.yourdomain.tld/federationmetadata/2007-06/federationmetadata.xml" />
   <add key="AdfsRelyingParty" value="https://localhost:44344/" />
   <add key="AdfsFederationServerIdentifier" value="https://sts.yourdomain.tld/adfs/services/trust" />
</appSettings>
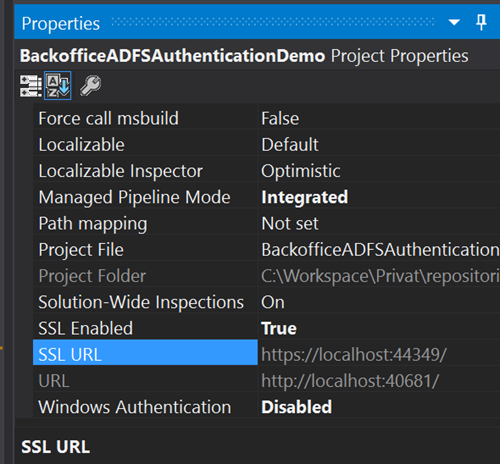
Remember to enable SSL in your project properties and use the port configured there:
Update your ConfigureOwinStartup.cs to include the following lines:
// Configure back office users membership provider
app.ConfigureUserManagerForUmbracoBackOffice(ApplicationContext.Current, MembershipProviderExtensions.GetUsersMembershipProvider().AsUmbracoMembershipProvider());

// Ensure OWIN is configured for Umbraco back office authentication
app.UseUmbracoBackOfficeCookieAuthentication(ApplicationContext.Current).UseUmbracoBackOfficeExternalCookieAuthentication(ApplicationContext.Current);

// Configure additional back office authentication options
app.ConfigureBackOfficeAdfsAuthentication();
To get rid of the nasty red line below ConfigureBackOfficeAdfsAuthentication() add the helper class AdfsAuthenticationExtensions to your solution with this content.
using System.Configuration;
using Microsoft.Owin.Security;
using Microsoft.Owin.Security.WsFederation;
using Owin;
using Umbraco.Web.Security.Identity;
using Constants = Umbraco.Core.Constants;

namespace BackofficeADFSAuthenticationDemo
{
    public static class AdfsAuthenticationExtensions
    {
        public static void ConfigureBackOfficeAdfsAuthentication(
            this IAppBuilder app,
            string caption = "AD FS",
            string style = "btn-microsoft",
            string icon = "fa-windows")
        {
            var adfsMetadataEndpoint = ConfigurationManager.AppSettings["AdfsMetadataEndpoint"];
            var adfsRelyingParty = ConfigurationManager.AppSettings["AdfsRelyingParty"];
            var adfsFederationServerIdentifier = ConfigurationManager.AppSettings["AdfsFederationServerIdentifier"];

            app.SetDefaultSignInAsAuthenticationType(Constants.Security.BackOfficeExternalAuthenticationType);

            var wsFedOptions = new WsFederationAuthenticationOptions
            {
                Wtrealm = adfsRelyingParty,
                MetadataAddress = adfsMetadataEndpoint,
                SignInAsAuthenticationType = Constants.Security.BackOfficeExternalAuthenticationType,
                Caption = caption,
                Wreply = $"{adfsRelyingParty}umbraco" // Redirect to the Umbraco back office after succesful authentication
            };

            wsFedOptions.ForUmbracoBackOffice(style, icon);

            wsFedOptions.AuthenticationType = adfsFederationServerIdentifier;

            wsFedOptions.SetExternalSignInAutoLinkOptions(new ExternalSignInAutoLinkOptions(true));

            app.UseWsFederationAuthentication(wsFedOptions);
        }
    }
}
It contains code to read your configuration settings and get around a few quirks with the way Umbraco deals with the WsFederationAuthenticationOptions and account linking.
Even though the code above yells for optimization refrain for now. The source order matters! Thanks to Elias who got me on the right track on Our when ExternalSignInAutoLinkOptions was playing tricks on me.
Now if you load the backoffice at https://localhost/umbraco you should see an option to login with AD FS. (Remember to include alternative port number if your website is not running on port 443.)
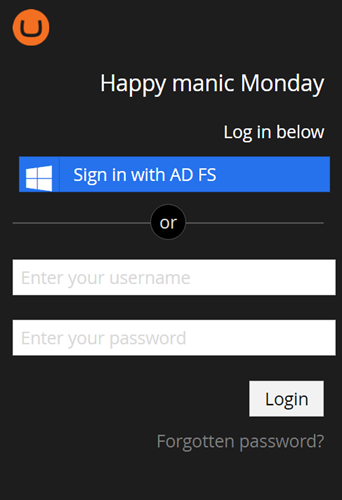
If you click the button you will be redirected to your AD FS server for authentication and authorization. If you are a member of the group you chose during the configuration of the relying party you will be granted access to the Umbraco back office. If not you will receive an error message informing you of missing privileges.
Pro tip: If you are using Windows and a supported browser (IE or Chrome works, Firefox might require a little extra effort) you can add the umbraco website and the AD FS server to your trusted sites to enable automatic sign-in using Windows credentials. If you do this you can just “click to login”.
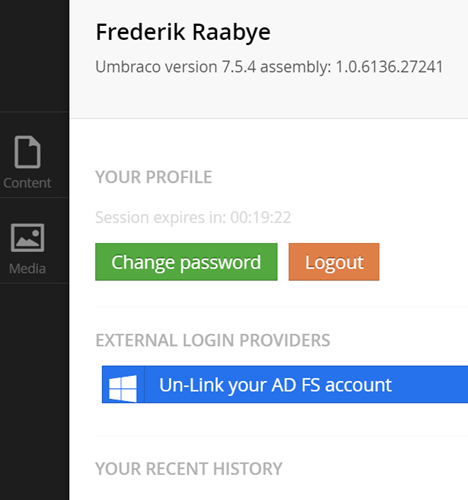
By default new users will be created with the role of Editor and have limited access to the back office.
It is possible to change the default role and other properties assigned on account linking by adding an optional second parameter to ExternalSignInAutoLinkOptions.
For further configuration options like default locale and allowed sections refer to the constructor from Umbraco.Web.Security.Identity.ExternalSignInAutoLinkOptions.
public ExternalSignInAutoLinkOptions(bool autoLinkExternalAccount = false, string defaultUserType = "editor", string[] defaultAllowedSections = null, string defaultCulture = null);Final notes
Summing up I hope this lengthy post can save somebody a little time. In less than 20 effective lines of code you should have a near plug and play solution for authentication and authorization using WS-Federation with an AD FS server and Umbraco.
The demo site is available on GitHub if you wish to have a look.
If you find any mistakes (in code or language) or need any clarification please let me now in the comments or via @fraabye on Twitter. I will try my best to update the post accordingly.
Further reading
Umbraco Identity Extensibility
Umbraco Backoffice Security Documentation
?Windows Server 2012 R2 AD FS Deployment Guide