Your first pull request
Heads Up!
This article is several years old now, and much has happened since then, so please keep that in mind while reading it.
Pick
For this example I wanted to get a quick win and went to the issue tracker and found all of the issues that were marked as "(very) easy" and found an excellent issue about some confusion around changing your password. I know how to fix that! It's "just" words!
If you're also thinking about helping out, it would be good to scroll through the (very) easy issues and see if there's something you think you can do. Most people who contribute want to see their favourite issue fixed though, which is awesome, feel free to pick any issue you want! The world is your oister etc., etc.
If you do pick an issue that's a new feature or requires quite a large change to the code, it would be good if you discussed your intentions on the dev mailinglist first, just to make sure you're not wasting your precious time on things that the Umbraco core team wants to fix in a completely different way than you're thinking of right now. Most of the time a little message goes a long way and people will chip in with fantastic ideas that you might not even have thought about in the first place. Free inspiration, what more could you wish for?!
Fork
Once you've decided on an issue you want to tackle, the first thing you'll want to do is fork the Umbraco core on GitHub.

Hitting the Fork button will create a copy of all of the Umbraco source code into your GitHub account. As an added bonus: If Umbraco ever disappears, you now have a copy of all of the code so you don't have to fear you'll ever lose any of that CMS goodness.
Branch
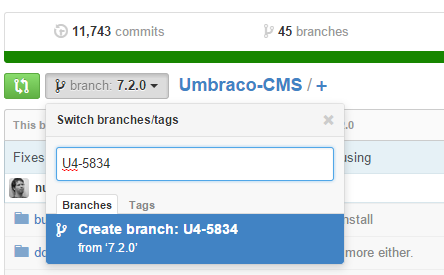
Tip: After forking, create a new branch with the issue number you're fixing.
Clone
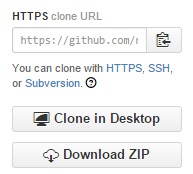 Now you can clone the source to your local machine, GitHub makes this easy for you and you can click the appropriate buttons here, there's options for whatever you like doing.
Bonus tip: if you're fixing something simple like a spelling mistake then you can just dig into the file structure online, find the file you want to edit and click the pencil icon to edit directly from your browser, no cloning required.
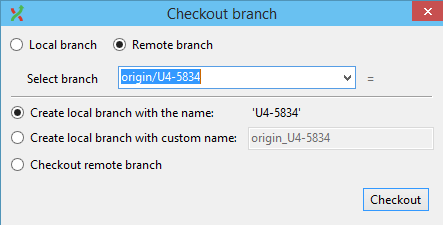
Let's assume you've chosen to clone the repository to your local machine. You can now switch to the branch you created so that all of the work on this issue is done in its own branch. When you at a later point want to work on a different issue you can make another branch for that and isolate the work on that issue in the separate branch.
Build
The first time you do this, you should try to build the code. The very easiest way to make sure you have all the required dependencies set up is to go into the build folder and run build.bat.
This batch file is quite amazing: It will set up all of the stuff you'll need to build Umbraco, from node.js to grunt to bower. It will even ask you to do an install of git, if you happen to not have it on your machine already.
The build should finish without errors after that and if it does, you can be certain that then you can also perform a build successfully in Visual Studio, should you need to alter code. So: run build.bat and the VS build will certainly succeed after that.
Fix
We're almost there now. Your build is succeeding and you can confidently start making changes, verify the build still succeeds and start committing code to your fork!
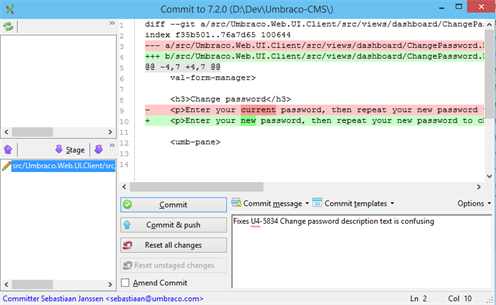
So in this case, you might want to change the text displayed on the "change password" dashboard. You happen to know the text is in:
src\Umbraco.Web.UI.Client\src\views\dashboard\ChangePassword.html
You can make your changes there and commit them to your fork using your favorite Git client.
Pull request
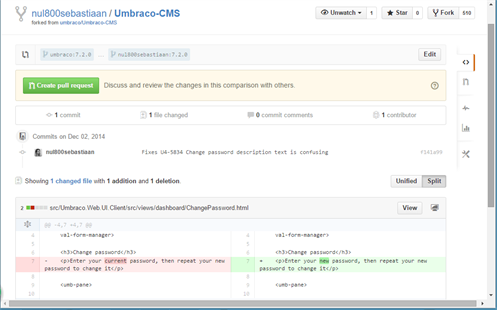
After committing and pushing the change you can then go back to your fork on GitHub and you should see the ability to create a pull request for the fix you just made.

After clicking the shiny green button you see the changes you made and you can hit the green button again to tell the core team what you did and why. Make sure to refer to an issue on the issue tracker so that the issue can eventually be marked as fixed.
Converse
It is then up to the Umbraco core team to evaluate your fix. They might encourage you to change some things before the pull request can be accepted into the core of Umbraco, so make sure to follow the guidelines as detailed on the contribution pages.
Not to worry though, this is the best phase! Opening a pull request is starting a conversation about the thing that you would love to be fixed and the core team loves to engage in these conversations.
If all is well then your pull request will be accepted and your commit will forever be part of the Umbraco core code. So when I accepted Jan's pull request, this is what happened:

And having a pull request accepted feels a little bit like this, each time! Some contributors get very addicted after this happens for the first time, so be warned.. ;)
Summary
- Find an itch to scratch (an issue you want fixed)
- Fork the Umbraco repository on GitHub
- Run build.bat to make sure all the dependencies you need are there
- Implement your changes
- Commit your changes and push them back to your fork on GitHub
- Create a pull request on GitHub by clicking the shiny green button
- Pray (or if you're not religious just have a bit of patience until the core team can evaluate your changes)
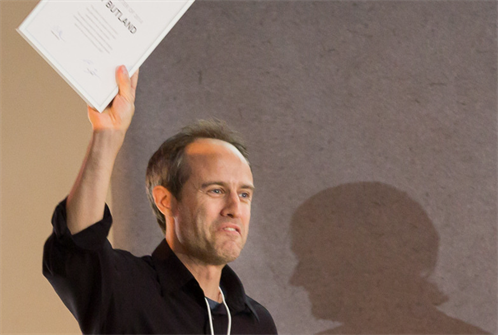
- Optionally: win the Pull Request of the year award at next year's CodeGarden like Andy Butland below!
