Newbie's Guide to Setting Up an Umbraco Website
Heads Up!
This article is several years old now, and much has happened since then, so please keep that in mind while reading it.
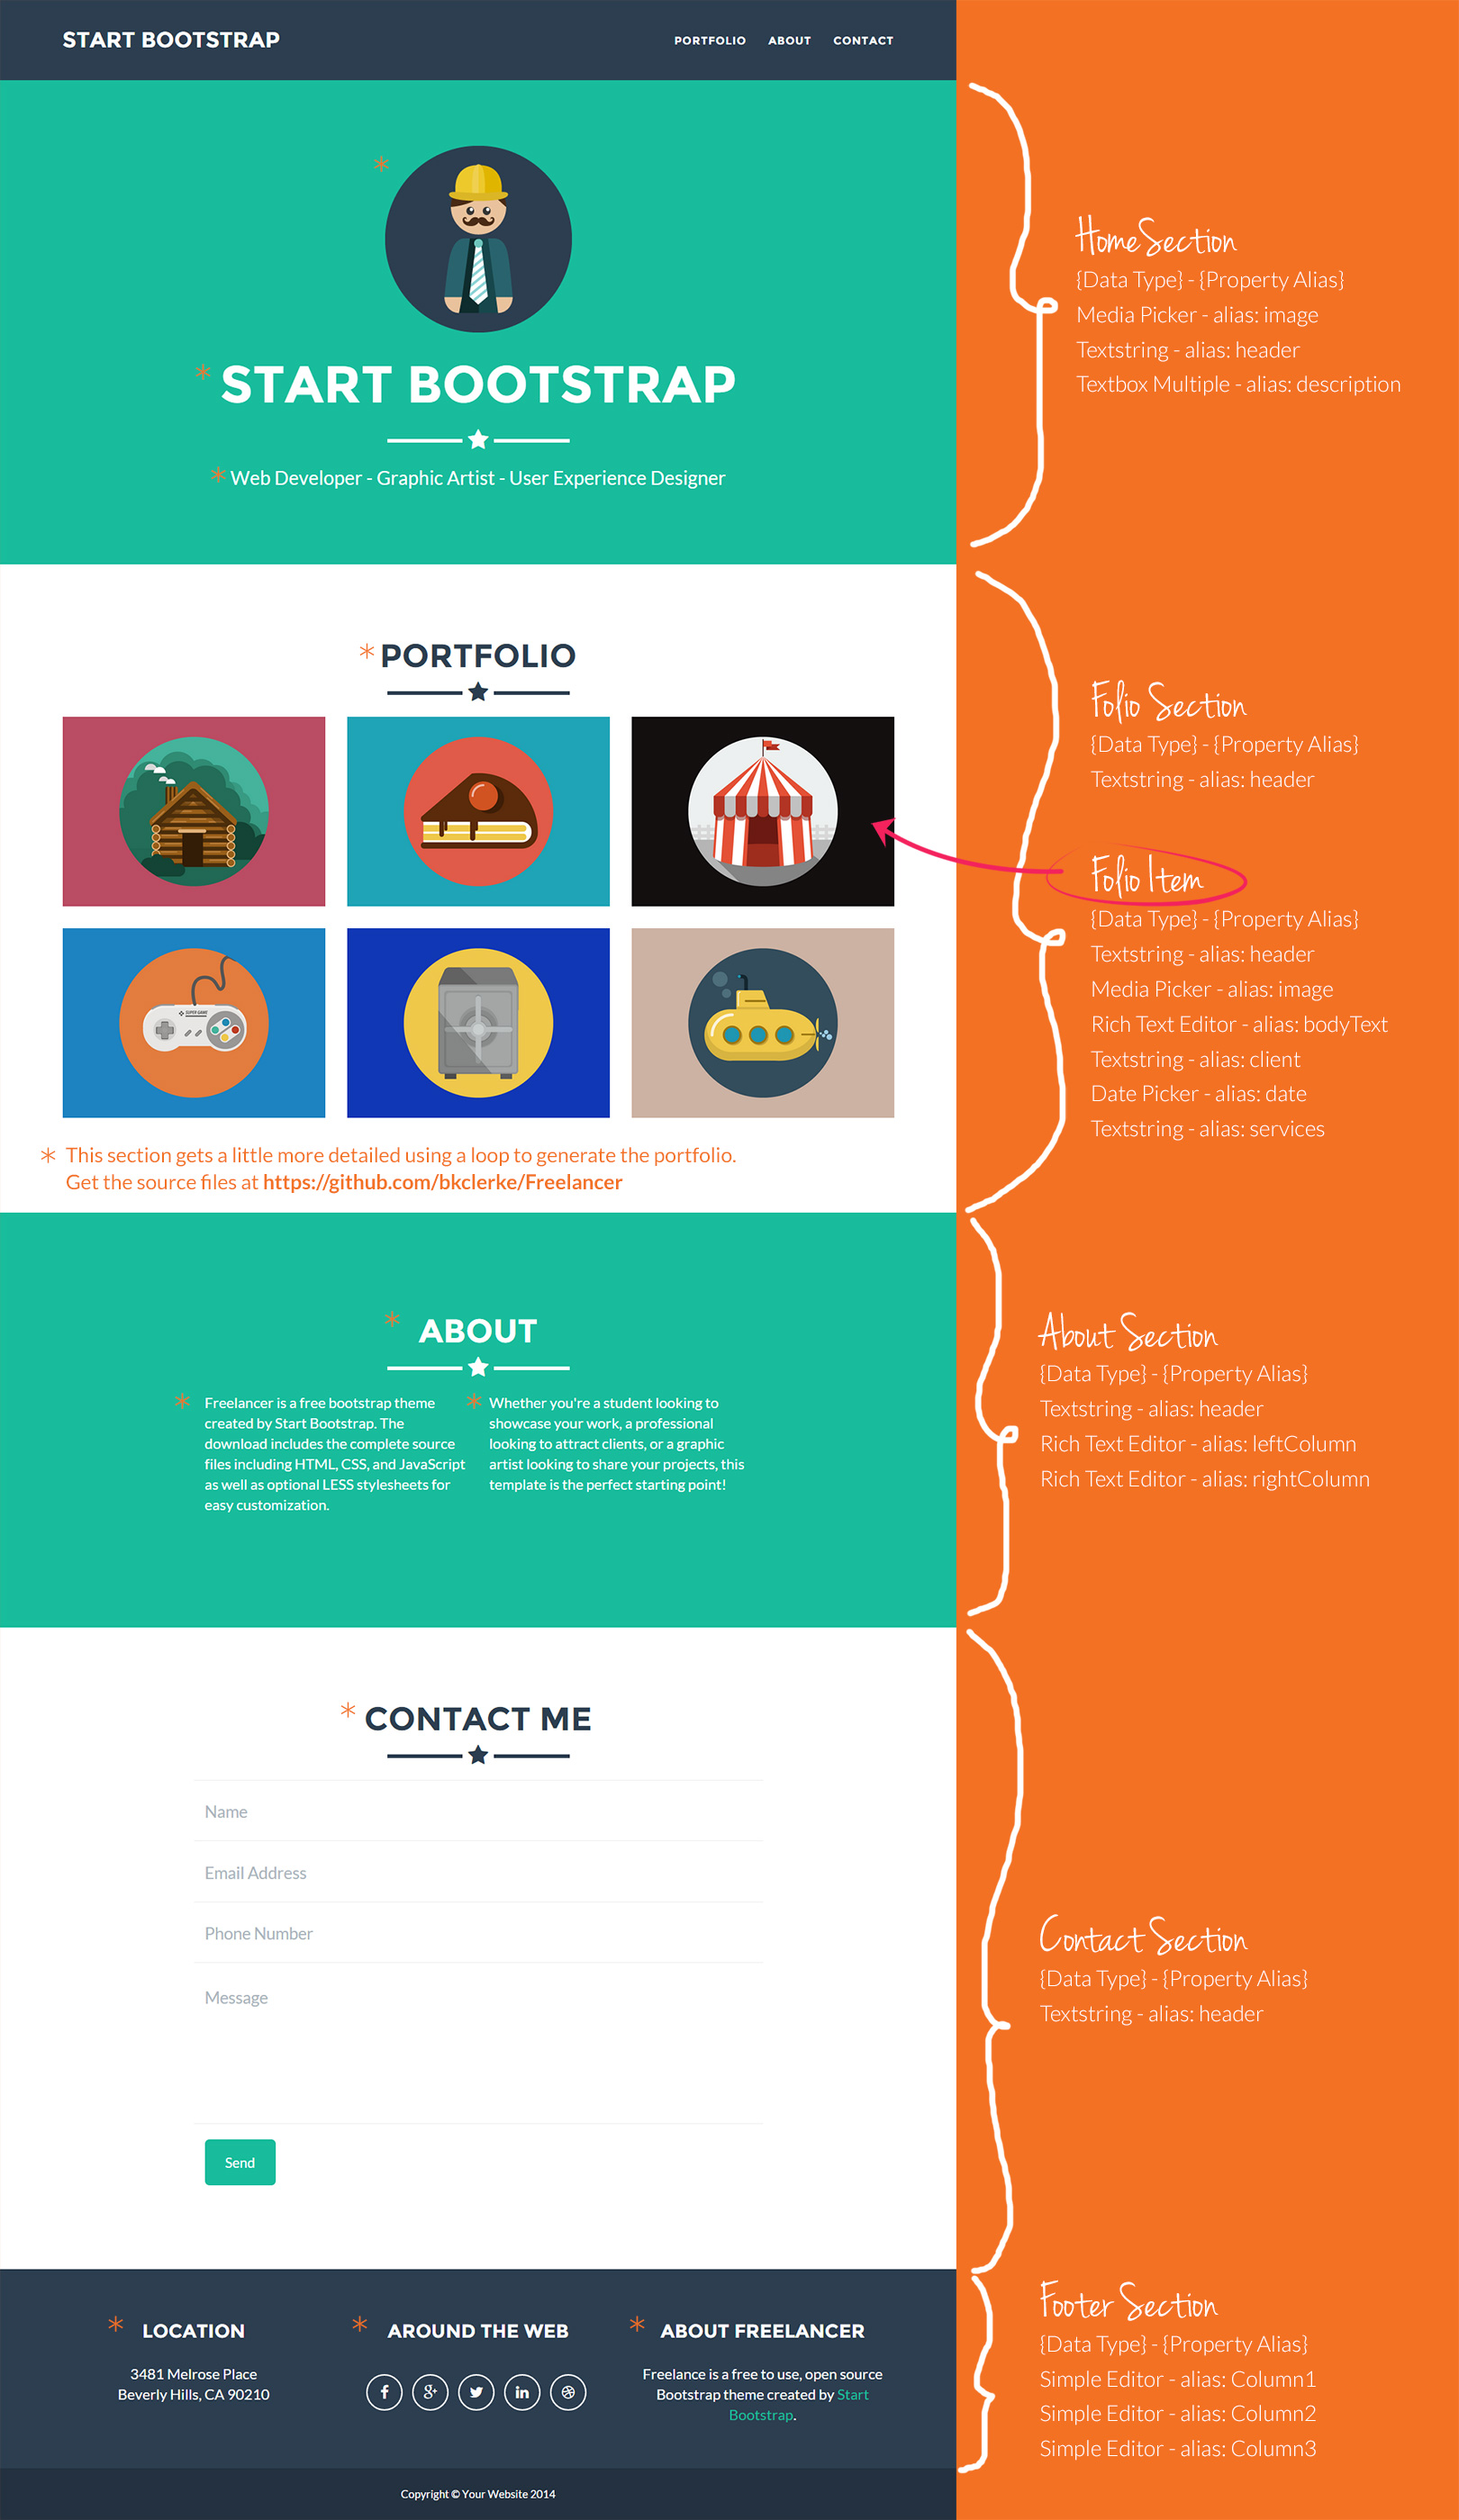
Let's assume you have a shiny new instance of Umbraco setup and you are given a design and just need to "hook it up". For demonstration purposes I've gone to startbootstrap.com and downloaded the freelancer template. We are going to hook up this template and the accompanying files in Umbraco and make it easy for content editors to manage.
Step 1: Evaluate your design
We want to determine how to set up this design in Umbraco so that it can be easily managed by our content editors. In order to do this, we need to evaluate our design and break it up into different sections. The editable items in our sections are properties, and the sections will be our Document Types.
Tip: When building your Document Types in Umbraco, assume your content editor is not familiar with code and setup your properties in such a way that the editor will not have to write any markup.
Once you have a better understanding of the Data Types available in Umbraco this initial design evaluation will become easier.
Take a look at the example design evaluation. You will see that we have set up five sections. For the Home Section we can set this up as a Home Document Type and combine our Footer Section into the same document type. Our Folio Section is going to be a simple document type, with just a textstring for the header property. The Portfolio Items themselves will be different document types that are child nodes of the Folio Section in the content tree. These portfolio items will have their own properties filled out in order to populate the details that popup on click. The About Section will be its own document type as well as the Content Section.
Step 2: Create a Custom Data Type
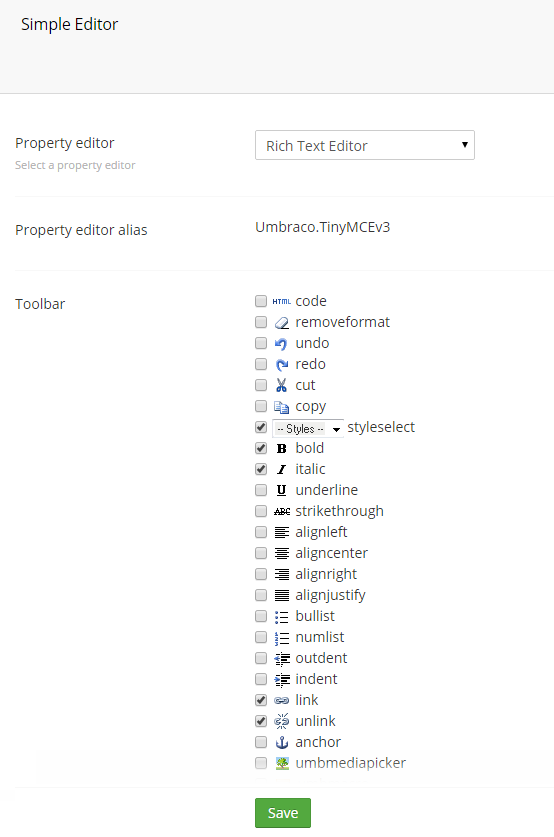
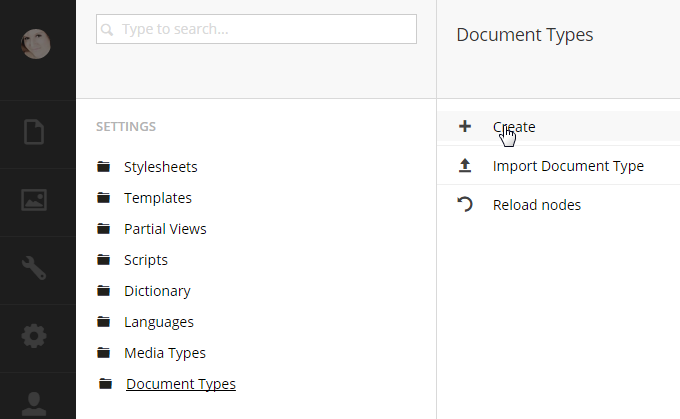
Since Umbraco 7 no longer includes the simple editor data type we are going to create our own. This will be used when we setup our document types. Head to the Developer section and right click on Data Types and click Create. Name your new data type Simple Editor and choose Richtext Editor from the Property editor drop down list and then click Save. You will see that you can now customize this Richtext Editor. Select only simple properties including bold, italic, link, styles and unlink. Once you have selected these checkboxes click Save.
Step 3: Set up your Document Types
Setting up your Document Types in Umbraco is a critical part of keeping your website organized and easy to manage for your content editors. Looking at our design evaluation, we can determine that every section has a header textstring. Let's take these common properties and put this on our master document type, that way every document type that we create underneath of the Master will inherit these properties. Login and head over to the Settings, right click on Document Types and click Create.
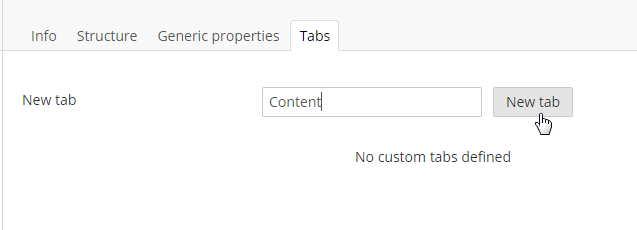
Name your new document type Master and uncheck the Create matching template checkbox. Since we are only using this document type to only setup common items for our future document types we only need a couple things. First let's setup a new tab to put all our properties on for our document types. Click the Tabs tab and create a new tab called Content.
Click New tab. You can see that your tab has been added to your document type. Now let's go over to the Generic properties tab and setup our common properties.
On the Generic properties tab we want to setup a header textstring so that when we create our new document types they will start off already having this property and we won't need to add it every time. Start by clicking Click here to add a new property and fill out the information as follows.
- Name: Header
- Alias: header
- Type: Textstring
- Tab: Content
You will notice that the alias will populate automatically using camel casing based on the name you entered.
Tip: For long names, you can manually shorten your alias by entering a new one that will be easier to use later in your code.
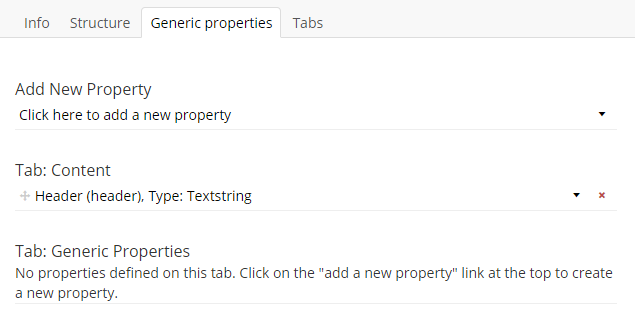
Click Save to save your new property. Your Master document type generic properties tab should look like this now.
Now that we have setup our common properties, let's set up our Home document type. Right click on Master and create a new document type.
Name our new doc type Home and click Create matching template. Since this is a one page site, we are not going to need more than one template so when you create the rest of your document types make sure to uncheck that checkbox.
Now that we have our Home document type made, let's configure it. We can start by choosing a new icon, I'm going to pick a home icon for my homepage document type.
![]()
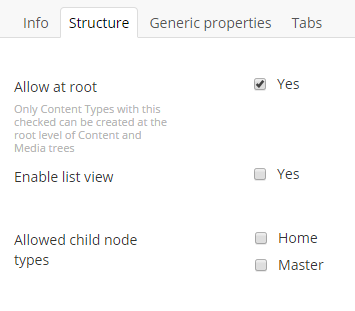
Next let's look at the Structure tab. We want the homepage to be the only thing at our root level so select the checkbox for Allow at root. We don't need the list view and we don't have any other child node types setup to allow just yet.
Click Save to save your changes and let's add new tabs to our homepage doc type. Go to the Tabs tab and add a new tab called Footer and another one called SEO. Next let's look at the Generic properties tab. You can see on here that there is the tab named Content that has been inherited from the Master. Since we setup the header property on our master, our homepage is already going to have that property on it. Based on our design evaluation we need the image and description properties setup on our Content tab. Click Click here to add a new property and fill out the information as follows.
Note: For the Image property you could you the image cropper or upload options here based on your needs.
- Name: Image
- Alias: image
- Type: Media Picker
- Tab: Content
Click Save to save your new property. We will need to repeat this same process whenever we add new properties to document types in Umbraco. Now add the description to our home doc type to the Content tab. Next let's add the footer section properties to our document type on the Footer tab. Create a new property as follows:
- Name: Column 1
- Alias: column1
- Type: Simple Editor
- Tab: Footer
Click Save to save your changes and create the remaining 2 properties for the footer in the same way.
Lastly, create a textstring property for the page title tag and a textbox multiple to put on the SEO tab for our homepage. Your SEO tab should like this.

Use these steps to setup the rest of your document types using the name and type we determined in the Design Evaluation.
Remember:
- The header property is inherited by child document types of the Master (you won't need to add this again)
- Uncheck the Create matching template checkbox (since this is a one page site, we don't need templates for all our nodes)
- Ignore the Structure tab for now
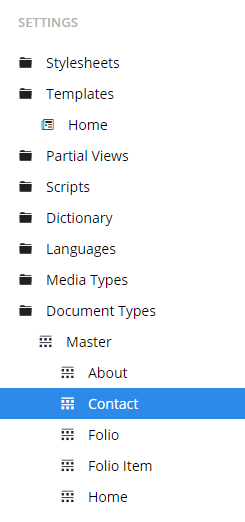
Once you have created all your document types your Settings menu in Umbraco should look like this:
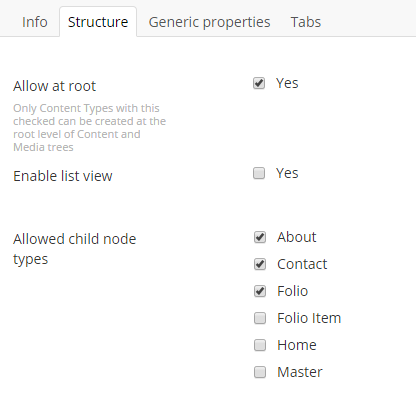
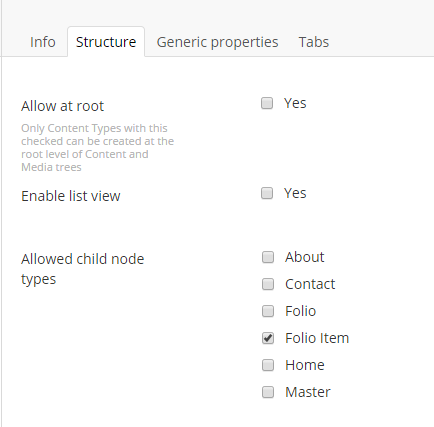
Now let's go back to our home doc type and view the structure tab. Now you will see that the Allowed child node types list has the list of document types that we have created. From our homepage we want to be able to create a new about, contact and folio child nodes in our Contact section. In order to do this, check these checkboxes and click Save.
The Folio document type will also need the Folio Item document type allowed. Navigate to the Structure tab and allow this child node type and click Save.
Step 4: Import your design files
The template files you are given include things like the css, web fonts, images, and javascript. Let's copy these to the proper areas in Umbraco's file system and make sure that our URL's are updated accordingly to the new file locations. Move the css and javascripts file into the css and scripts files located in our Umbraco file system. I moved the fonts into a fonts folder located in the css folder and update the links to these fonts in their corresponding css files. The img folder contains images that we are going to let our editor pick so these will need to be uploaded into our Media section. In order to upload images into our media let's go to the Media section in Umbraco and right click on Media, click Create, click Folder, and name your Folder.
Tip: Use folders to keep your media section organized.
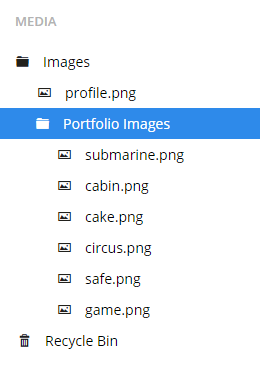
Now that we have our new Images folder we want to drag and drop our images into this new folder. We can use Images for our profile.png and create a new folder for Portfolio Images and drag and drop the rest of our portfolio images there.
Our static index.html file that is used for our website will need to be broken out into different views but for now, we can add this HTML markup onto our Home Template in the Settings section. Make sure you don't delete the inherits and layout statements in the top of your template and remember to update the links to the new location for our css, script, and webfont files.
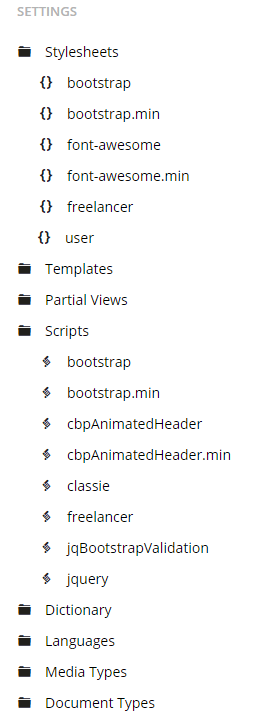
If you reload your Stylesheets and Scripts folder in the Settings menu you will see the files have been added in Umbraco.
Step 5: Setup your Templates and Partial Views
In the markup that we copied to our home template you will see that they have comments where each section begins. We are basically going to take these sections out of the homepage template and create partial views out of them. This area will require some knowledge of razor to setup functionality of the different sections. Writing the razor itself is beyond the scope of this article, but you can check out how I did this over on github in the Views folder. The portfolio grid partial also includes the "for-each" loop that will go through each folio item to put them in the grid. The portfolio modals partial generates the content of each portfolio items modal.
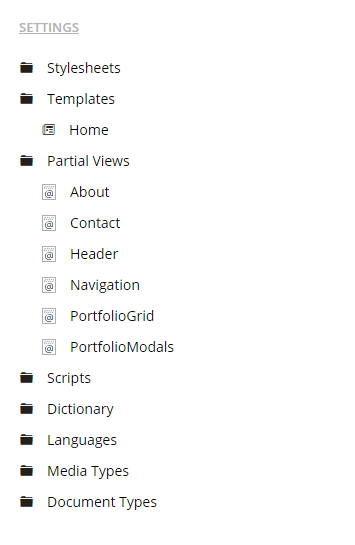
Once you have broken out your Partial Views from your home template you should have a structure similar to this.
Tip: For more information on templating in Umbraco check out the templating videos on Umbraco.TV.
Step 6: Create your Content
Now that we have our template and views setup, let's head over to our Content section and start creating our nodes. Right click on Content, click Create, and click Home. Name your new home page and begin adding in your content. Your home page will have the properties on it that you setup on your home doc type.
Creating Content is pretty straight forward, it is the initial setup of the document types, their structure, and getting the templates sorted that is where the focus of your Umbraco setup should be. Setting up your document types properly will help you keep your website organized and make it easier for your content editors to manage. Go ahead and create the rest of your content. Your structure should look like this when you are finished.

After you have your content in your site, you can preview it by going to the homepage properties tab and clicking the link to document.
Wrap up
You should have a working site if you setup your template and partial views correctly. Your content editors will easily be able to manage the content within Umbraco. The form itself will take a developer's time to setup the model and controller to make it work but you could look into form packages that let you build your own forms in Umbraco such as Contour. It is a very user friendly package that can get your forms up and running in no time without a developer.
Hopefully this tutorial was helpful for Umbraco newbies and can get you started with setting up your next Umbraco site. There are many different ways that you can setup your Umbraco site so just try to keep things organized and good luck in future endeavors!
Download it from GitHub
You can checkout the files I used for this project on github.
