Umbraco Packaging with AppVeyor CI
Heads Up!
This article is several years old now, and much has happened since then, so please keep that in mind while reading it.
AppVeyor is essentially a Microsoft build server service hosted in the Azure cloud. Each build spins up an Azure VM and you can then execute whatever you want to in order to complete your build cycle and extract and deploy some artefacts (files you want post build).
As you might know I have authored a few Umbraco packages myself and contribute to many more. One of the challenges with supporting an open source project is packaging and releasing, it's fantastic when you can fix a quick bug or even better when someone else does it for you and sends a pull request, but then you have to find the time and remember all the steps needed to create a release and package it up.

So, enter the Umbraco build scripts. A few years ago I ended up at small session upstairs at CodeGarden where Matt Brailsford presented a short demo of his Umbraco Build Tasks. Using MSBuild, from a ton of XML and few batch files, he could create an Umbraco installable ZIP package! I have been using various versions of these scripts for all of the packages I work on ever since.

Having these build scripts makes packaging pretty quick, but what if we could have a build server execute the package build scripts? Well we can with AppVeyor and here's how.
The following walkthrough is an introduction and a starting point for most packages. The sample package is expected to contain a single DLL and a collection of JS, CSS & HTML files destined for the App_Plugins folder for your UI, this could be a typical Umbraco AngularJS property editor and a complimentary C# property value converter.
Prerequisite: you will need to have MSBuild v12 installed on your local machine, if you have VS2013 you will have it already, if not, you can download it from here.
1: First off we need to get MSBuild working and creating your package on your local machine, so get a copy of the BuildPackage folder from here and add it to the root of your project.
These build scripts are setup to do two things, firstly build your Grunt project, then build your C# project. If you have only one of these, you can remove the lines applicable to the other project and it will work just fine.
Package.build.xml
- Edit line 42 and set it to the folder of your C# project (it's "Test" in the sample).
<CoreProjectDir>$(RootDir)\Test</CoreProjectDir> - Edit line 43 and set it to the folder containing your Grunt project (it's "Angular" in the sample)
<GruntProjectDir>$(RootDir)\Angular</GruntProjectDir> - Edit line 72 and set to match your csproj filename (it's "Test.csproj" in the sample)
<MSBuildProjects="$(CoreProjectDir)\Test.csproj" /> - Edit line 81 and set to the output folder of your Grunt project ("dist" in the sample)
<GruntProjectFilesInclude="$(GruntProjectDir)\dist\**\*" />
Build.bat
- Edit line 4 and set it to the path of your Grunt project (it's "Angular" in the sample)
cd ..\Angular\ - Edit line 8 and set it to the path of your sln file, this is used to restore any NuGet packages you have referenced before build begins.
Call Tools\nuget.exe restore ..\AppVeyorUmbracoPackage.sln
Edit the meta data in both Package.xml and Package.nuspec, such as your package name.
Now you should be able to run Test.bat and both a .zip and a .nupkg files containing your compiled files should be created in the /BuildPackage/Package/ folder.

By default the Test.bat batch file will create build100, you can change this in the file itself but these packages are only for debugging on your local machine.
2: Add appveyor.yml to the root of your project.
# version format
version: 1.0.2.{build}

# UMBRACO_PACKAGE_PRERELEASE_SUFFIX will only be used for Release builds
# example UMBRACO_PACKAGE_PRERELEASE_SUFFIX=beta
install:
  - cmd: npm install -g grunt-cli
  - cmd: set UMBRACO_PACKAGE_PRERELEASE_SUFFIX=
  - cmd: set UMBRACO_PACKAGE_MIN_VERSION=7.2.0
  - cmd: cd BuildPackage
  - cmd: Build.bat

# to disable automatic builds
build: off

artifacts:
  - path: BuildPackage\Package\*.nupkg
  - path: BuildPackage\Package\*.zip
You can do a lot of build configuration using the AppVeyor UI however you can do even more with appveyor.yml, and crucially, it allows us to maintain our package's version number in source control. When you have an appveyor.yml in the root of your project none of the settings you make in the AppVeyor UI will have any effect.
The version number of your package is at the top of appveyor.yml and importantly it is only here. This number is used to version the DLL file and also you can use it for banners within your Angular files, as well as being used in the package meta data.
Let's look at the options for a couple of those lines.
version: 1.0.2.{build}
This defines your package's version, and after every release you should update the version number so that CI builds are for the next version. The {build} is the build number and this is managed by AppVeyor.
By default your CI packages will be created in the format: MyPackageName.<major>.<minor>.<patch>-build<buildNumber>
- cmd: set UMBRACO_PACKAGE_PRERELEASE_SUFFIX=beta
Quite often you want to release a prerelease (publish it to our.umbraco.org and Nuget), so you can add valid suffixes here, e.g. "beta", "beta1" or "alpha".
- cmd: set UMBRACO_PACKAGE_MIN_VERSION=7.2.0
This is used in the Umbraco Package Meta data. I don't think it actually does anything but I believe it's supposed to prevent the package being installed on a version of Umbraco that is older than the one specified (that would be a good feature!). Ideally this would also populate the version of UmbracoCms.Core used as a dependency in the NuGet package (but I've not worked out how to do this yet).
3: Push your project to GitHub
4: Get an AppVeyor account and connect it to your GitHub, this is super simple to do just by following the wizard in AppVeyor. Once setup, you should see the "Latest build" tab and it's likely that your build is showing as queued. Time for some tea and biscuits!


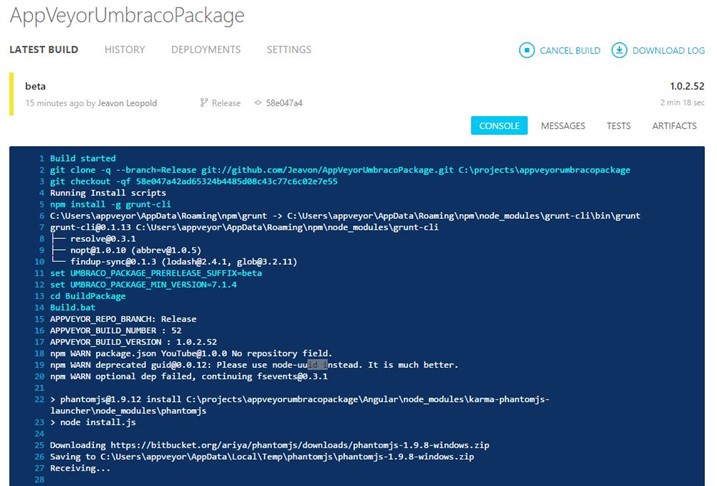
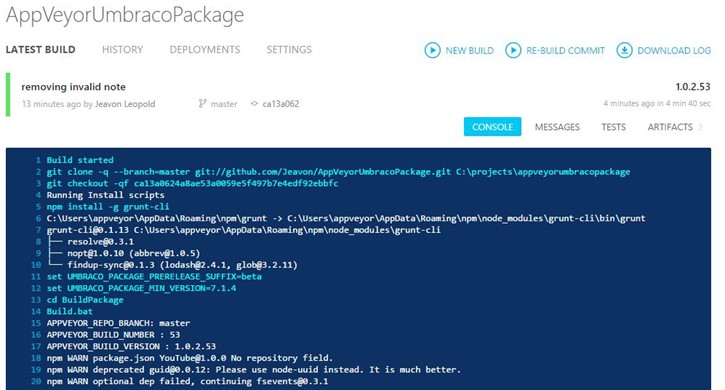
5: After some time, you will see the magic console appear and you will see the output from the build scripts live updating as it executes the various steps.

6: Once the build has finished and was hopefully successful, you should see the "Artifacts" tab, here you can download both the Umbraco and NuGet packages and now you have package CI working.

7: AppVeyor will now automatically build from every commit you make on GitHub. You can always post links directly to your package files and know that your user will be able to install the very latest prerelease version. Example from my upcoming Crop Healer Package (shameless plug) can be seen here.

What about deployment and releases?
The way I have set up releases, to make a release you simply merge your master branch into a branch named "release". You then push that, AppVeyor will build it using the release version format and perform release deployment such as pushing the package automatically to NuGet (you will have to download the package from the artifacts tab and upload to our.umbraco.org). Once released, you immediately switch back to your "master" branch, increment the version number (e.g. v1.0.1 to v.1.0.2), commit and then carry on developing.
For deployment of build releases, I generally setup a MyGet feed for developers to be able to get the latest build using NuGet.
For deployment of full releases I have AppVeyor automatically push my package to NuGet and then manually download the .zip file from AppVeyor and upload it to our.umbraco.org (maybe one day we can automate this also).
To do this we need to configure the "deploy" section in appveyor.yml.
deploy:
  - provider: NuGet
    server: https://www.myget.org/F/myPackage/
    api_key:
      secure: AEncryptedKeyFromAppVeyor
    artifact: /.*\.nupkg/

  - provider: NuGet
    server:
    api_key:
      secure: AEncryptedKeyFromAppVeyor
    artifact: /.*\.nupkg/
    on:
      branch: release
This deploys every build to to MyGet from both the master and release branches but only builds from the release branch get pushed to NuGet.
Whoa, that was a lot of stuff!
Yes it was, and there is a lot more, such as the Grunt tasks for adding banners with the correct versions, unit tests, adding AppVeyor status badges, pull request builds etc., but I don't want this article to go on for eternity so I recommend you checkout the sample AppVeyorUmbraco package project and also the AppVeyor documentation.
If you are wanting to get AppVeyor builds and deployments working on an existing package or for something new, I will be more than happy to help get it going so don't hesitate to get in touch!
Also I would love to develop this process and the template AppVeyorUmbraco project further so please do get involved!

photo credit: Jameson42 & westpark & Kaustav Bhattacharya & quinn.anya & dhammza via photopin cc