Dashboards and Sections
Heads Up!
This article is several years old now, and much has happened since then, so please keep that in mind while reading it.
Now, some of you might have heard about Content Apps in Umbraco v8 and might be wondering what is the difference between dashboards and content apps. Or what could be the use cases and how to choose between one or the other? Content apps are companions to your editing experience. These apps can provide insight and feedback about the content you are editing. The idea is you don’t need to jump browser tabs or visit other sites to gain this information but you have it in hand alongside the content you are currently editing. You can read more about content apps here. An example of content app in the Umbraco backoffice is the Info content app which replaces the info tab in V7. You can also extend and create your own content apps and even control permissions on your content apps, more information on it is available here. Some examples of Content Apps are Nathan Woulfe’s award-winning Preflight, Anders Bjerner’s Google Analytics Integration etc. Sections and dashboards, as I see it, is a level higher. It can be used to show site-wide information – status of your third party integrations, side wide analytics are some examples of what you could do. There could also be examples where content apps and section/dashboards could cross paths. For eg, you could show analytics information about a page as a content app, but you can still show site-wide analytics and behaviour as a dashboard or a section of its own.
Before we start talking about the v8 situation around sections and dashboards, lets rewind a bit and talk about v7. The starting point for creating and configuring custom sections and dashboards were config files.
Applications.config - configure CMS “sections”
Dashboards.config - configure CMS “dashboards”
Trees.config – configure section trees
Fast forward and talking about v8, none of the above config files exist and this is one of the big difference between v7 and v8. So how do you go about creating dashboards and custom sections? Lets have a look.. I will first talk about creating a dashboard, followed by a custom section with a custom tree and then finally, the bonus Treeless Section.
Creating a Dashboard
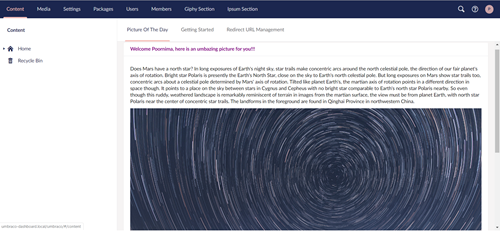
In Umbraco, each section has a set of default dashboards. For eg, the content section has a Getting Started and the Redirect URL Management dashboards. I am going to add a custom dashboard to the content section to welcome my editors. This dashboard will show my editors a personalised welcome message followed by a picture. I am using the getCurrentUser() method to show the personalised welcome message, for the picture I am using NASA’s Astronomy Picture of the Day (APOD) API. Each day, this API shows a picture or a video from the Universe together with some information about it.
The NASA APOD API
NASA exposes some cool APIs to give access to their astronomy data. The picture of the day can be retrieved from NASA’s APOD API by performing a HTTPGET request to the Url https://api.nasa.gov/planetary/apod. There is no need to authenticate in order to explore the data but you need an API key that you have to sign up for. You can get your api key and also know about the rate limits here.
The parameters to perform the get request are the following
Date - Date in YYYY-MM-DD format. The date for which you wish to retrieve the APOD image. The default is today
Hd - Boolean value to denote whether to retrieve the URL for the high res image
Api_key - Your API key
Your Custom Dashboard
To begin with, I create a folder in the App_Plugins folder called CustomDashboards. I am going to organise all the custom dashboards I have created for this demo into this folder. But you can decide what is the best approach to organise them in your solution. In my App_Plugins/CustomDashboards folder I now create a folder called PictureOfTheDay. All my files for this particular dashboard will be in this folder.
The first step in creating your own dashboard is to register it. There are two ways to do it – registering using with package.manifest and registering with a C# class as mentioned here. I have used package.manifest to register my dashboard. The package.manifest file is a JSON file and can be used to describe your dashboards and sections. You can read more about it here.
In my App_Plugins/CustomDashboards/PictureOfTheDay folder I add the package.manifest file. I use Visual Studio to work on my Umbraco Projects so I usually add a new Application Manifest file into my folder and rename it. I have mapped .manifest extension to the hosted JSON schema in my Visual Studio so it gives me autocomplete and IntelliSense support. You can find information on how to do it here.
I can now start registering my custom dashboard by adding the following code in to my package.manifest.
{
  "dashboards": [
    {
      "alias": "pictureOfTheDay",
      "view": "~/App_Plugins/CustomDashboards/PictureOfTheDay/pictureoftheday.html",
      "sections": [ "content" ],
      "weight": -10
    }
  ],
  "javascript": [
    "~/App_Plugins/CustomDashboards/PictureOfTheDay/pictureoftheday.controller.js"
  ],
  "css": [
    "~/App_Plugins/CustomDashboards/PictureOfTheDay/pictureoftheday.css"
  ]
}
Package.manifest for the custom dashboard
Tip: Any changes to package.manifest will be picked up by the backoffice only upon recycle of the app pool.
The dashboards array can be used to specify an array of dashboards. Each dashboard has an alias which is the unique alias for the dashboard. The View configuration option is to specify the path to the HTML file which renders the dashboard. The sections option is again an array where I can specify which sections must display my dashboard. I am displaying mine in the content section, but multiple sections may be specified using comma separated values. The weight option is used to specify the order in which the dashboard appears, the dashboard with lower weight values appear first. The Content section in Umbraco already has two dashboards Getting Started with a weight of 10 and Redirect URL Management which has a weight of 20. I want my dashboard to appear first so I have chosen -10 as the weight for my dashboard. More information about weights and re-ordering can be found here.
The javascript configuration option to specify paths to any angular controllers/ resource files etc which provides functionality to my dashboard. I also specify css files to support my dashboard and make it look pretty using the css option.
Time to bring the dashboard to life now. This is what the code in my view is.
<div class="pictureoftheday" ng-controller="PictureOfTheDayController as vm">
  <umb-box>
    <umb-box-header title="{{vm.title}}"></umb-box-header>
    <umb-box-content>
      <div ng-if="vm.pictureOfTheDay && vm.pictureOfTheDay.media_type=='image'">
        <figure>
          <figcaption>{{vm.pictureOfTheDay.explanation}}</figcaption>

          <img src="{{vm.pictureOfTheDay.hdurl}}" alt="{{vm.pictureOfTheDay.title}}" />

        </figure>
      </div>
      <div ng-if="vm.pictureOfTheDay && vm.pictureOfTheDay.media_type=='video'">
        <iframe width="640" height="385" ng-src="{{vm.trustSrc(vm.pictureOfTheDay.url)}}" frameborder="0"></iframe>
      </div>
    </umb-box-content>
  </umb-box>
</div>
Picture of the Day View
I am using some of the directives in the core to make it more consistent with the backoffice, you can learn more about it here.
In my controller I inject userService, $sce and $http service. I use the getCurrentUser() method to retrieve the name of the current logged in user. I use $http to perform an HTTPGET request to the NASA APOD API. The $sce provider helps me load any videos from external sources like YouTube, Vimeo.
angular.module("umbraco").controller("PictureOfTheDayController", function (userService, $http, $sce) {
    var vm = this;
    vm.title = "Hello, here is an umbazing picture for you!!!";

    userService.getCurrentUser().then(function (user) {
        vm.title = "Welcome " + user.name + ", here is an umbazing picture for you!!!";
    });

    $http.get("https://api.nasa.gov/planetary/apod?api_key=<your-api-key>&hd=true")
        .then(function (response) {
            vm.pictureOfTheDay = response.data;
        });

    vm.trustSrc = function (src) {
        return $sce.trustAsResourceUrl(src);
    }

});
Picture of the Day AngularJS Controller
I also have added some additional styles in my css stylesheet
.pictureoftheday .umb-box-header-title span {
    color: darkmagenta;
}
figure {
    margin: 0;
}

figcaption {
    margin: 10px 0;
}
Picture of the Day Stylesheet
Build the solution and log into the backoffice. My dashboard welcomes me, but the name of the dashboard does not look right. The name appears like [pictureOfTheDay].

This can be fixed using language files. I create a folder called lang in App_Plugins/CustomDashboards/PictureOfTheDay/ folder and add a language xml file, en-US.xml. The code inside my XML file looks like below. Note that the key alias matches the alias of the dashboard which I specified in the package.manifest.
<?xml version="1.0" encoding="utf-8" standalone="yes"?>
<language>
  <area alias="dashboardTabs">
    <key alias="pictureOfTheDay">Picture Of The Day</key>
  </area>
</language>
Language File for Custom Dashboard
Multiple language files can be specified if you want the name to be translated depending upon the language setting for the logged in user. In my example, my login to backoffice is set to use English(United States) hence I am using en-US.xml. You can specify multiple language files according to the language set up for your backoffice users. The XML files must be named using the convention language-country code.xml
Note that the area alias does not change. It is a keyword.
Tip: What I noticed during the course of developing this demo is that the lang folder should always be at the root of the Section/Dashboard folder
Tip: If the language files do not get picked up, save and recycle the app pool and refresh your browser.
And putting it all together this is what my dashboard looks like
Tip: Whenever you make changes to your angular controller, view or stylesheet, update the version number in config/ClientDependency.config file and recycle your app pool. Else your changes won’t get picked up.
Creating Custom Section With Trees
Another fantastic feature in the backoffice is the ability to create custom sections(also called as application) with custom trees. In my example,I am creating a new section called Ipsum Section where I can generate some Ipsum content. I also have a custom tree with two nodes in my custom section – Bacon Ipsum and Dino Ipsum to generate Bacon Ipsum and Dino Ipsum. Both these ipsums have an API and I am making use of that to generate the content.
The Bacon Ipsum API
You can generate bacon ipsum by performing an HTTPS GET request to https://baconipsum.com/api. I am using the following parameters.
type - 'all-meat' for meat only or 'meat-and-filler' for meat mixed with miscellaneous ‘lorem ipsum’ filler.
paras - optional number of paragraphs, defaults to 5.
format - ‘json’ (default), ‘text’, or ‘html’ , I am using html
You can read more about the API here.
The DINO Ipsum API
You can generate bacon ipsum by performing an HTTPS GET request to http://dinoipsum.herokuapp.com/api. I am using the following parameters.
format - json, html, text output format (defaults to html)
words - the number of words per paragraph (defaults to 30)
paragraphs - the number of paragraphs (defaults to 10)
You can read more about the API here.
Your custom section
To create a custom section, I start off with a folder CustomSections in my App_Plugins folder. I add a package.manifest file into this folder to register my custom section and add the following code.
{
  "sections": [
    {
      "alias": "ipsumSection",
      "name": "Ipsum Section"
    }
  ]
}
Custom Section Registration using package.manifest
I will also need to assign my custom section to the correct user group before I can see my section in the top navigation ribbon.

As with the custom dashboards, the name appears to be in square brackets and this can be addressed using language files. Create a lang folder in App_Plugins/CustomSections and add an en-US.xml file with the following code. Again note that the key alias matches with the alias of the section specified in the package.manifest.
<?xml version="1.0" encoding="utf-8" standalone="yes"?>
<language alias="en" intName="English (US)" localName="English (US)" lcid="" culture="en-US">
  <area alias="sections">
    <key alias="giphySection">Giphy Section</key>
  </area>
</language>
Language File for Custom Section
After an app pool recycle I can now see my changes.
You may provide translated values for your section names with multiple language files as I explained in the custom dashboards section.
I have my custom section now, I now want an overview page to show some welcome content and my custom tree nodes. For this I need to create a controller that inherits from a TreeController.
[Tree("ipsumSection", "ipsumTreeAlias", TreeGroup = "ipSumsGroup" , SortOrder = 1)]
[PluginController("Ipsums")]
public class IpsumDashboardTreeController : TreeController
{
}
I have my custom section now, I now want an overview page to show some welcome content and my custom tree nodes. For this I need to create a controller which inherits from a TreeController.
I decorate my controller with the Tree Attribute, with the alias of the section it should load and an alias for the tree itself. The section alias is same as the alias I specified in my package.manifest. I have also specified a TreeGroup which can help me group your tree within a section. An existing example of this is the Settings section where you have the settings group tree and the templating group. I have also specified a SortOrder which defines the sort order of the tree within the tree group.
By default any views for the sections will be loaded from a folder Views/sectionalias/. I want to change it and load it from the App_Plugins folder. For this I make use of PluginController attribute passing in an areaName. The PluginController attribute makes sure that the controller is routed to its own area. Now I can load my views for each of my tree nodes from a folder App_Plugins/areaName/backoffice/treealias/. This is all achieved by MVC routing. In my example the view will be loaded from App_Plugins/Ipsums/backoffice/ipsumTreeAlias/ folder.
I am now ready to implement two abstract methods GetTreeNodes and GetMenuForNode. The GetTreeNodes method is used to build the tree. The GetMenuForNode is used to specify the actions available for each tree node, like delete, reload etc.. You can have dynamically built trees from a database or an api or you can have hardcoded values if you are using the section for a very specific set of tasks. I also want to customise the root node by showing an overview dashboard with some content so I am overriding the CreateRootNode method as well. Putting this all together this is what my code looks like.
using System;
using System.Collections.Generic;
using System.Net.Http.Formatting;
using Umbraco.Core;
using Umbraco.Web.Models.Trees;
using Umbraco.Web.Mvc;
using Umbraco.Web.Trees;

namespace Umbraco.V8.Dashboard.Controllers
{
    [Tree("ipsumSection", "ipsumTreeAlias", TreeGroup = "ipsumsGroup" , SortOrder = 1)]
    [PluginController("Ipsums")]
    public class IpsumDashboardTreeController : TreeController
    {
        protected override TreeNodeCollection GetTreeNodes(string id, FormDataCollection queryStrings)
        {
            // check if we're rendering the root node's children
            if (id == Constants.System.Root.ToInvariantString())
            {
                //hardcoding a set of ipsum nodes
                Dictionary<int, string> ipsums = new Dictionary<int, string>();
                ipsums.Add(1, "Bacon Ipsum");
                ipsums.Add(2, "Dino Ipsum");

                var nodes = new TreeNodeCollection();

                 foreach (var ipsum in ipsums)
                {
                    // add each node to the tree collection using the base CreateTreeNode method
                    //the code will look for a view in the App_Plugins/Ipsums/backoffice/ipsumTreeAlias
                    //the view name is set to be the node name with the space removed eg for Bacon Ipsum the view name will be baconipsum
                    var node = this.CreateTreeNode(ipsum.Key.ToString(), "-1", queryStrings, ipsum.Value,
                        "icon-presentation", false,
                        routePath: string.Format("{0}/{1}/{2}", "ipsumSection", "ipsumTreeAlias",
                            ipsum.Value.Replace(" ","")));
                    nodes.Add(node);
                }

                return nodes;
            }

            throw new NotSupportedException();
        }

        protected override MenuItemCollection GetMenuForNode(string id, FormDataCollection queryStrings)
        {
           //no actions for each menu item
            return null;
        }

        protected override TreeNode CreateRootNode(FormDataCollection queryStrings)
        {
            var root = base.CreateRootNode(queryStrings);

            //the code will look for a view in the App_Plugins/Ipsums/backoffice/ipsumTreeAlias
            root.RoutePath = string.Format("{0}/{1}/{2}", "ipsumSection", "ipsumTreeAlias", "overview");

            // set the icon
            root.Icon = "icon-hearts";
            // could be set to false for a custom tree with a single node.
            root.HasChildren = true;

            return root;
        }
    }
}
Custom Section Tree Controller
Let us now look at the views and angular controllers for the section. As with the custom dasboards, I start off with the package.manifest. We already have the views specified in the above class. So all I have in my package.manifest is the angular controllers and stylesheets. And the package.manifest goes in the folder App_Plugins/Ipsums.
{
  "javascript": [
    "~/App_Plugins/Ipsums/backoffice/js/baconipsum.controller.js",
    "~/App_Plugins/Ipsums/backoffice/js/dinoipsum.controller.js"
  ],
  "css": [
    "~/App_Plugins/Ipsums/backoffice/css/ipsum.css"
  ]
}
Packahe.manifest for the custom dashboard in the custom section
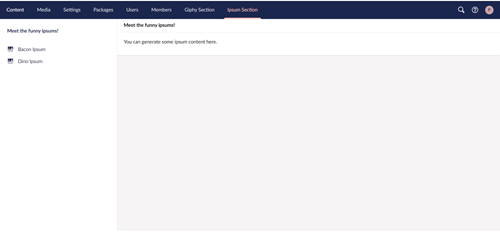
I need an Overview.html view as the welcome dashboard when my editor goes into the Ipsum Section. I also need a baconipsum.html view for my bacon ipsum tree node and dinoipsum.html for my dino ipsum tree node.
<umb-box>
  <umb-box-header title-key="treeHeaders_ipsumTreeAlias"></umb-box-header>
  <umb-box-content>
    <p><localize key="ipsumsTree_intro">Generate your favourite ipsum here..</localize></p>
  </umb-box-content>
</umb-box>
Overview
<umb-box>
<umb-box-header title-key="ipsumsTree_generatebaconipsum">
</umb-box-header>
<umb-box-content>
<div class="ipsum" ng-controller="BaconIpsumController as vm">
<div class="ipsum-search">
<label for="paragraphs">Number of paragraphs</label>
<input type="number" name="paragraphs" ng-model="vm.paragraphs" placeholder="5" required/>
</div>
<umb-button action="vm.getBaconIpsum()" type="button"
button-style="success"
label-key="ipsumsTree_generatebaconipsum"></umb-button>
<div class="umb-panel-group__details-check-description" id="baconipsum">
</div>
</div>
</umb-box-content>
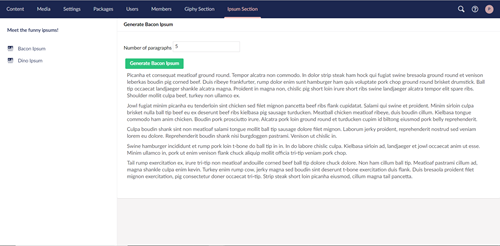
</umb-box>Bacon Ipsum View
<umb-box>
<umb-box-header title-key="ipsumsTree_generatedinoipsum">
</umb-box-header>
<umb-box-content>
<div class="ipsum" ng-controller="DinoIpsumController as vm">
<div class="ipsum-search">
<label for="paragraphs">Number of paragraphs</label>
<input type="number" name="paragraphs" ng-model="vm.paragraphs" placeholder="5" required/>
<br/>
<label for="words">Words per paragraph</label>
<input type="number" name="words" ng-model="vm.words" placeholder="100" required/>
</div>
<umb-button action="vm.getDinoIpsum()" type="button"
button-style="success"
label-key="ipsumsTree_generatedinoipsum"></umb-button>
<div class="umb-panel-group__details-check-description" id="dinoipsum">
</div>
</div>
</umb-box-content>
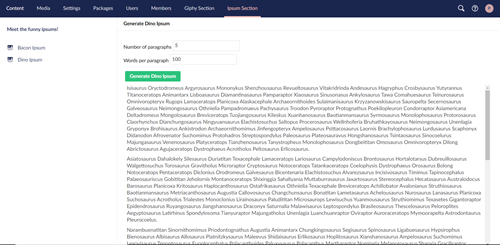
</umb-box>Dino Ipsum View
As you have rightly noticed there are some localization keys which I have used to help me translate my dashboard to other languages if needed. Enter the language files again. I have set up a lang folder inside App_Plugins/Ipsums and have an en-US.xml and en-GB.xml.
<?xml version="1.0" encoding="utf-8" standalone="yes"?>
<language alias="en" intName="English (US)" localName="English (US)" lcid="" culture="en-US">
  <area alias="treeHeaders">
    <key alias="ipsumTreeAlias">Meet the funny ipsums!</key>
  </area>
  <area alias="ipsumsTree">
    <key alias="intro">You can generate some ipsum content here.</key>
    <key alias="generatebaconipsum">Generate Bacon Ipsum</key>
    <key alias="generatedinoipsum">Generate Dino Ipsum</key>
  </area>
</language>
Language file for custom dashboard in the custom section
The area alias treeHeaders is a keyword and I am using the treealias I specified in my TreeController attribute, ipsumsTree as the translation key for my tree heading. In addition, I also have some localization keys in my dashboard view and also specified fall back values for them as a best practice. If you have missing translations in your XML files and no fallback content is specified it shows the key in square brackets as content which can be quite unhelpful to your editors.
In both my controllers, I inject the $http service to perform get requests to the ipsum apis by passing the relevant parameters as I mentioned about and bind the response to an element.
angular.module("umbraco").controller("BaconIpsumController", function ($http) {
    var vm = this;
    vm.paragraphs = 5;
    vm.words = 100;
    vm.format = "html";
    vm.getBaconIpsum = function() {
        $http({
            url: "https://baconipsum.com/api/",
            method: "GET",
            params: {
                format: vm.format,
                type: "meat-and-filler",
                paras: vm.paragraphs
            }
        }).then(function (response) {
            angular.element('#baconipsum').html(response.data);
        });
    };

    vm.getBaconIpsum();
});
Bacon Ipsum AngualrJS Controller
angular.module("umbraco").controller("DinoIpsumController", function ($http) {
    var vm = this;
    vm.paragraphs = 5;
    vm.words = 100;
    vm.format = "html";
    vm.getDinoIpsum = function() {
        $http({
            url: "http://dinoipsum.herokuapp.com/api/",
            method: "GET",
            params: {
                format: vm.format,
                words: vm.words,
                paragraphs: vm.paragraphs
            }
        }).then(function (response) {
            angular.element('#dinoipsum').html(response.data);
        });
    };

    vm.getDinoIpsum();
});
Dino Ipsum AngualrJS Controller
The CSS stylesheet.
.ipsum {
    margin: 10px 0;
}

.ipsum-search {
    margin: 10px 0;
}

.umb-panel-group__details-check-description {
    overflow-y: auto;
}

.sub-view-column-left {
    margin-right: 5px;
}
CSS Stylesheet
Putting all of the above together this is what we have in my custom Ipsum Section.
Treeless Sections
We can also have custom sections in Umbraco which span across the entire width of the application and does not have a tree navigation. This is a new feature in v8. In my example of treeless section, I am going to load a dashboard into my section which can help my editors search for a GIPHY using the GIPHY API.
The GIPHY API
GIPHY exposes a few endpoints for developers. You can read all about it here. I am going to use the search endpoint for GIF search. You can perform a GIF search by performing an HTTPGET request to api.giphy.com/v1/gifs/search. I a using the following parameters.
api_key - string YOUR_API_KEY GIPHY API Key.
q - string Search query term or phrase.
limit - integer The maximum number of objects to return. (Default: “25”)
offset - integer Specifies the starting position of the results. Defaults to 0.
rating - string Filters results by specified rating. If you do not specify a rating, you will receive results from all possible ratings.
You can sign up for an api key from the dashboard https://developers.giphy.com/.
Your treeless section
As with the custom section, I start off by registering my custom section using a package.manifest file. I am going to use the same file I used for my custom sections.
{
  "sections": [
    {
      "alias": "giphySection",
      "name": "Giphy Section"
    },
    {
      "alias": "ipsumSection",
      "name": "Ipsum Section"
    }
  ]
}
package.manifest for the section
As with the custom section above, I grant the correct user group access to the section. I am extending the xml files I used for my custom section above to show the section name without square brackets in the top navigation ribbon. So now my xml file for the custom sections looks like below.
<?xml version="1.0" encoding="utf-8" standalone="yes"?>
<language>
  <area alias="dashboardTabs">
    <key alias="giphyDashboard">Giphy Dashboard</key>
  </area>
  <area alias="giphyDashboard">
    <key alias="search">Search for gifs</key>
    <key alias="showMore">Show me more..</key>
    <key alias="intro">Lets search for some gifs...</key>
  </area>
</language>
Language file for the section
I now create my TreeController and add the attribute IsSingleNodeTree to the Tree attribute of my controller. Setting the attribute value to true makes my section full width without the tree navigation on the left.
using System.Net.Http.Formatting;
using Umbraco.Web.Models.Trees;
using Umbraco.Web.Mvc;
using Umbraco.Web.Trees;

namespace Umbraco.V8.Dashboard.Controllers
{
    [Tree("giphySection", "giphySectionTreeAlias", IsSingleNodeTree = true)]
    [PluginController("giphySectionArea")]
    public class GiphySectionTreeController : TreeController
    {
        protected override TreeNodeCollection GetTreeNodes(string id, FormDataCollection queryStrings)
        {
            //full screen app without tree nodes
            return TreeNodeCollection.Empty;
        }

        protected override MenuItemCollection GetMenuForNode(string id, FormDataCollection queryStrings)
        {
            //doesn't have a menu, this is a full screen app without tree nodes
            return MenuItemCollection.Empty;
        }
    }
}
Tree Controller
I still implement the abstract methods but I am returning an empty TreeCollection and MenuItemCollection in this instance.
Once this is in place, showing a dashboard in the section follows the same process as creating a custom dashboard in any section. I start off with the package.manifest. I am going to organise all my dashboards into my App_Plugins/CustomDashboards folder. So I create another folder called GiphyDashboard and add a package.manifest file into the folder. I also organise my views, css stylesheets and angular controllers into this folder.
<umb-box>
  <umb-box-header title-key="giphyDashboard_intro"></umb-box-header>
  <umb-box-content>
    <div class="giphyDashboard" ng-controller="GiphyDashboardController as vm">
      <div class="gif-search">
        <input class="-full-width-input" type="text" ng-model="vm.searchText" placeholder="Search for your gif..." required/>
      </div>
      <umb-button disabled="vm.searchText ===''" type="button"
                  action="vm.searchGifs()"
                  button-style="success"
                  label-key="giphyDashboard_search">
      </umb-button>
      <div class="umb-panel-group__details-checks" ng-if="vm.gifs.length != 0">
        <div class="umb-panel-group__details-check">
          <div class="umb-panel-group__details-check-title">
            <div class="umb-panel-group__details-check-description" ng-repeat="gif in vm.gifs">
              <p>{{gif.title}}</p>
              <a ng-href="{{gif.bitly_gif_url}}" target="_blank"><img src="{{gif.images.downsized.url}}" alt="{{gif.title}}" ng-if="gif.images.downsized"/></a>

            </div>
          </div>
          <div class="umb-panel-group__details-status-content">

            <div class="umb-panel-group__details-status-actions">
              <div class="umb-panel-group__details-status-action">
                <umb-button type="button" action="vm.searchGifs()"
                            button-style="action" size="xl"
                            label-key="giphyDashboard_showMore"></umb-button>
              </div>
            </div>
          </div>
        </div>
      </div>
    </div>
  </umb-box-content>
</umb-box>
View
angular.module("umbraco").controller("GiphyDashboardController", function ($scope, $http) {
    var vm = this;
    vm.searchText = '';
    vm.pageNumber = 0;
    vm.gifs = [];

    vm.searchGifs = function () {
        vm.pageNumber = 0;
        vm.gifs = [];
        loadGifs();
    };

    vm.showMore = function() {
        loadGifs();
    };

    function loadGifs() {
        $http({
            url: "https://api.giphy.com/v1/gifs/search",
            method: "GET",
            params: {
                api_key: "<your-api-key>",
                q: vm.searchText,
                limit: 25,
                offset: (vm.pageNumber * 25),
                rating: "G",
                lang: "en"
            }
        }).then(function (response) {
            if (response.data.meta.msg === "OK") {
                angular.forEach(response.data.data,
                    function (item) {
                        vm.gifs.push(item);
                    });
            }
            vm.pageNumber = vm.pageNumber + 1;
        });
    }
});
AngularJS Controller
You might have noticed some localization keys. Enter the language files again. I have set up a lang folder inside App_Plugins/CustomDashboards/GiphySection and have an en-US.xml file.
<?xml version="1.0" encoding="utf-8" standalone="yes"?>
<language>
  <area alias="dashboardTabs">
    <key alias="giphyDashboard">Giphy Dashboard 1</key>
  </area>
  <area alias="giphyDashboard">
    <key alias="search">Search for gifs</key>
    <key alias="showMore">Show me more..</key>
    <key alias="intro">Lets search for some gifs...</key>
  </area>
</language>
Language file for the dashboard
The CSS Stylesheet
.gif-search {
    margin: 10px 0;
}

.gif-url {
    width: 35%;
}

.gif-image {
    width: 45%;
    float: left;
}

.gif-details {
    width: 45%;
    float: left;
    margin-left: 10px;
}


.umb-panel-group__details-check-description {
    display: inline-block;
    max-height: 500px;
    margin: 10px;
    width: 45%;
}

.umb-panel-group__details-check-description p {
    font-size: 16px;
}

.umb-panel-group__details-check {
    padding-bottom: 10px;
    margin-top: 10px;
}

.umb-panel-group__details-status-action {
    text-align: center;
}
CSS Stylesheet
Putting all of the above together this is how my Giphy Section looks like below.
So that’s it! Go give it a shot yourself and let me know. The code is in Github.
Some points to be noted
- I am calling the various API from angular controller itself but in real world scenario you might want to use an UmbracoAuthorizedAPIController.
- I have not covered permissions for dashboards but that’s also achievable. Please see here on how to control access to your dashboard.
- Finally, the core code is your best friend in this instance. The documentation was of massive help but there are code examples for this in the back office itself and it proved mega useful while I was clarifying my code. Some good examples are the PackagesTreeController for a treeless section and ContentTypeTreeController for a normal tree.
Wish you all a very Merry X'mas and a very Happy New Year in advance!!!
