Multiple brushes
Heads Up!
This article is several years old now, and much has happened since then, so please keep that in mind while reading it.
When it comes to brushing in Lightroom I'm some what a master. At least that's my own opinion. Well I'm allowed to have an opinion, so get off my back :D
Anyhow ... I really use the brush tool a great deal when I am editing my photos. I primarily do this to compensate for my lacking skills as a photographer ... or because I need to accentuate something in the photo. And I have – throughout my years as a Lightroom user – created a great deal of brush presets that I use over and over again.
But once in a while I come upon a scenario where a brush preset in general do what I'm looking for, but it's just too darn strong on the effect ... so here's how to deal with that.
Ok .. so you're familiar with the brush tool so you know it looks like this:
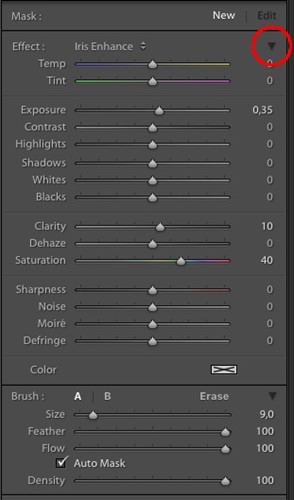
Well ... except for one little thing – that red circle I've drawn on there.
That because that's the tip. Really that IS the tip!
If your brush is too strong, simply click that little arrow pointing down I have marked, and your brush tool will turn into this:

See ... you now have an amount slider in stead of the whole shabang.
And by moving this slider to the left your brush becomes less stong and vice versa.
Neat, right?
Really ... was that the tip?
It really was. Hiding in plain sight. I bet some of you out there did not know this little gem ... but now you do.
Thank you for reading ... Merry Christmas
