Make your details pop
Heads Up!
This article is several years old now, and much has happened since then, so please keep that in mind while reading it.
But that's where another piece of skill kicks in – Lightroom adjustment brushes ... or the skill to use them just right.
What's an adjustment brush?
I'm glad you asked! See ... I asume you are familiar with Lightroom reading this. And when I say Lightroom, I [now] of course mean Lightroom Classic CC. Let's not get into that whole talk right now, ok ... :D
Anyways ... if you are familiar with Lightroom, you might know something about Presets. If not, let's hope "someone" cover those later on ... mayby before Christmas????
In quick, a preset is a, well a set of values on how an image is developed. You can save those into presets and reuse the same exact settings over and over again. Now, these apply to the entire image.
The Adjustment brush is more or less the same. You can either tweak the settings and values for the brush each time, or you can save those into brush presets.
But the amazing difference is, that the adjustment brushes don't apply to the entire image ... only the parts you brush in – hence the name :)
Quick example

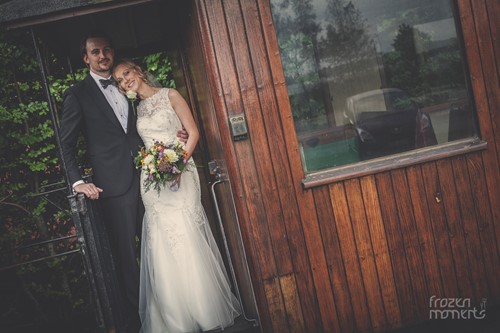
Now ... this is a RAW file straight out of the camera
Then .. one click on a preset and I end up with this
Getting somewhere right?
But now is where the fun part starts. Now you could take this into PhotoShop and start masking because you start asking yourself all these questions when you are really looking at the image:
- Is the window taking too much attention in stead of leading your eyes to the wedding couple?
- Those faces could maybe do with a little more light.
- What about that dress ... is that white enough?
- Should the flowers have more colour?
- Is the suit maybe too dark?
And the list goes on.
And yes ... you could easily fix this in PhotoShop. But if you're like me, and really really love having your workflow in one place, and one place only .. you could try to do all this within Lightroom.
Need I say it again ? – with the Adjustment brush tool (I guess you get it by now!)
Let's take a look
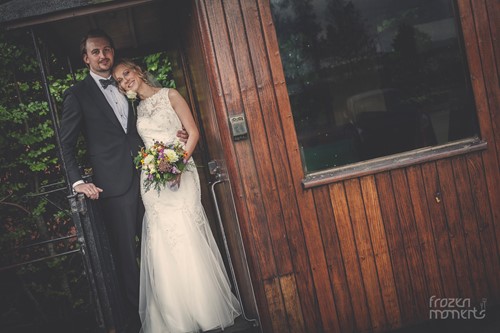
You can see a better comparison on this "companion" site I've done for the occation.
All is done by brushing in details within Lightroom
Let's try one more

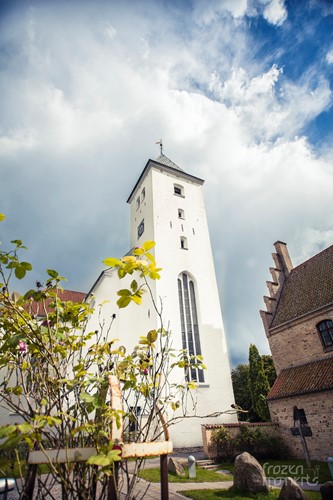
This one has the preset applied already ... but it's still pretty bland if you ask me.
So let's paint a little magic back in the image
I have to different adjustment brushes on this one.
- Covers the sky. I'm adding clarity + contrast. A bit of saturation, and then have moved the temperature slightly towards cold to really make the blues in the sky pop.
- the church is now "white" compared to the yellow-ish before, to give the feeling of the sun shining right at it. I am boosting the exposure on this brush a bit, and lovering the saturation to reach a neutral white on the church. And then – because I can't help myself – added some clarity.
So ... let's see it
And ... just one more
Just to show you some basic portrait retouching, let's go
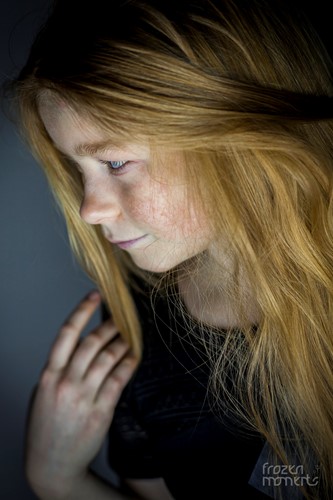
For starters, I'd like the hair to be more vibrant ... I really want to emphasise that she's a redhead.
So let's brush some clarity, vibrance, saturation ... and warm temperature in here.
But in Lightroom you also have the option of brushing a colour in. So for this, I went with a subtle red to give her the look I wanted.
I always brush the eyes also. I give them some highlights, some saturation and some exposure, to brighten up the whites, and really saturate the eye color.
And brushing unwanted shades out as well. It can be hard to see here, since she is turned a bit, but I think you can see it – otherwise check out the comparison
And then the skin is just ever so light smoothened. I'm not a big fan of VOGUE style skin smoothing, but a tiny bit I like.
The end result

And now ... some of you might argue why her skin still has that "reddish" look ... well, it's pretty easy to fix, but I think together with the red / orange hair it tells the story of her.
Wrap up
I really just wanted to show you the potential of Lightroom for those of you maybe haven't tried the brushing out yet. Or some of you might not even know about the potential of it.
And I have really just scratched the surface because the good thing is, this tool is exactly as good as you make it.
I make brush-presets for everything, like:
- Teeth whitening
- Skin smoothing
- Wedding dress enhancer
- Iris enhancer
- Repair sky detals
- Enhance clouds
- Metal pop
And so on and so on
What I would really like to hear is How are you brushing your images?
Leave a comment if you like.
Thank you for reading ... and I'll see you all tomorrow.
NOTE: It's seems the system used (Umbraco) for this little project render the images a bit too red, so please take that with you when watching then. Thank you!
